3.0.0.1 Specifications
Developing the Quarter Car modelling from ordinary differential equations to simulink model. Then extending the model to account for road disturbances.
With the flat road model, investigating:
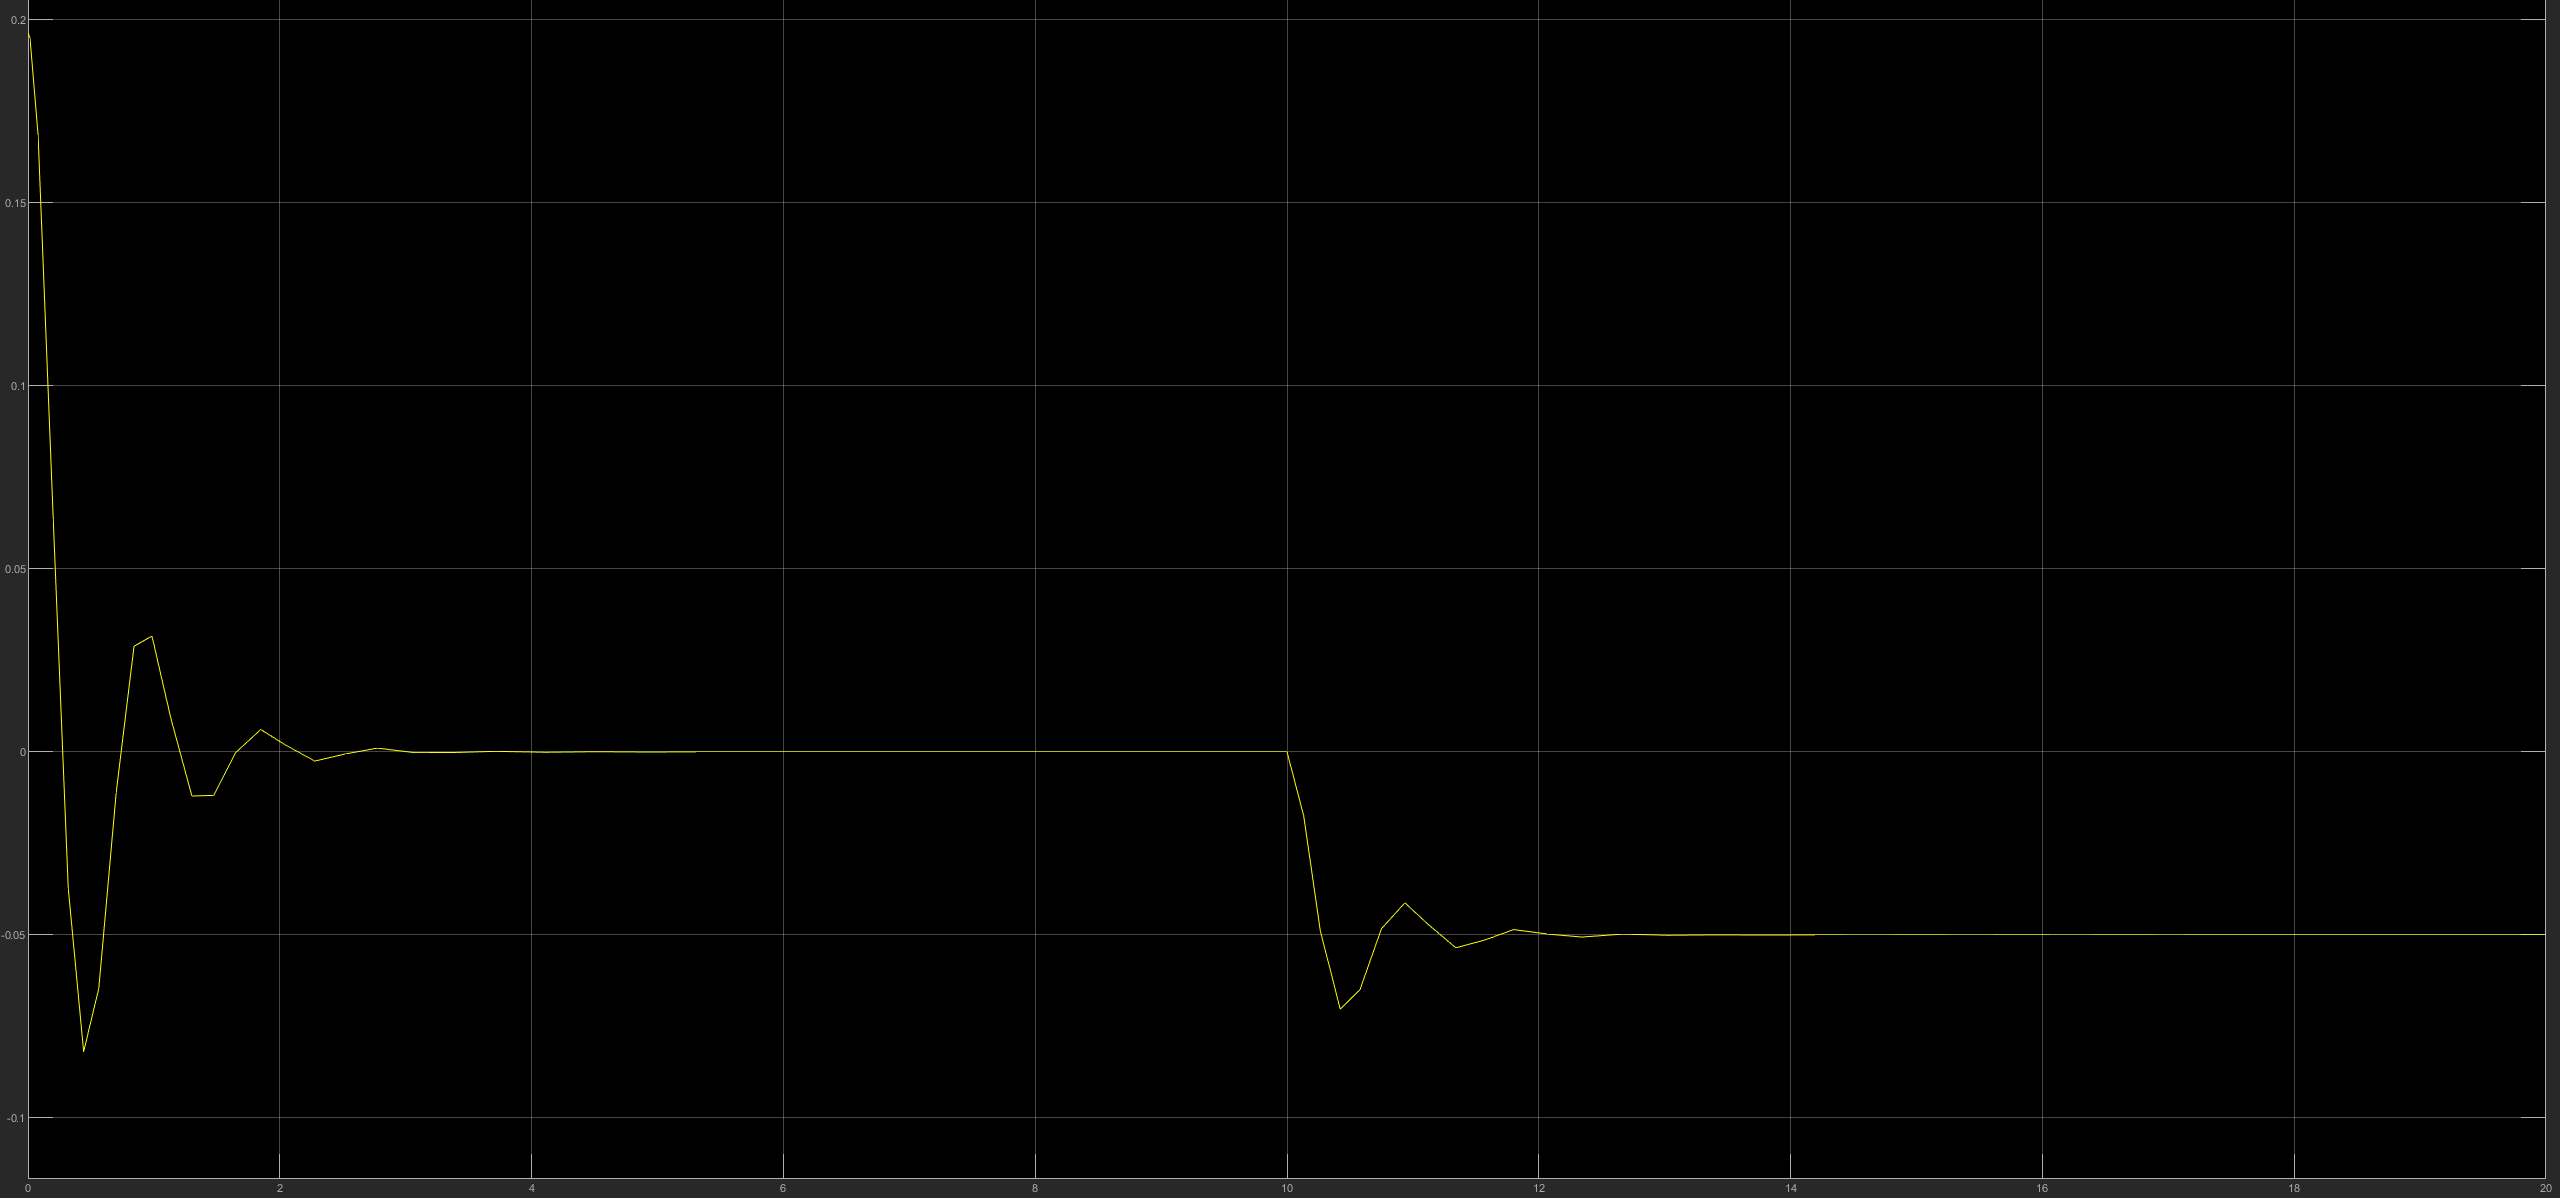
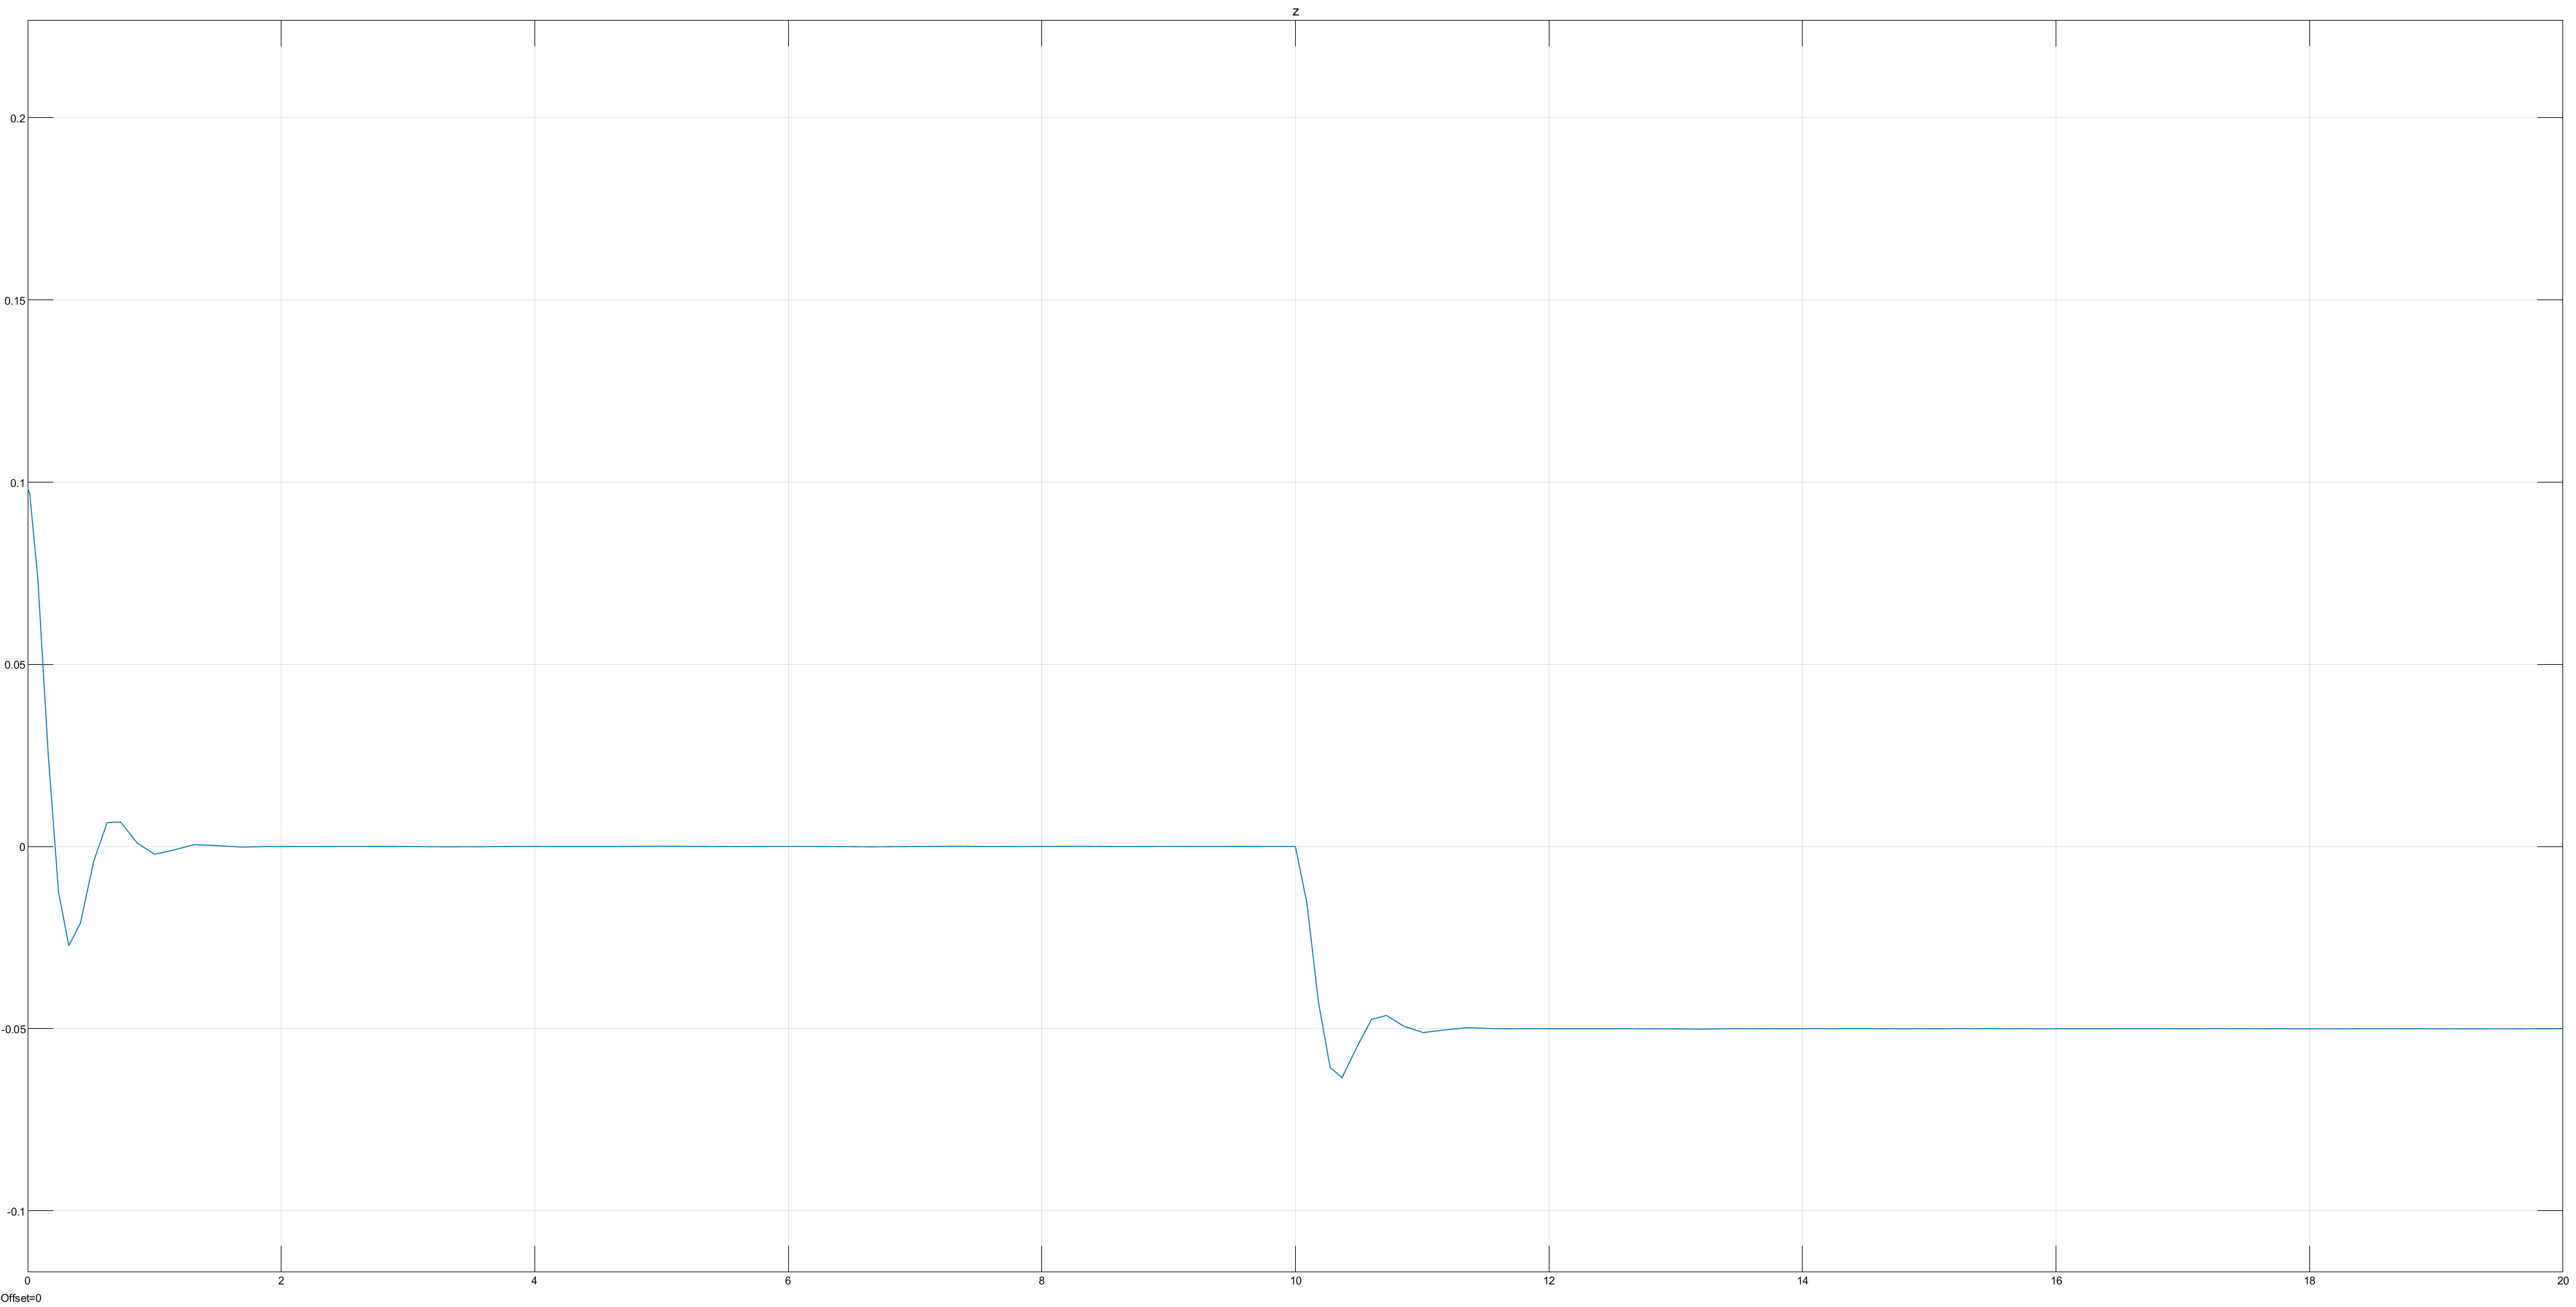
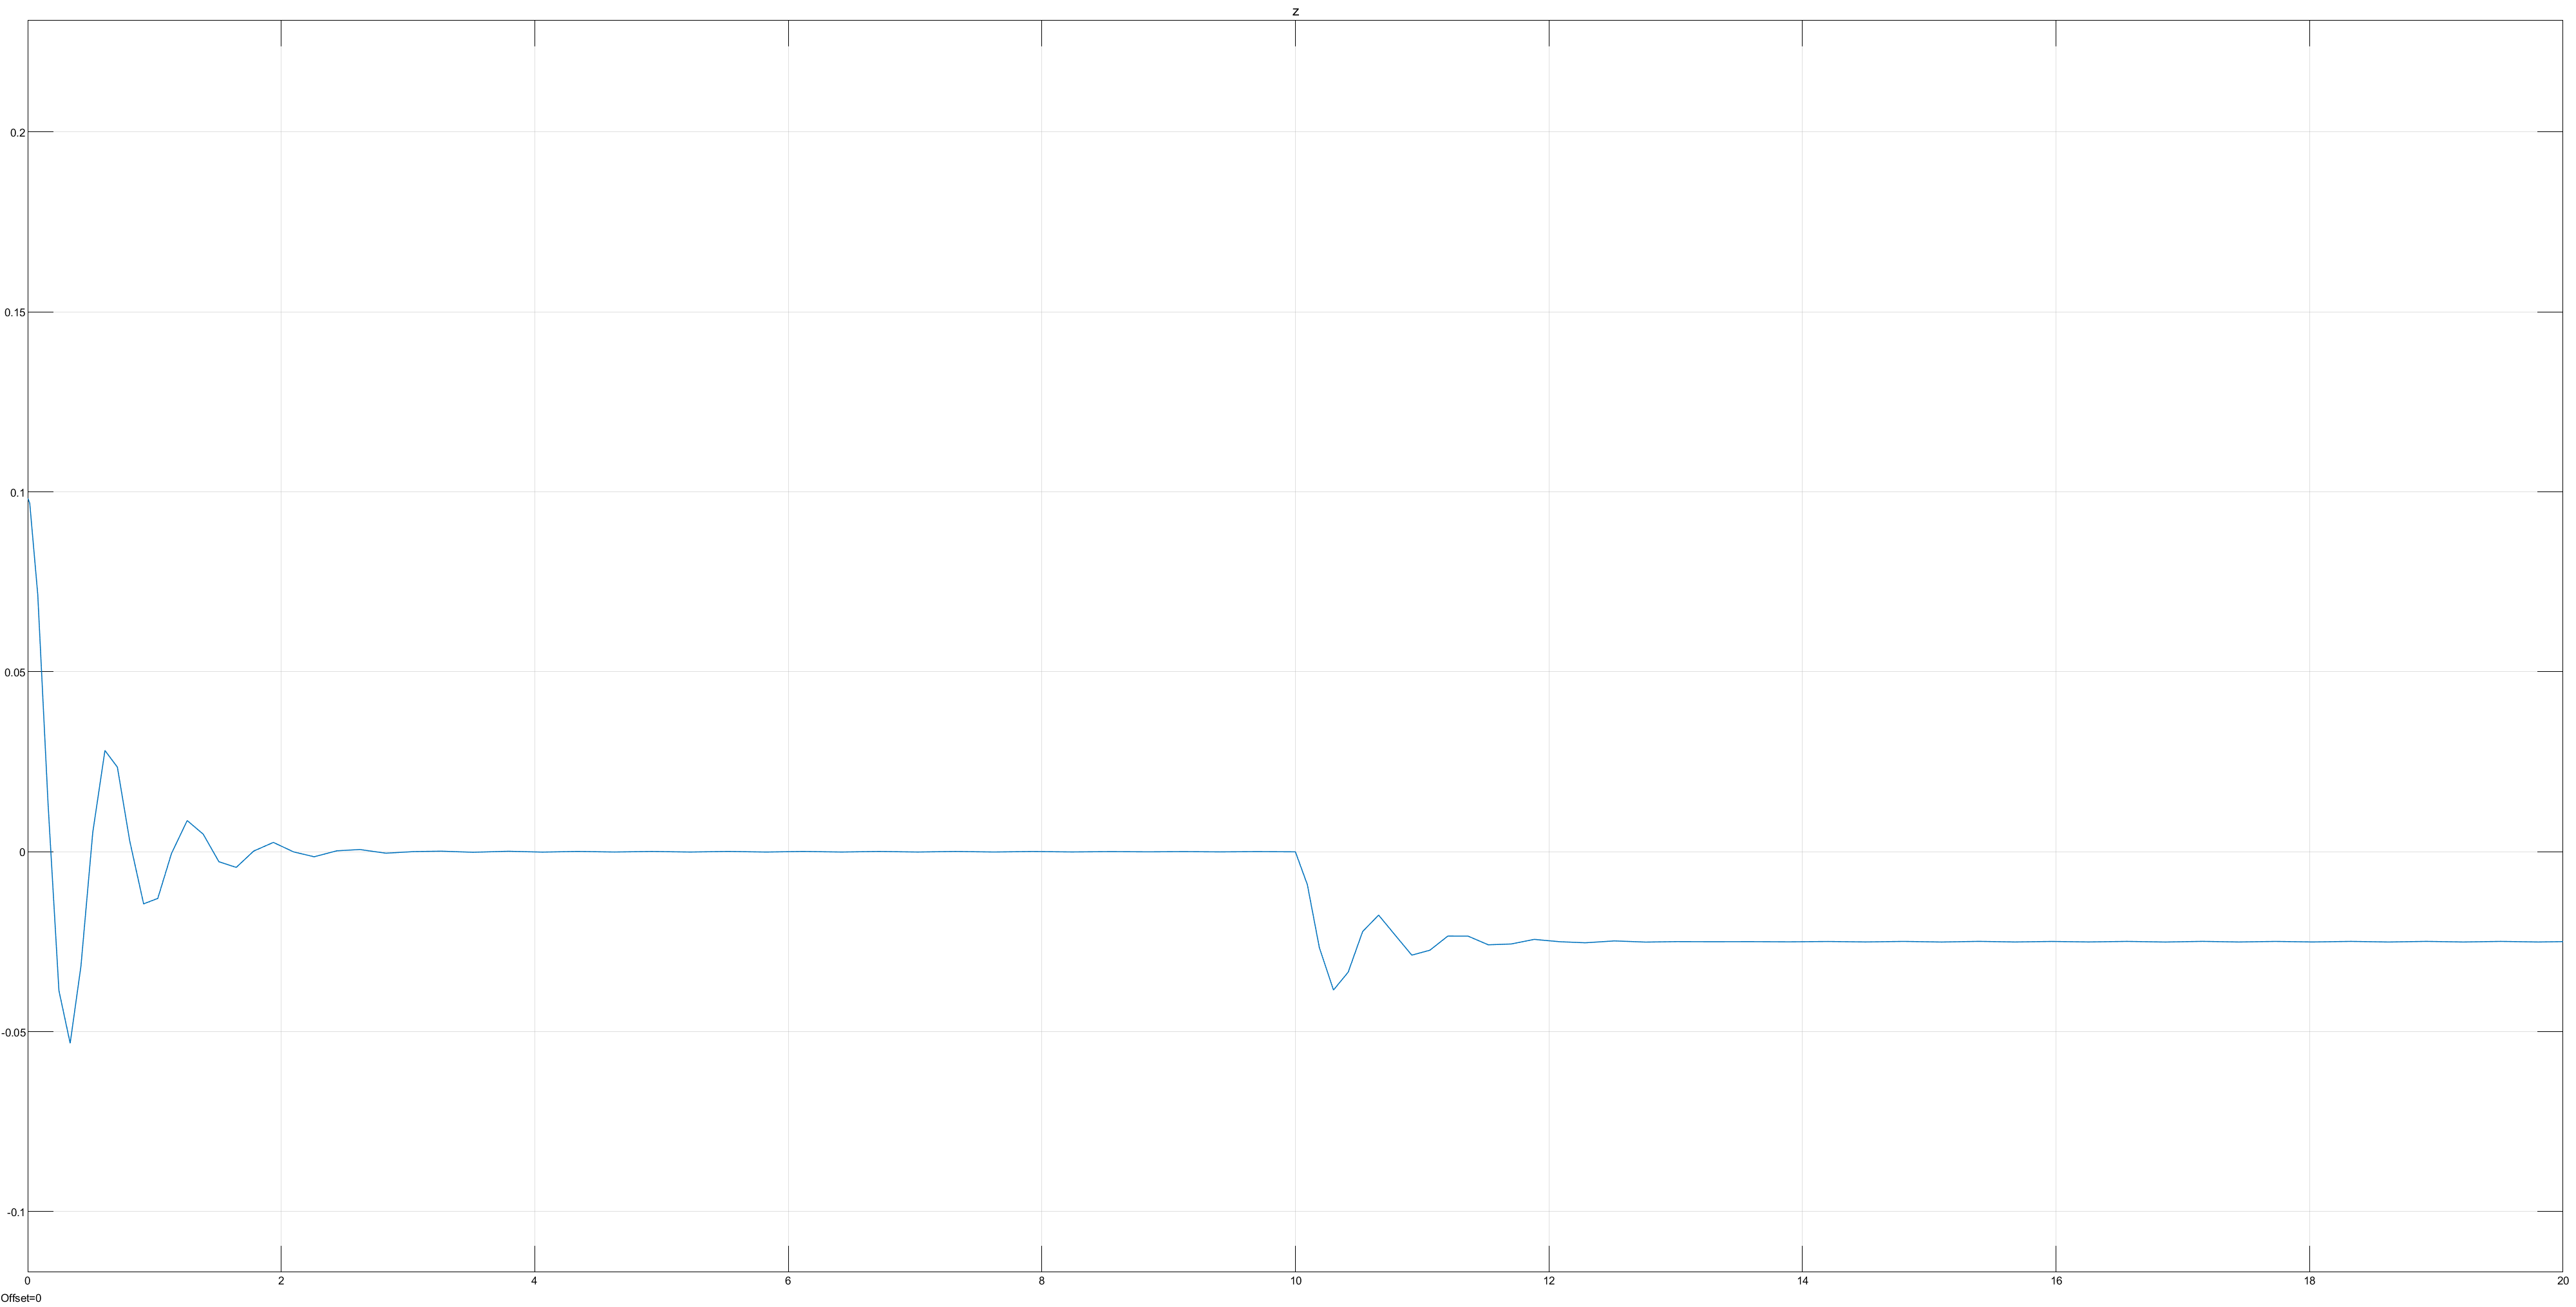
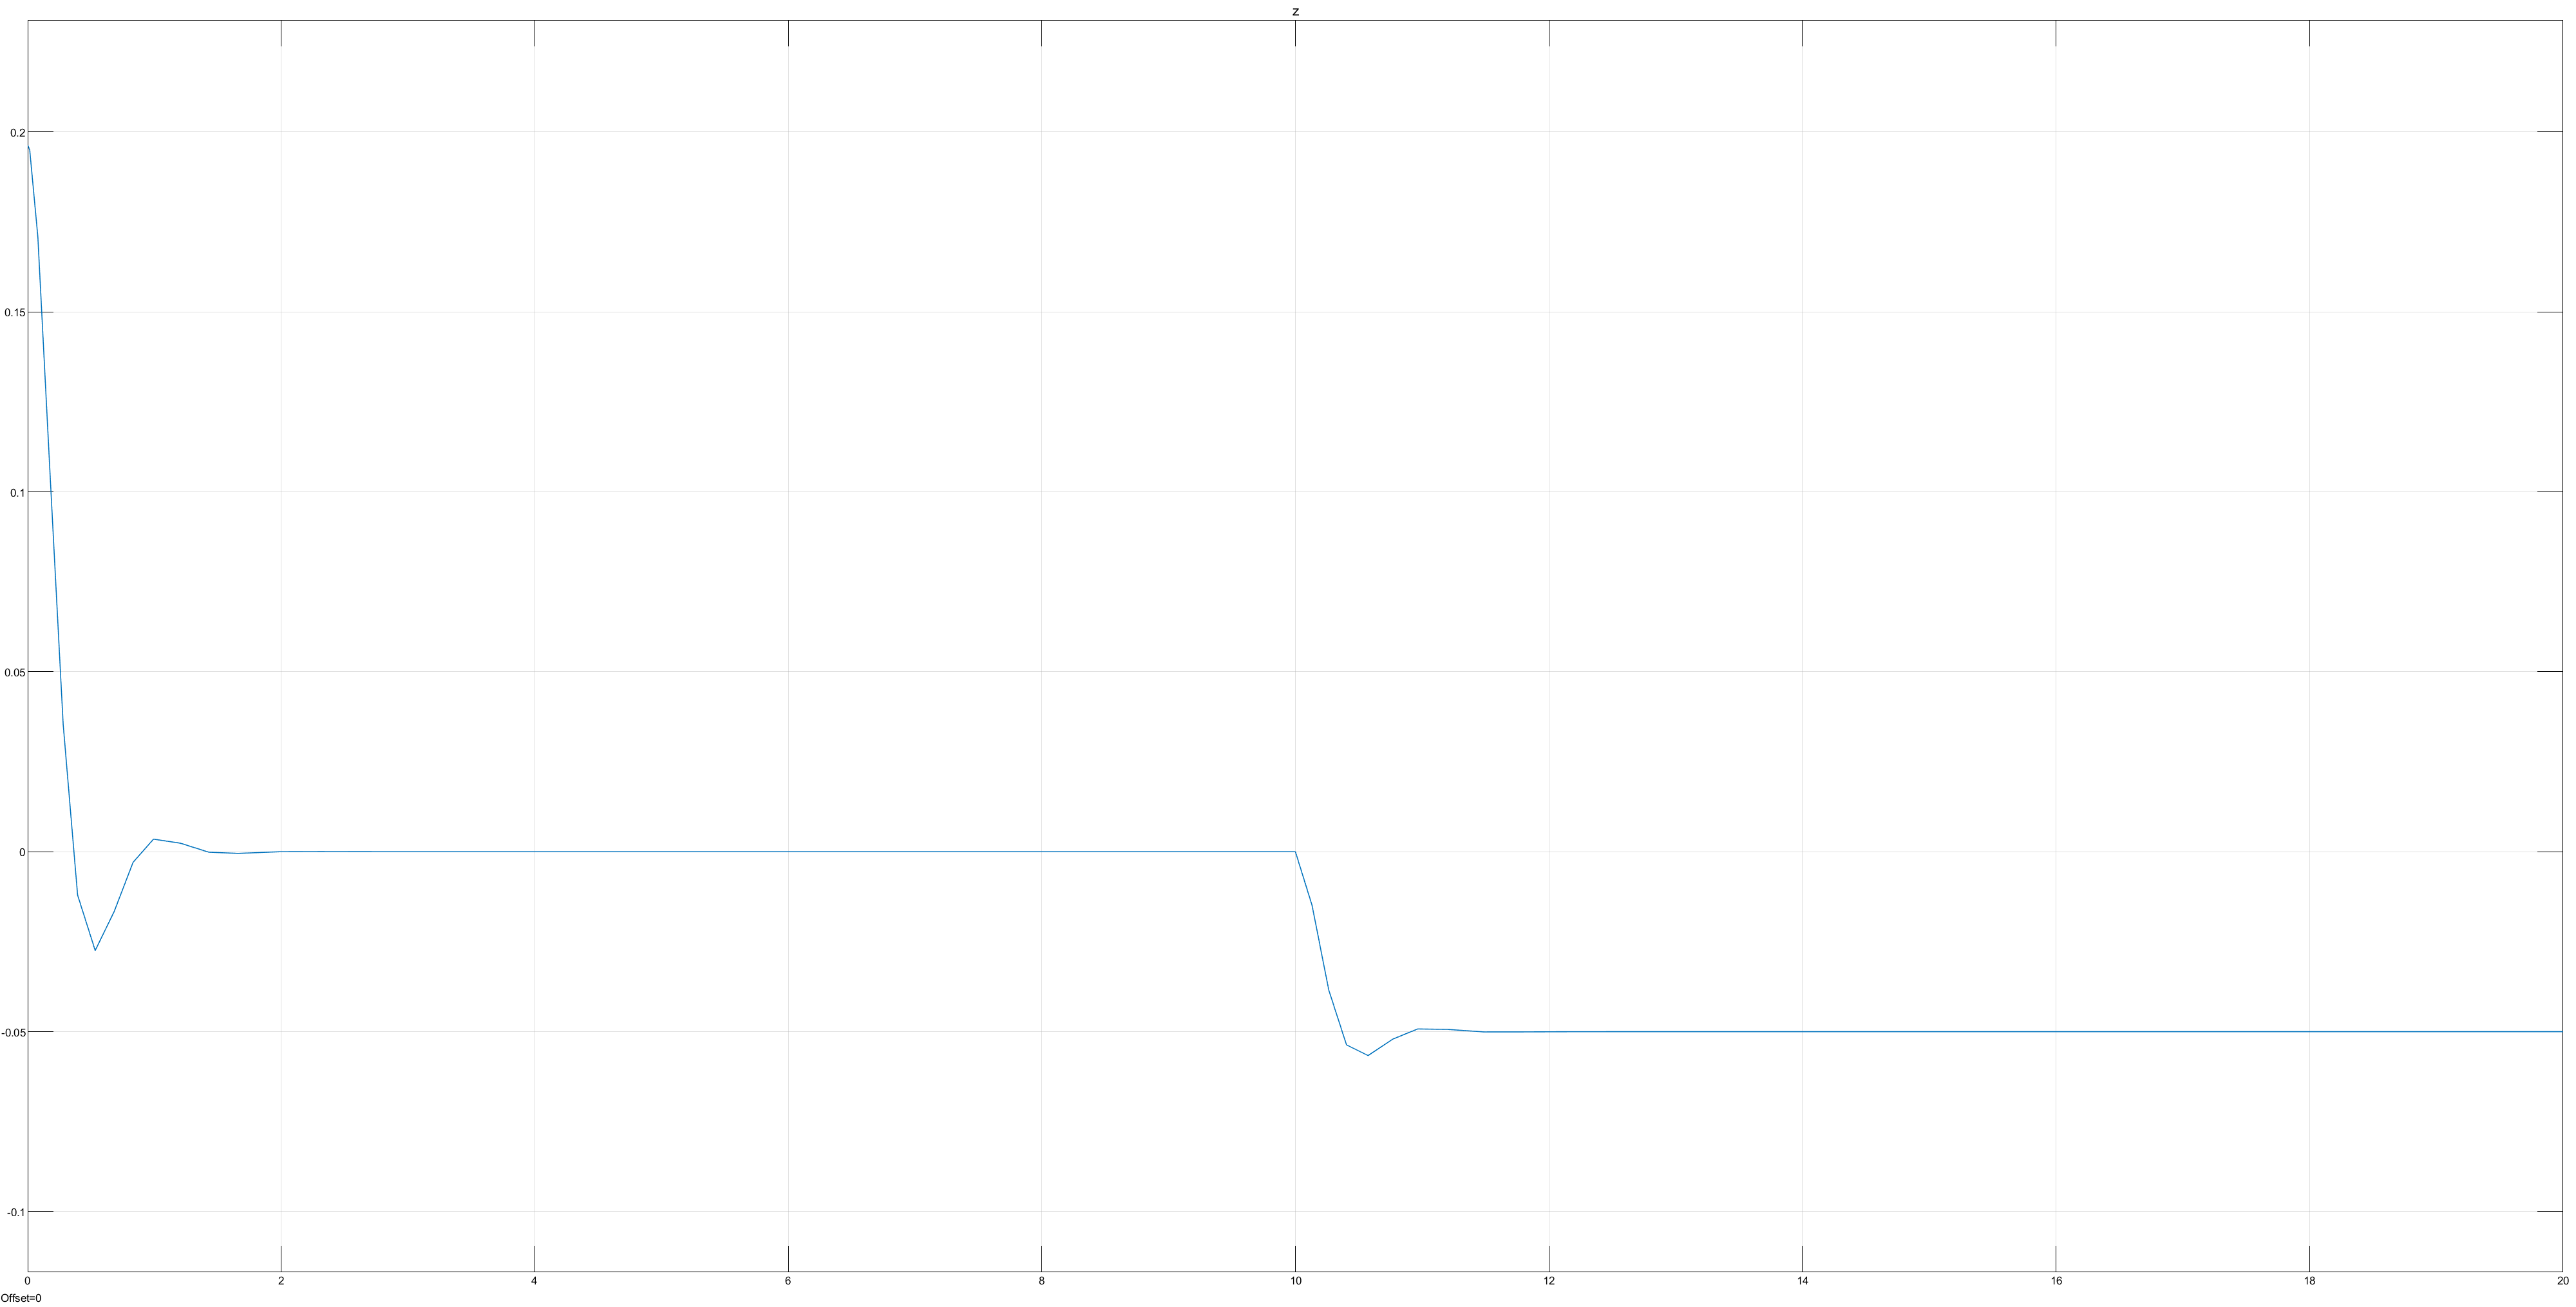
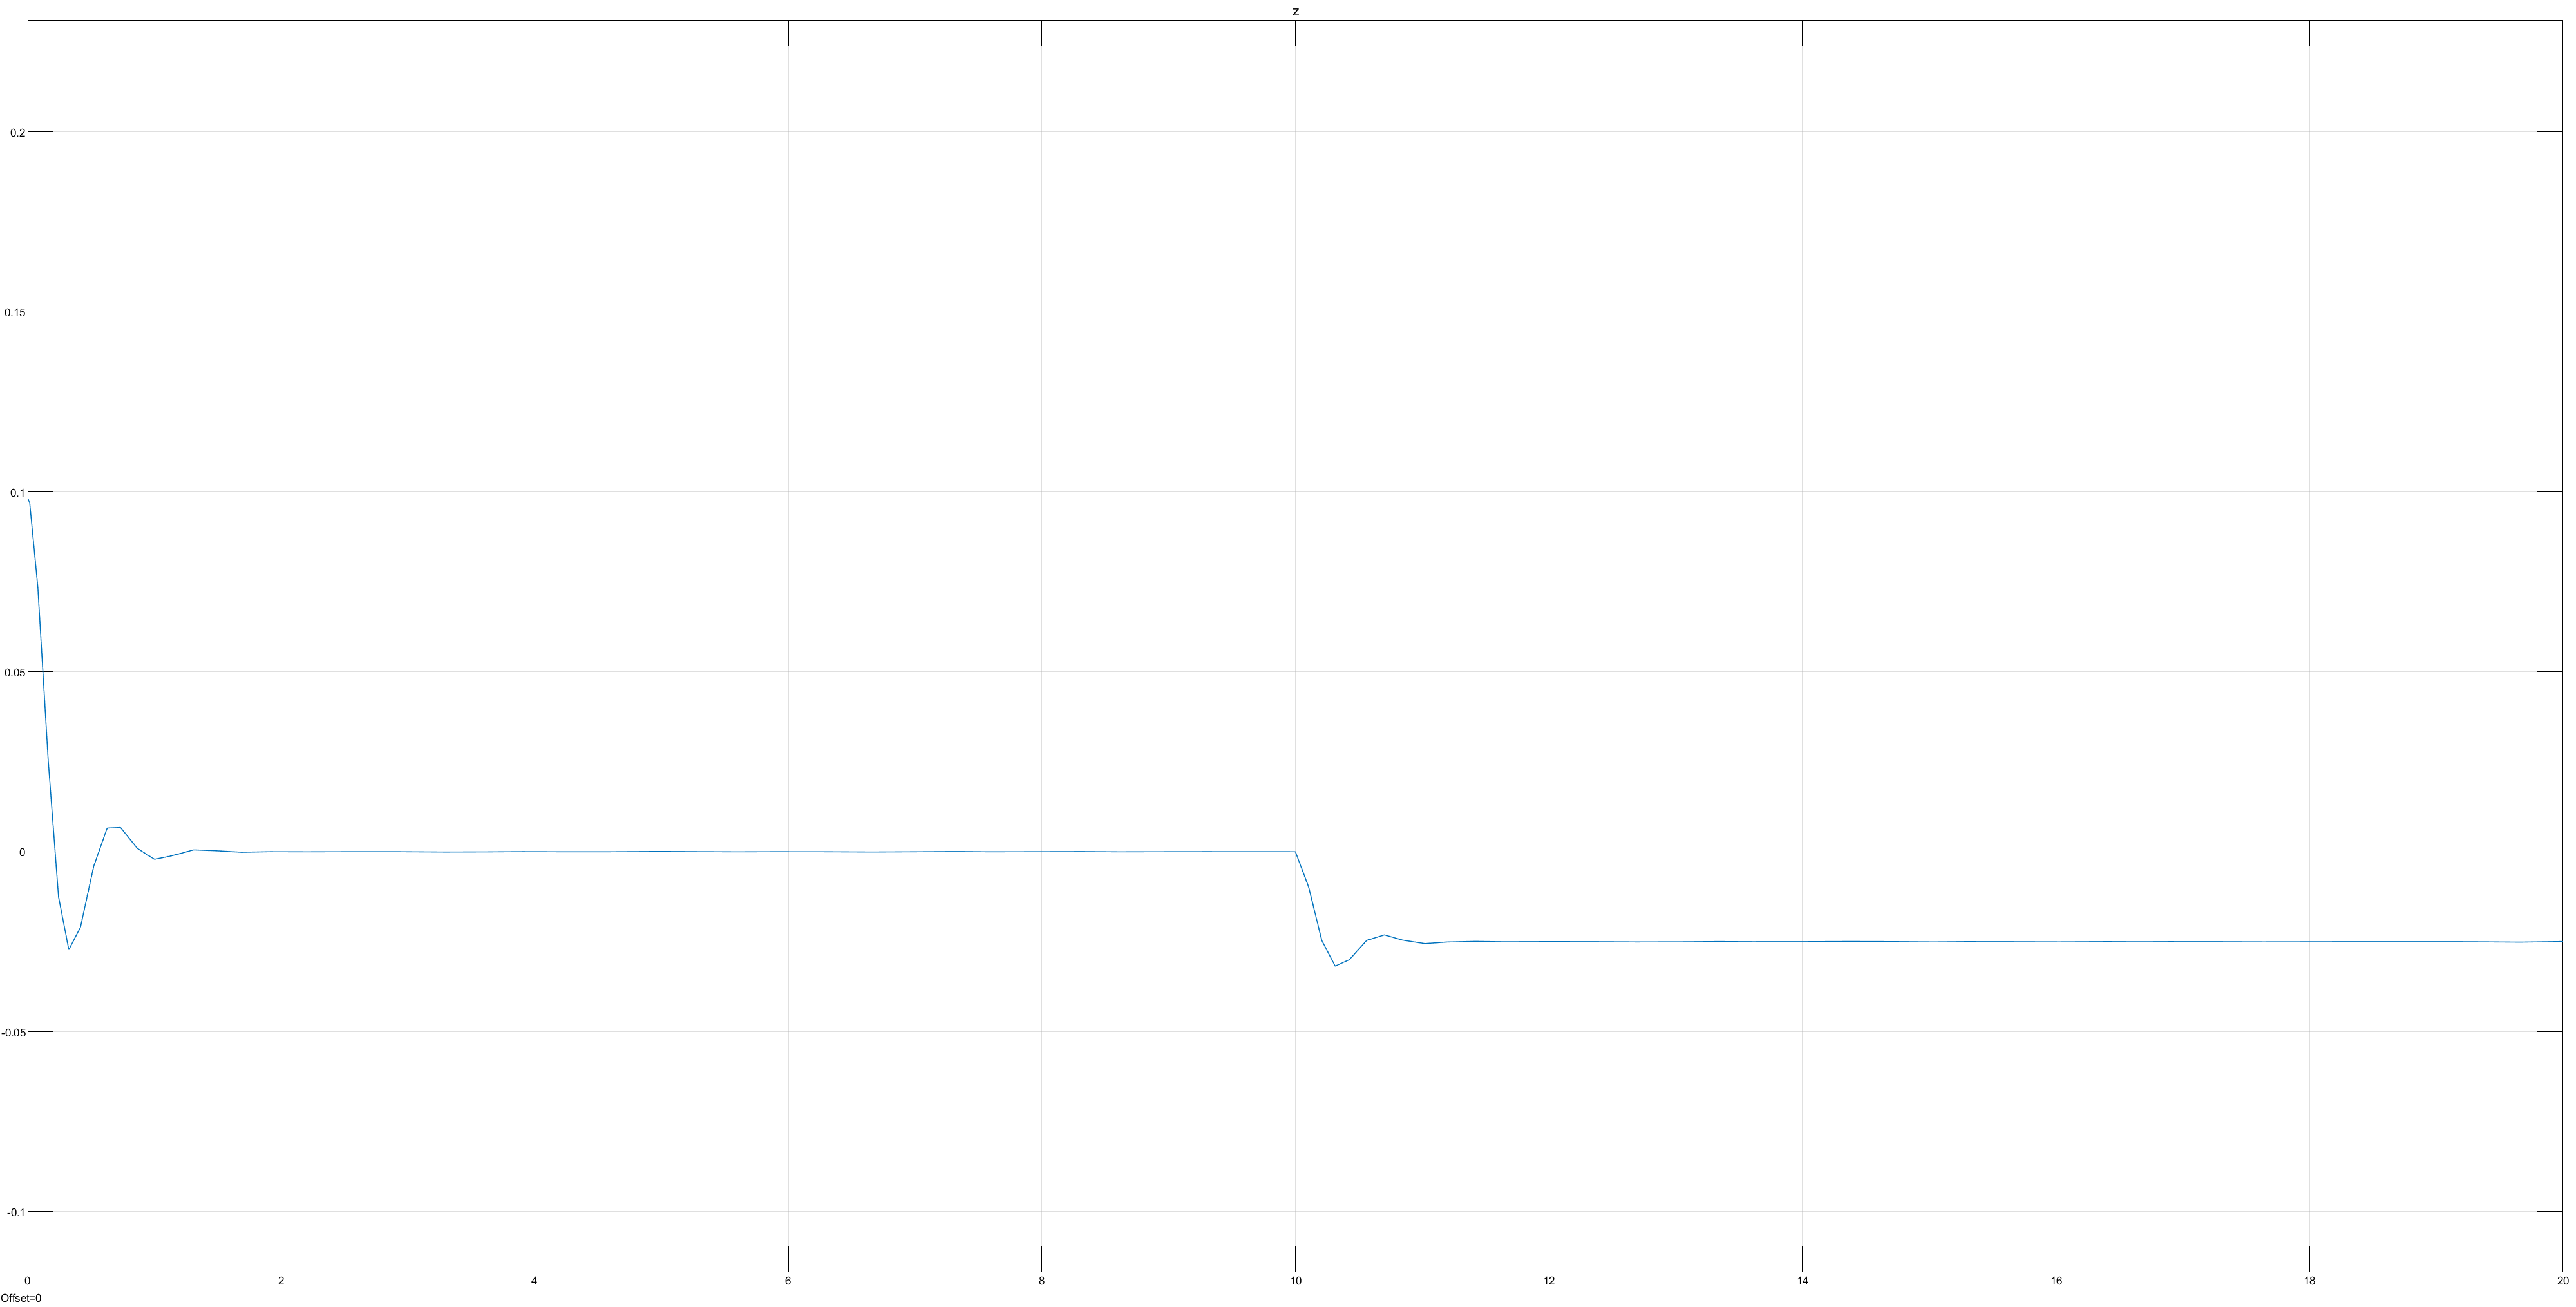
- Response after a force step after 10 seconds
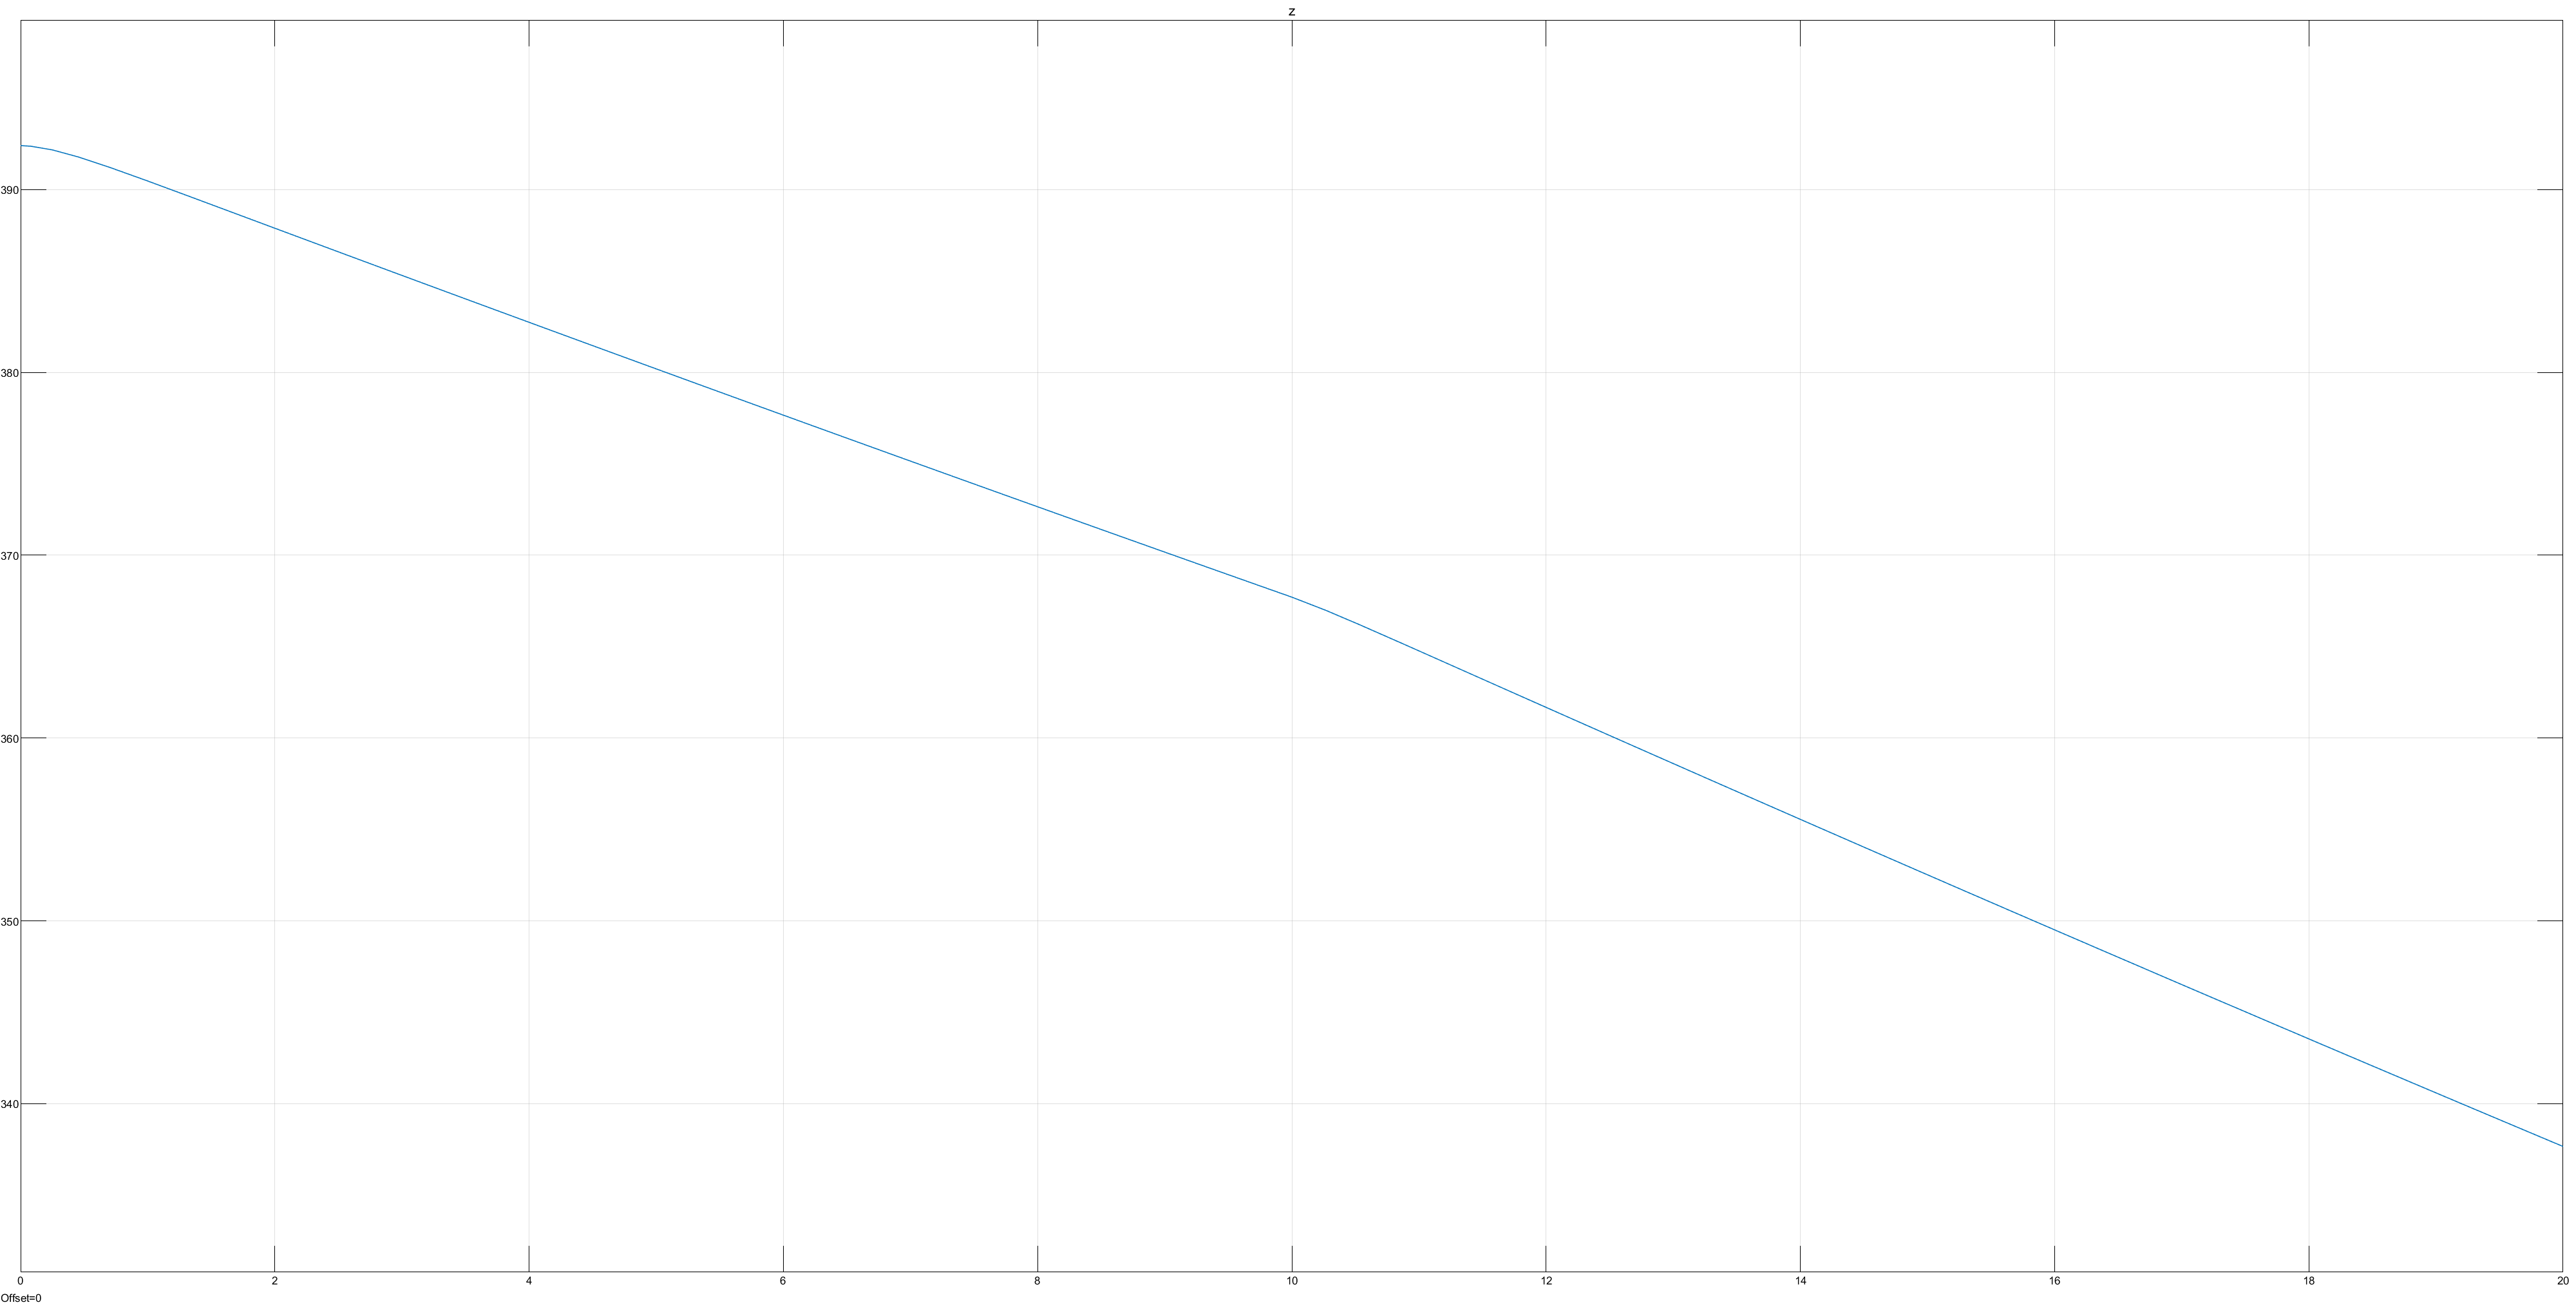
- Response from parameter variation
With the road excitation model, investigating:
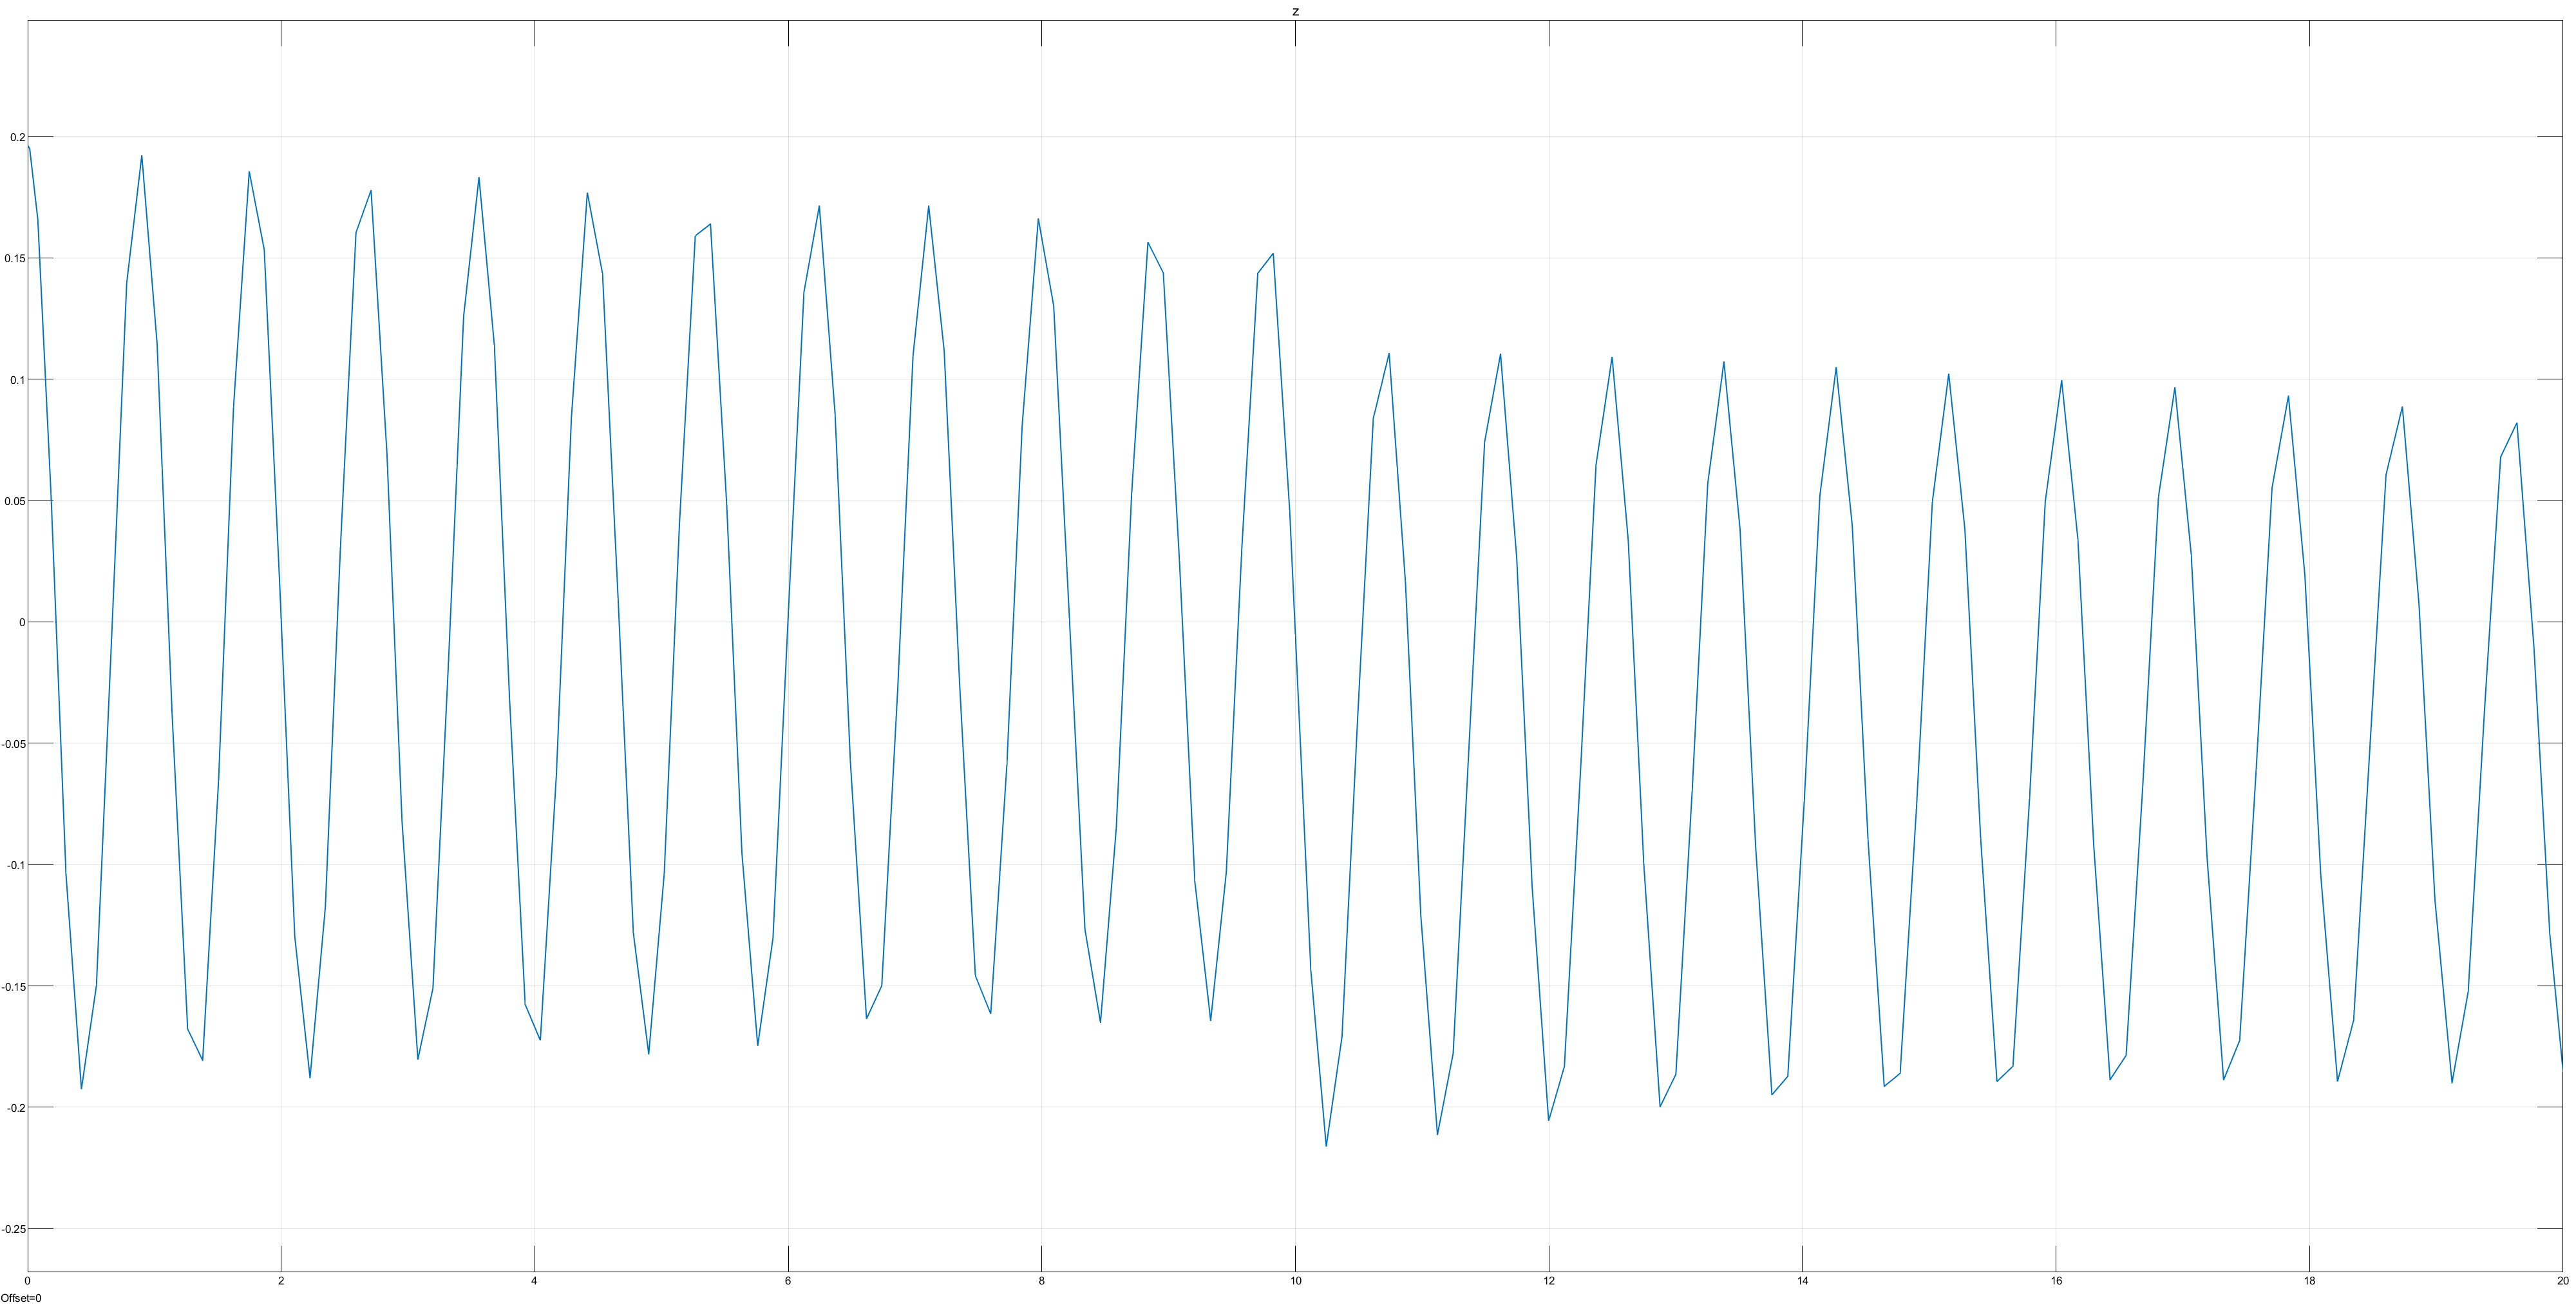
- Response for a sinusoidal excitation of 20mm at 2 Hz frequency.
- Frequency domain characteristics
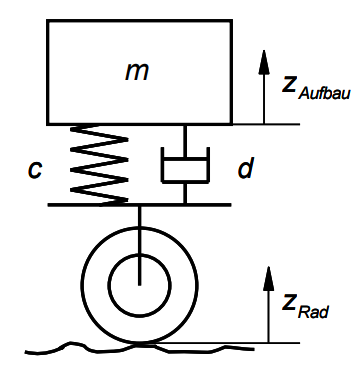
3.0.0.2 Model Diagrams
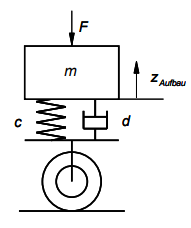
3.0.0.3 Assumptions
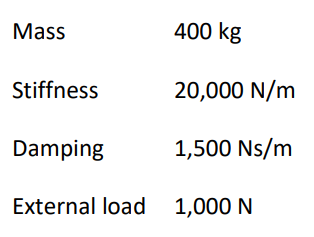
3.0.0.4 Parameters
3.0.1.0 Formulation of Differential Equations
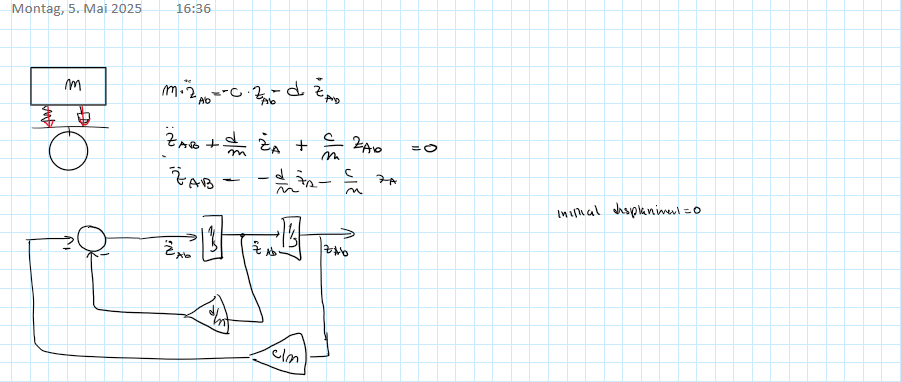
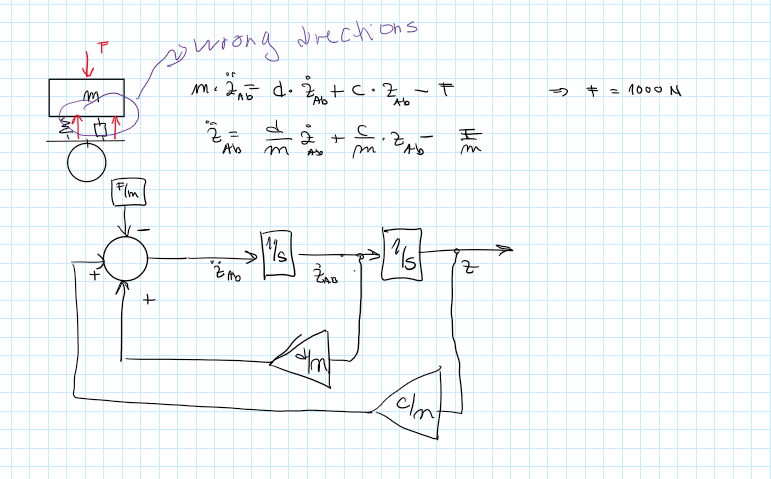
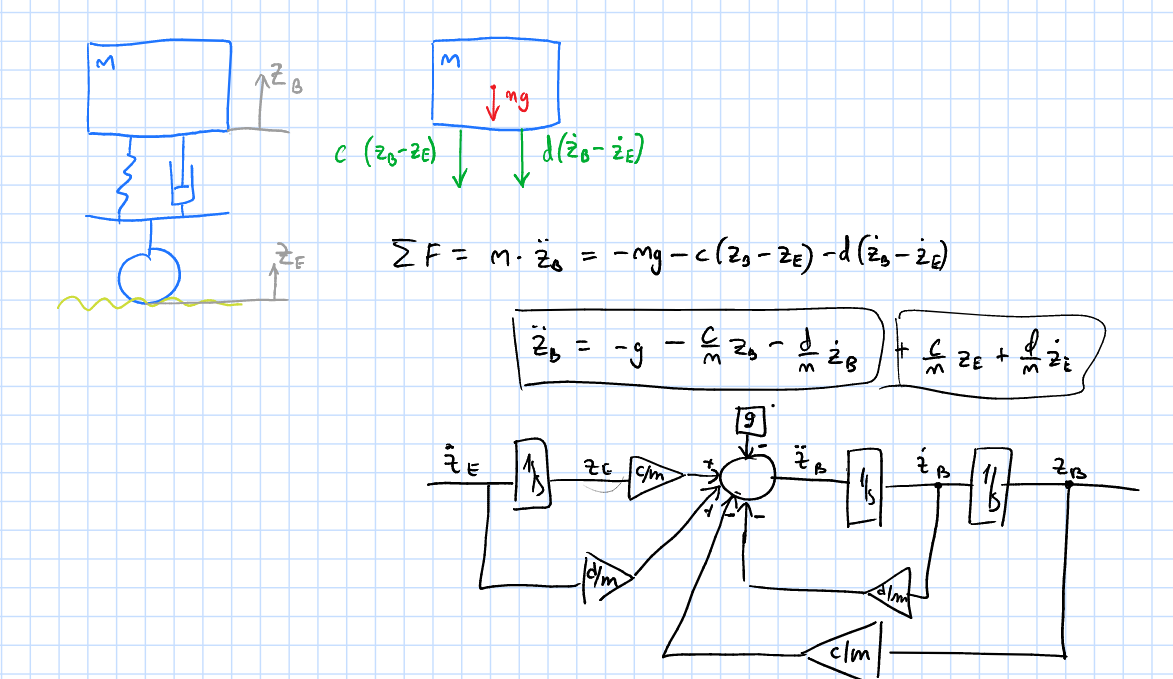
3.0.1.1 Final Equations
3.0.1.2 Simulink Models
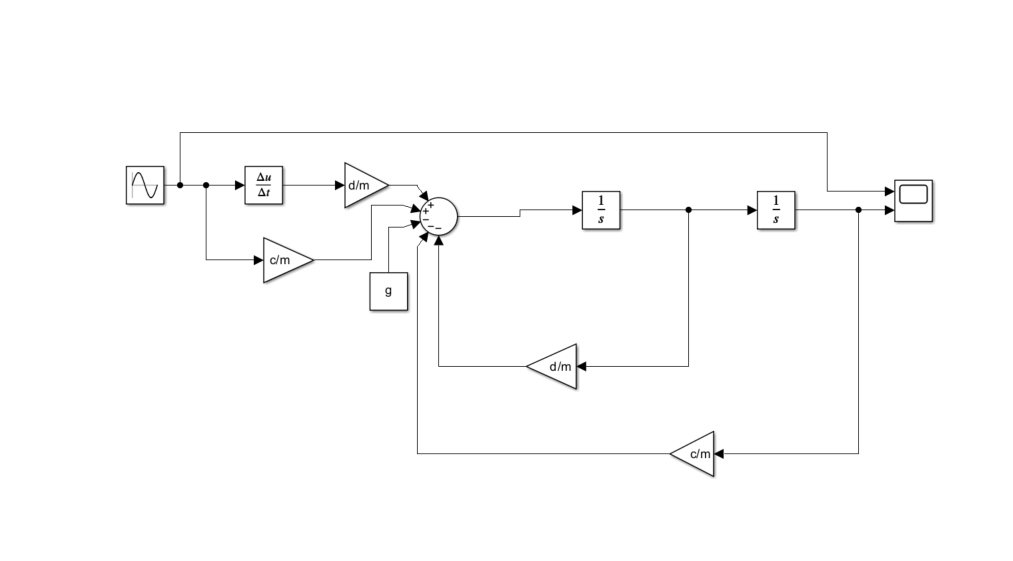
Simulink Model for Quarter Car with Road Excitation
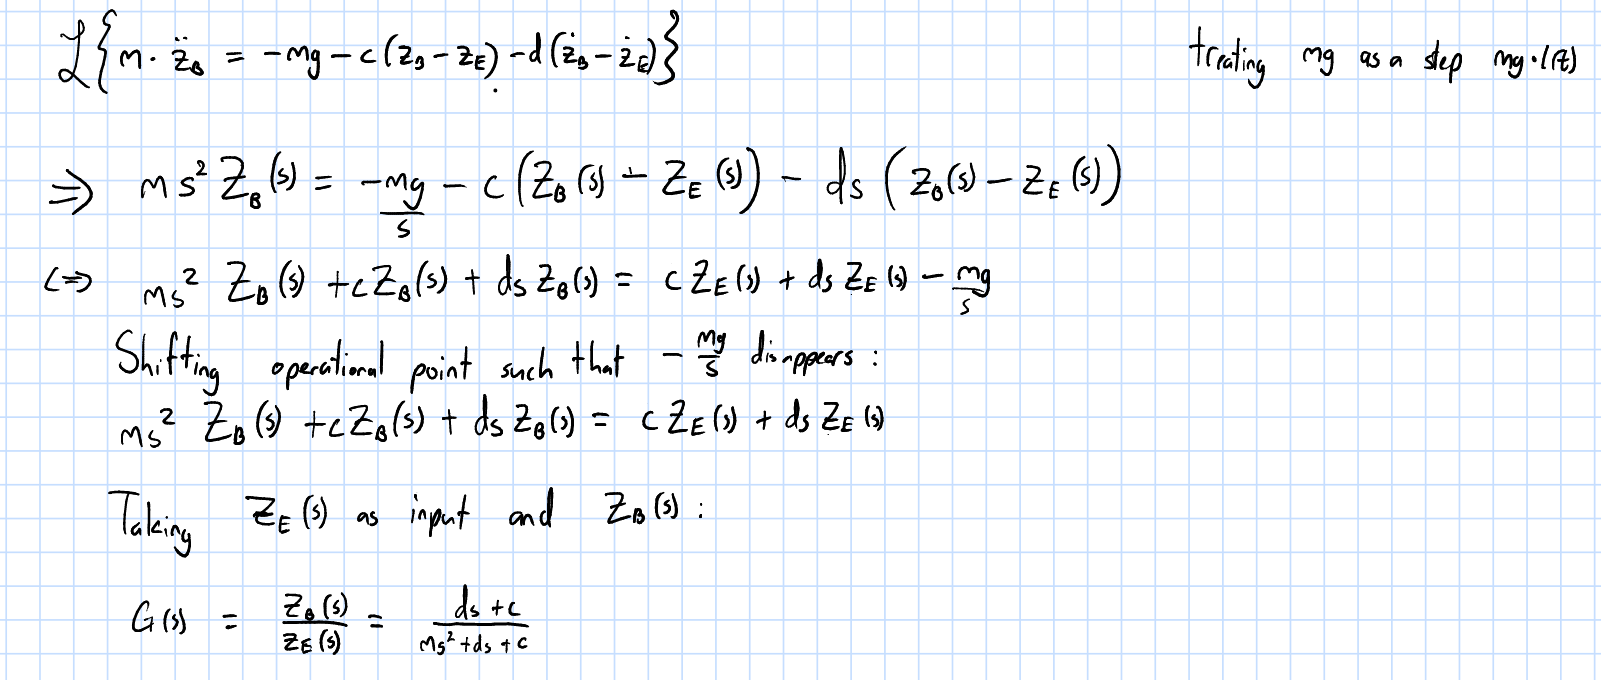
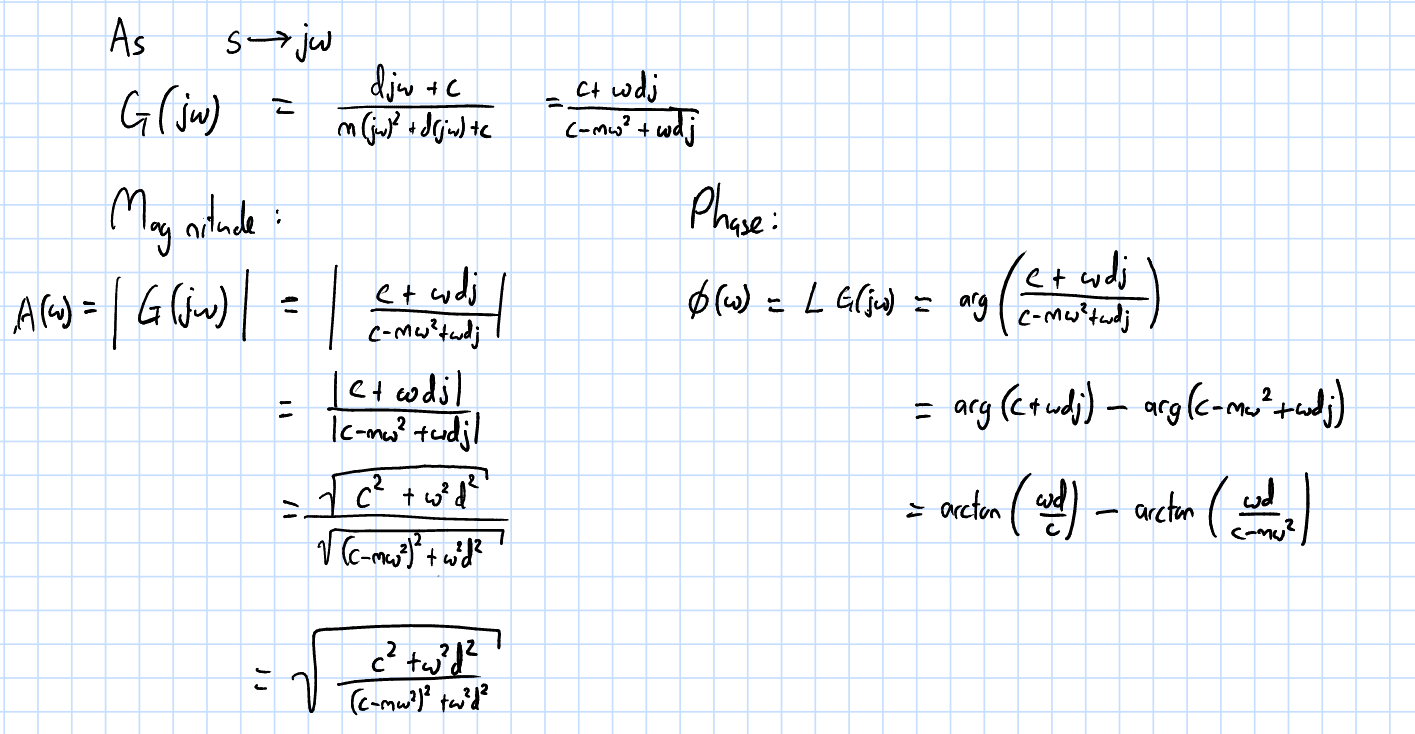
3.0.1.3 Laplace Transform
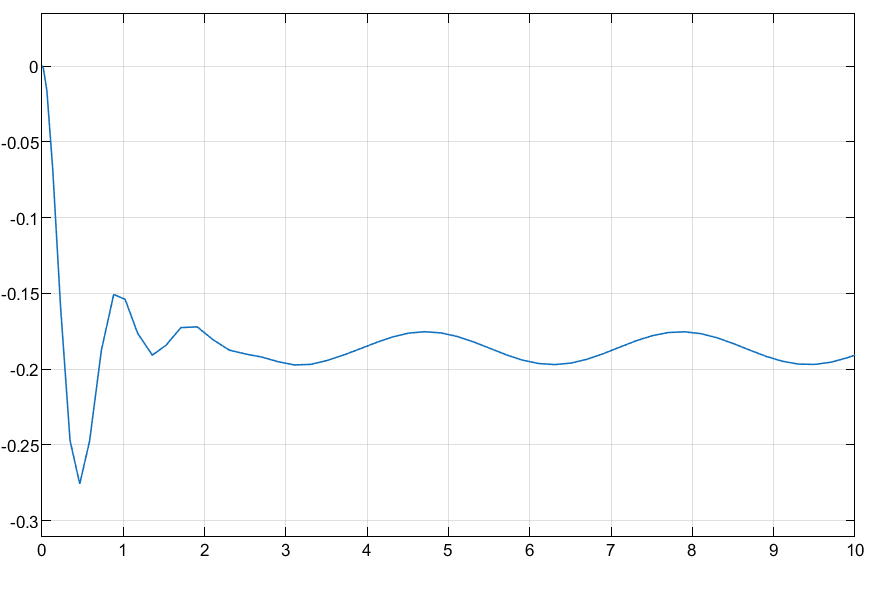
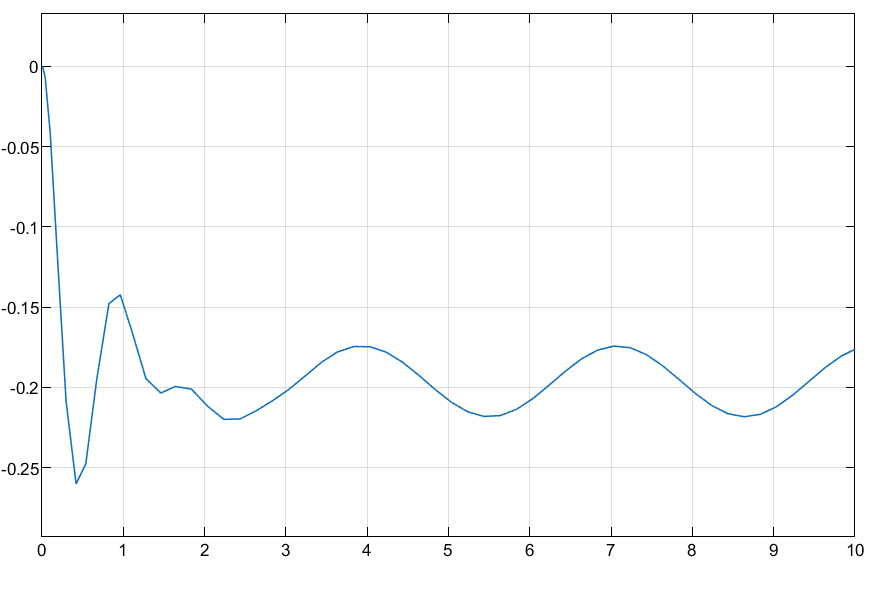
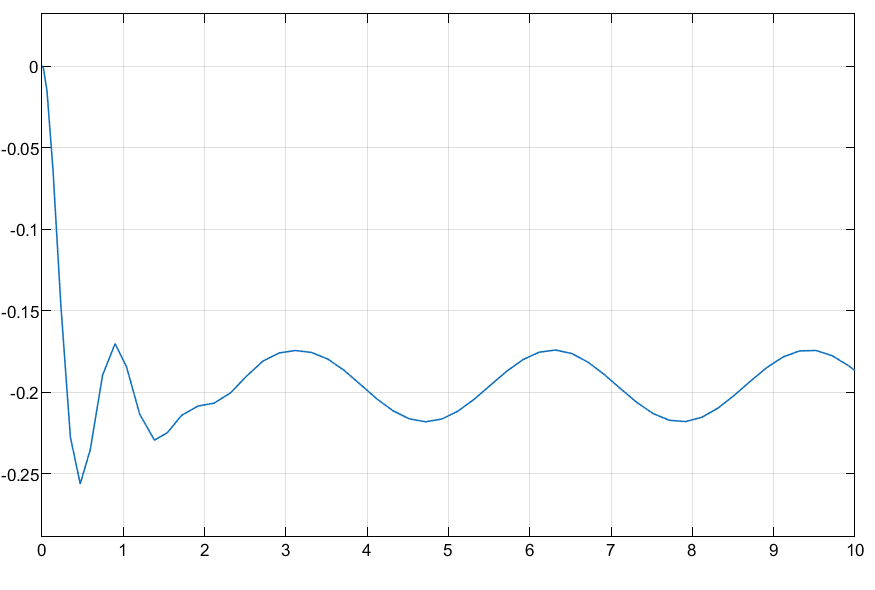
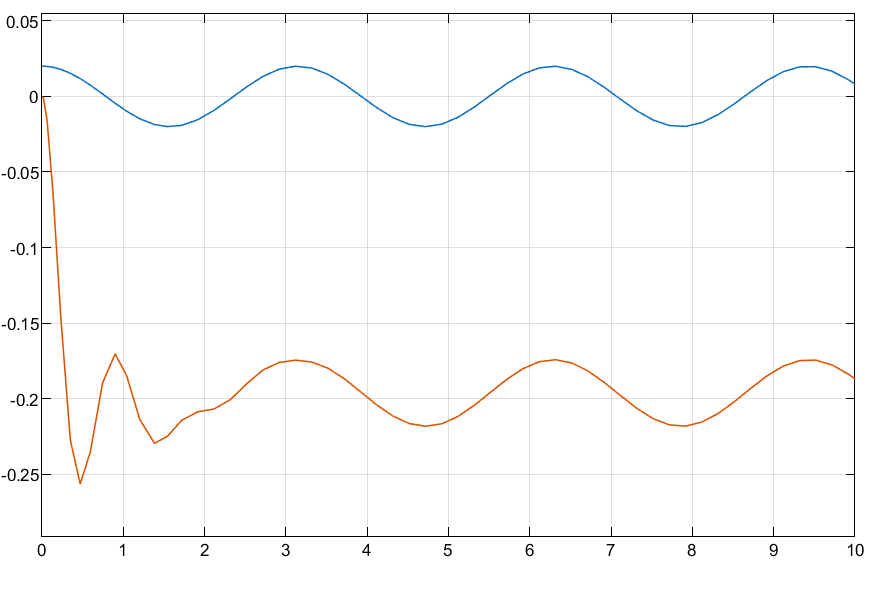
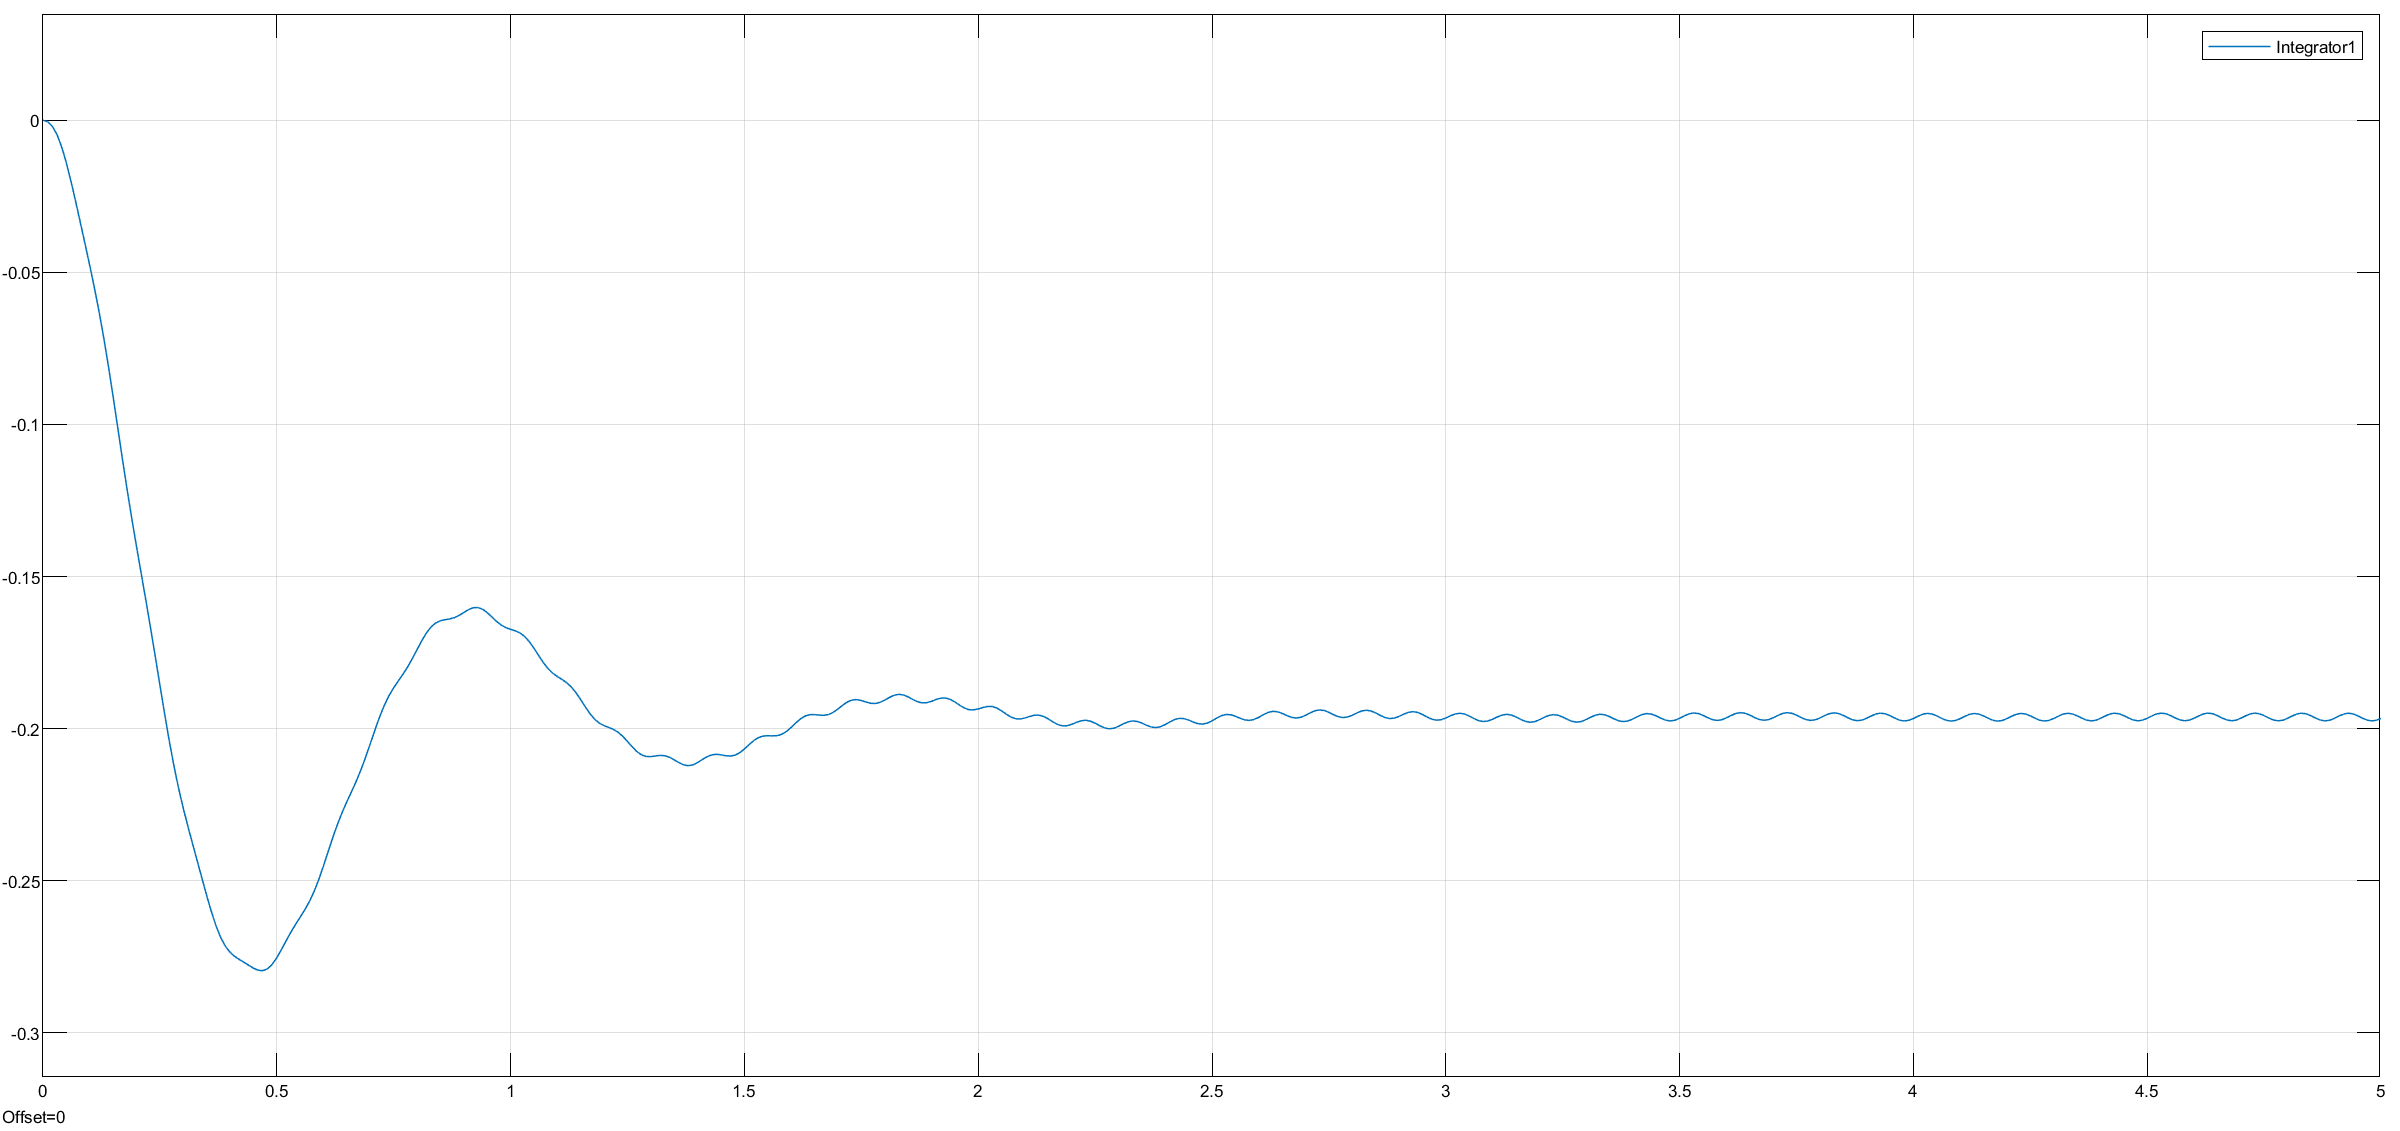
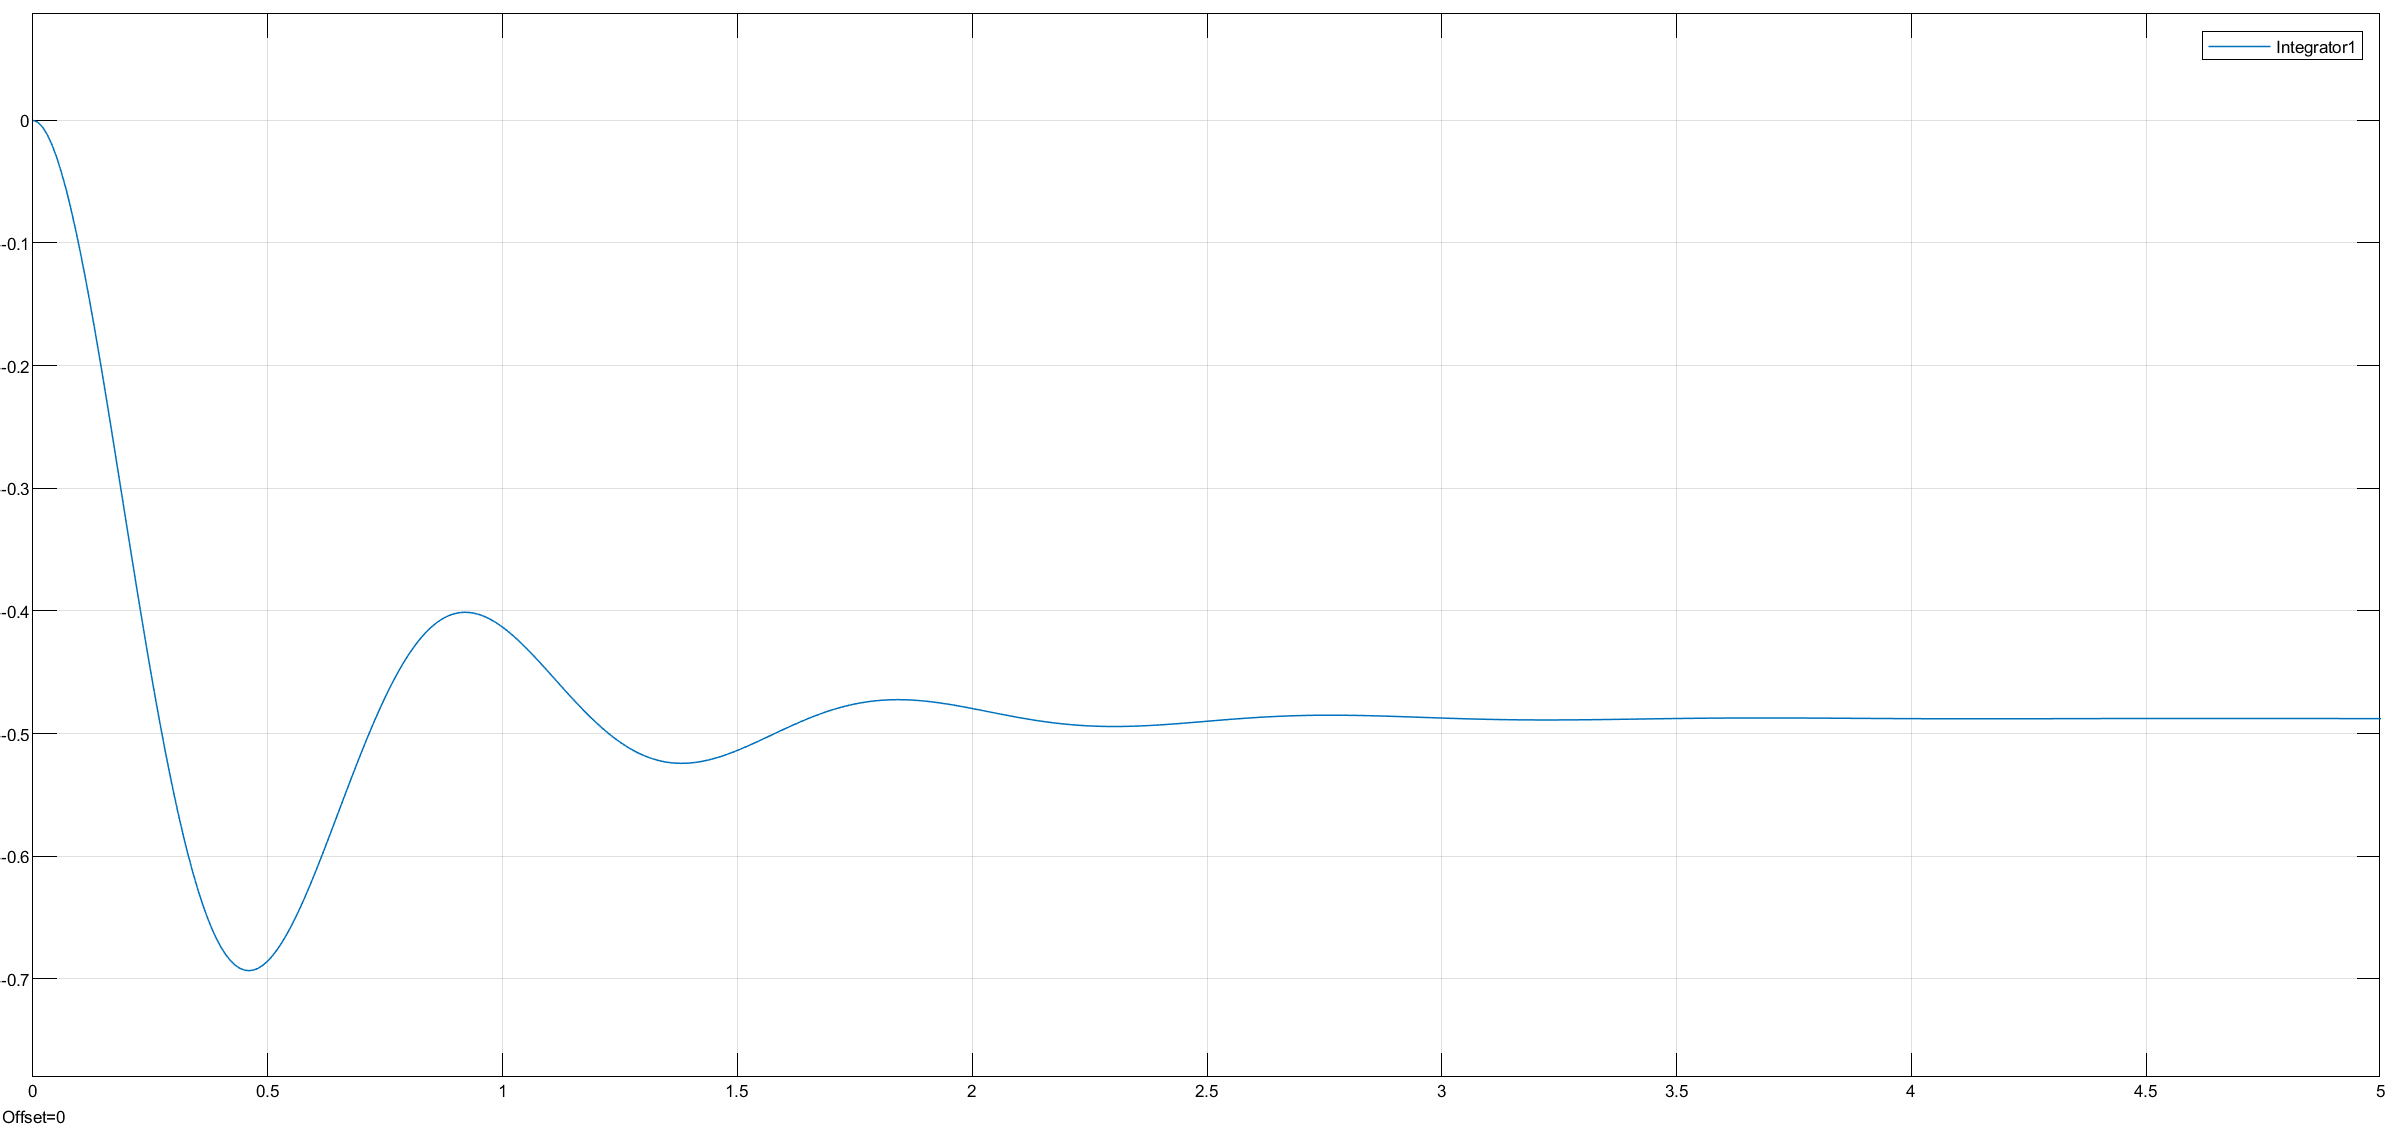
3.0.2.0 Observations from Parameter Modification w/o Road Excitation
200 kg less
40000 N/m more
3000 damping more
400000 spring 3000 damping
10 stiffness
15 damping
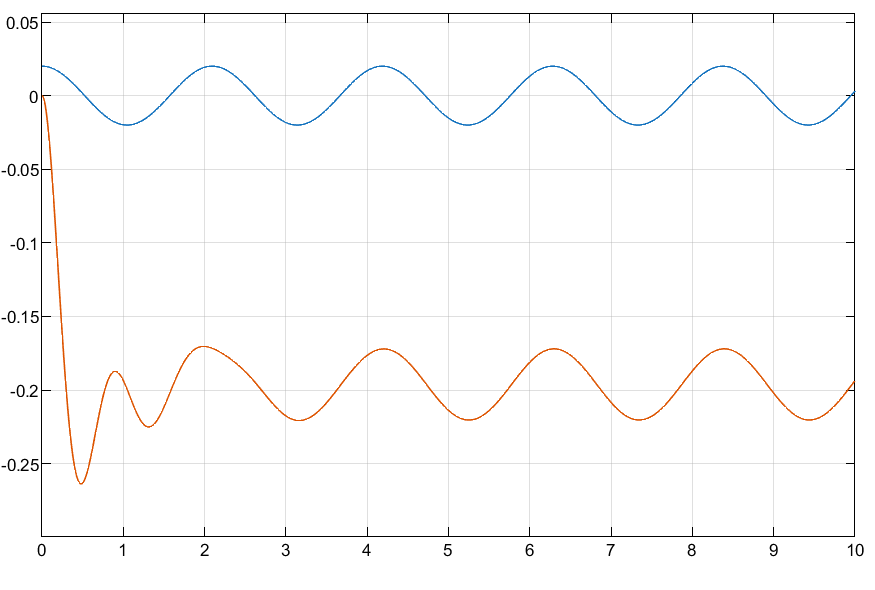
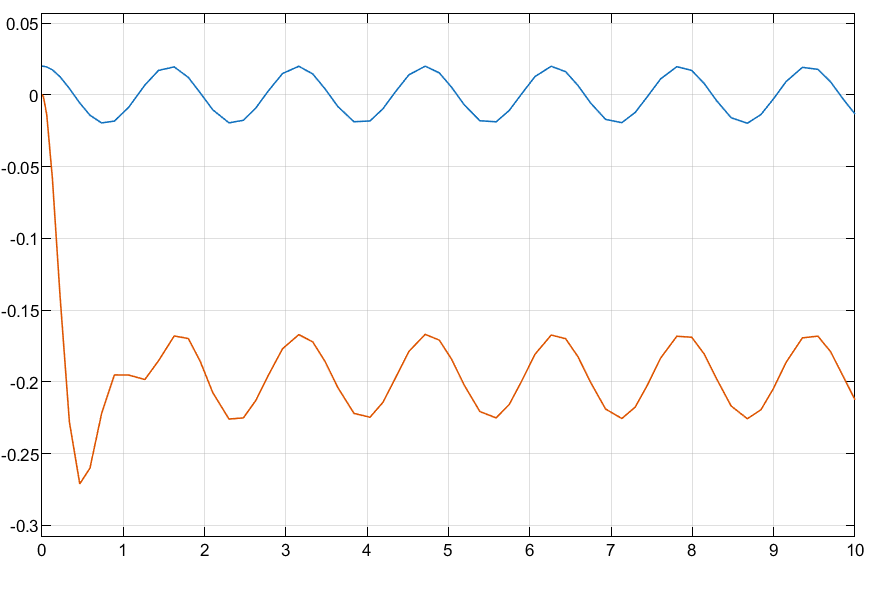
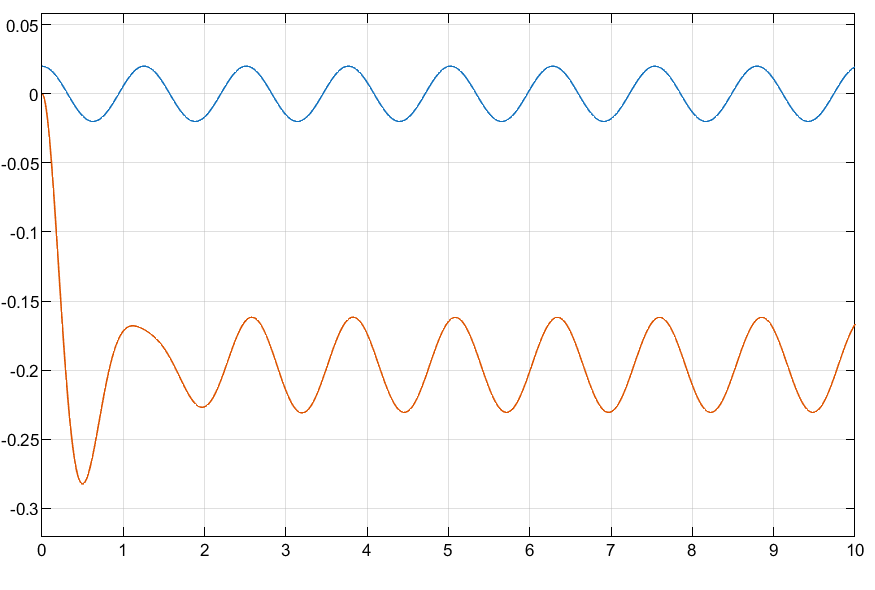
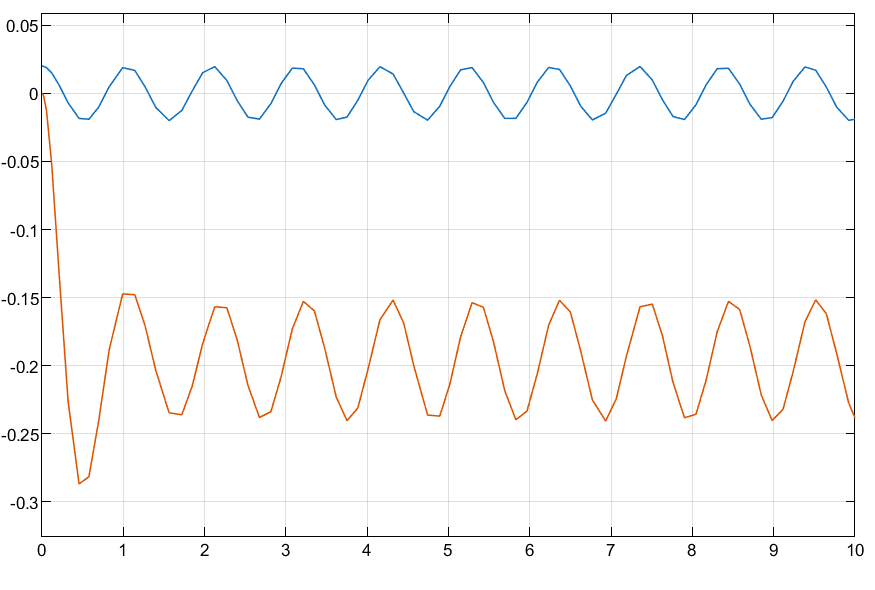
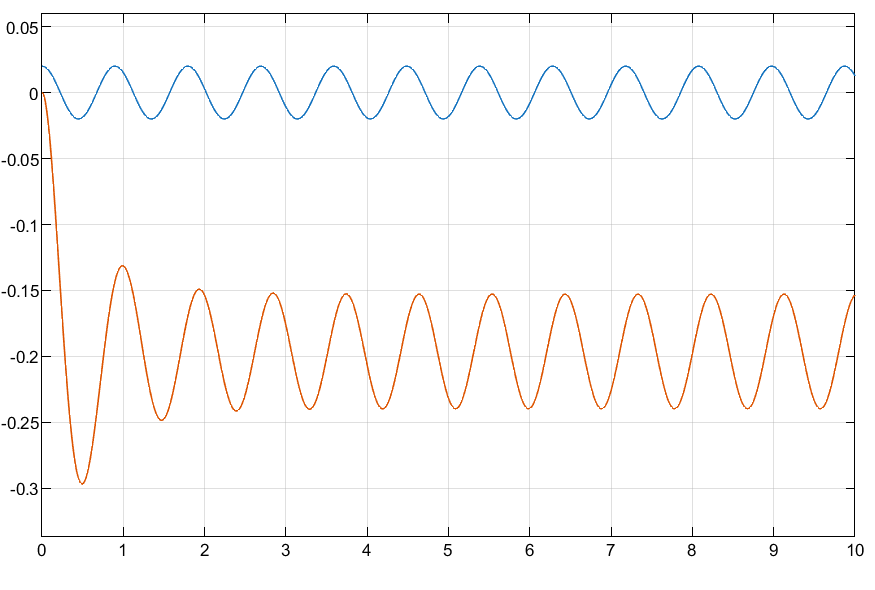
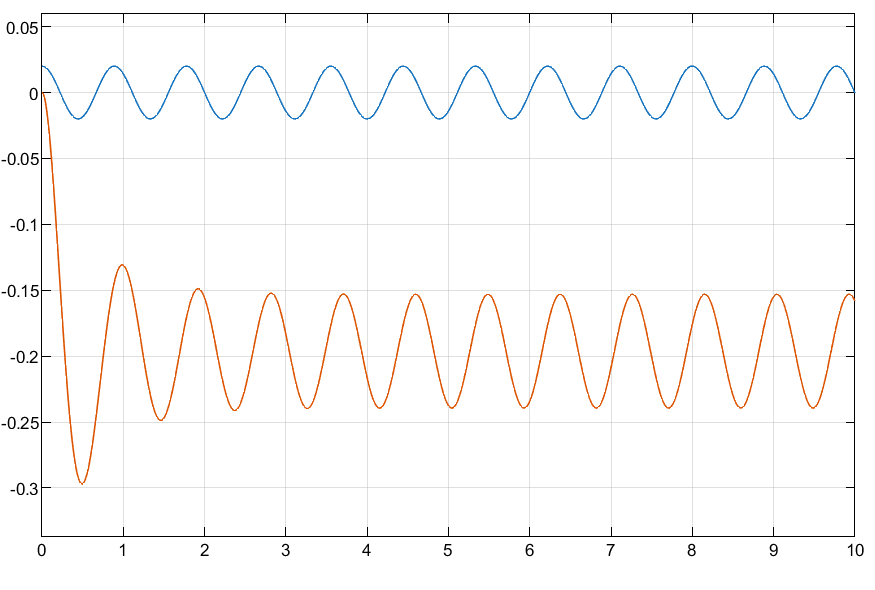
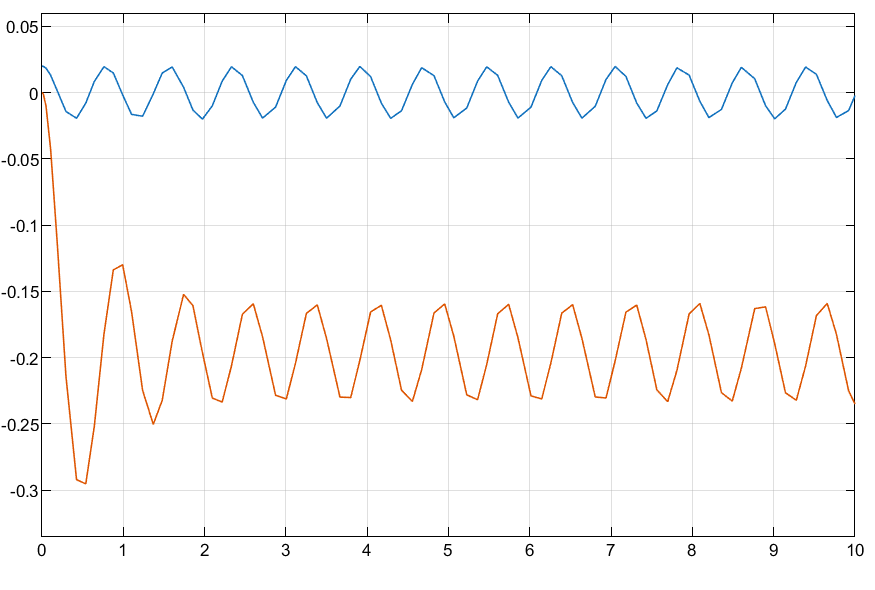
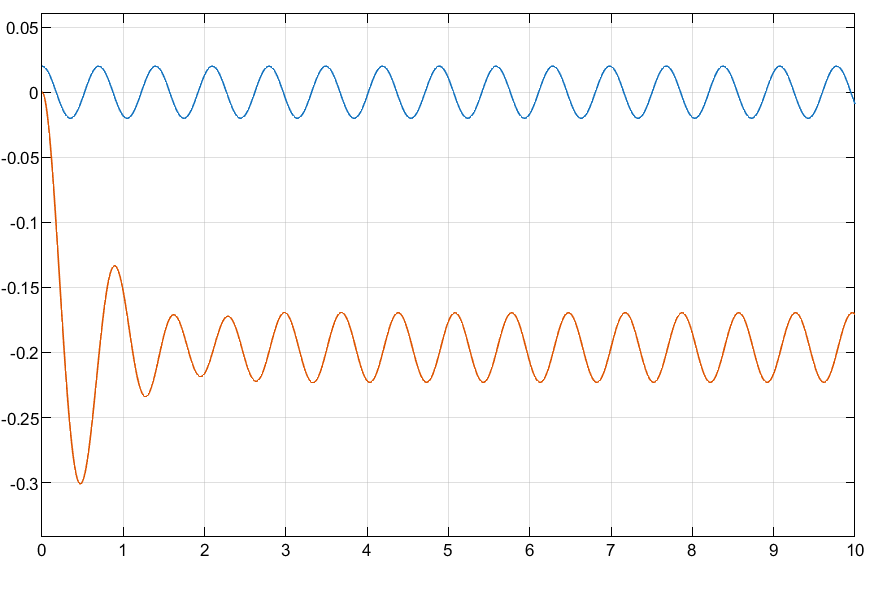
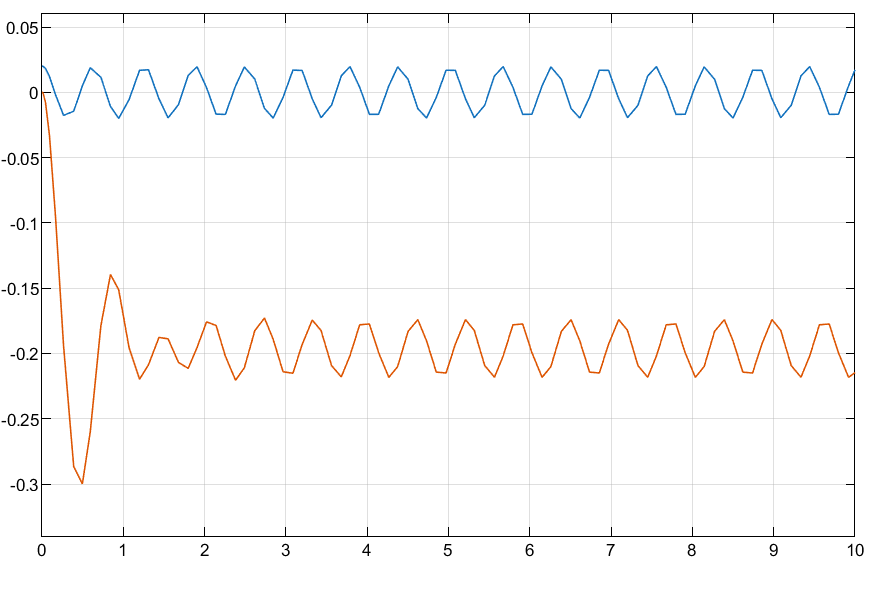
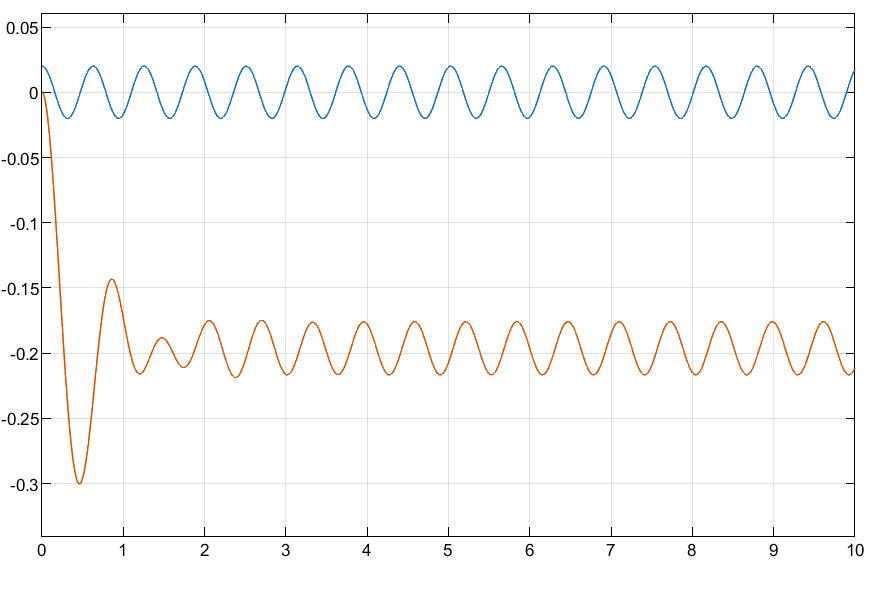
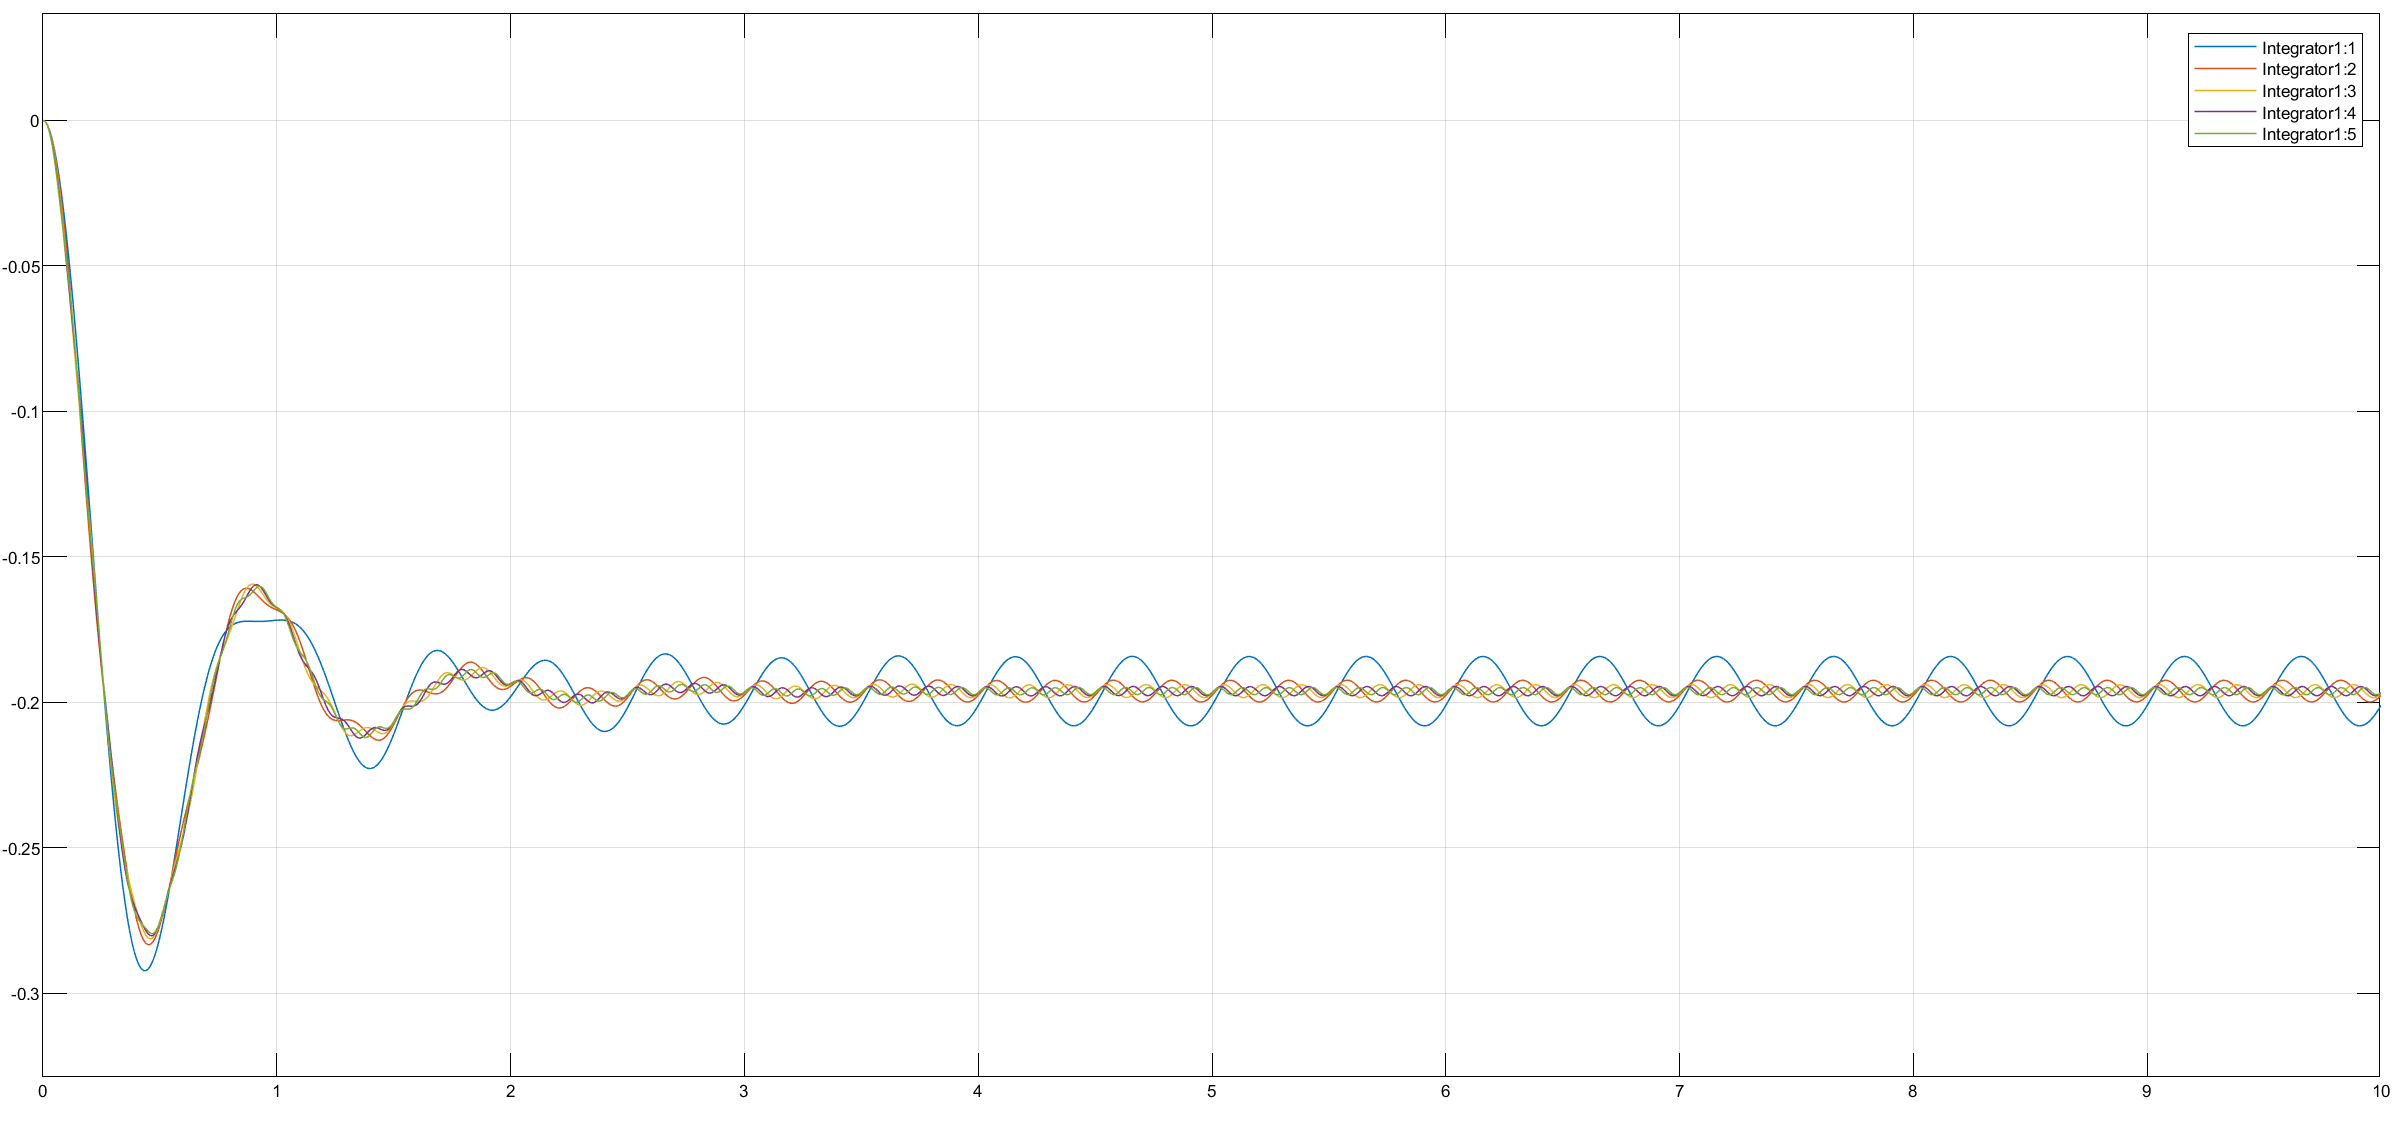
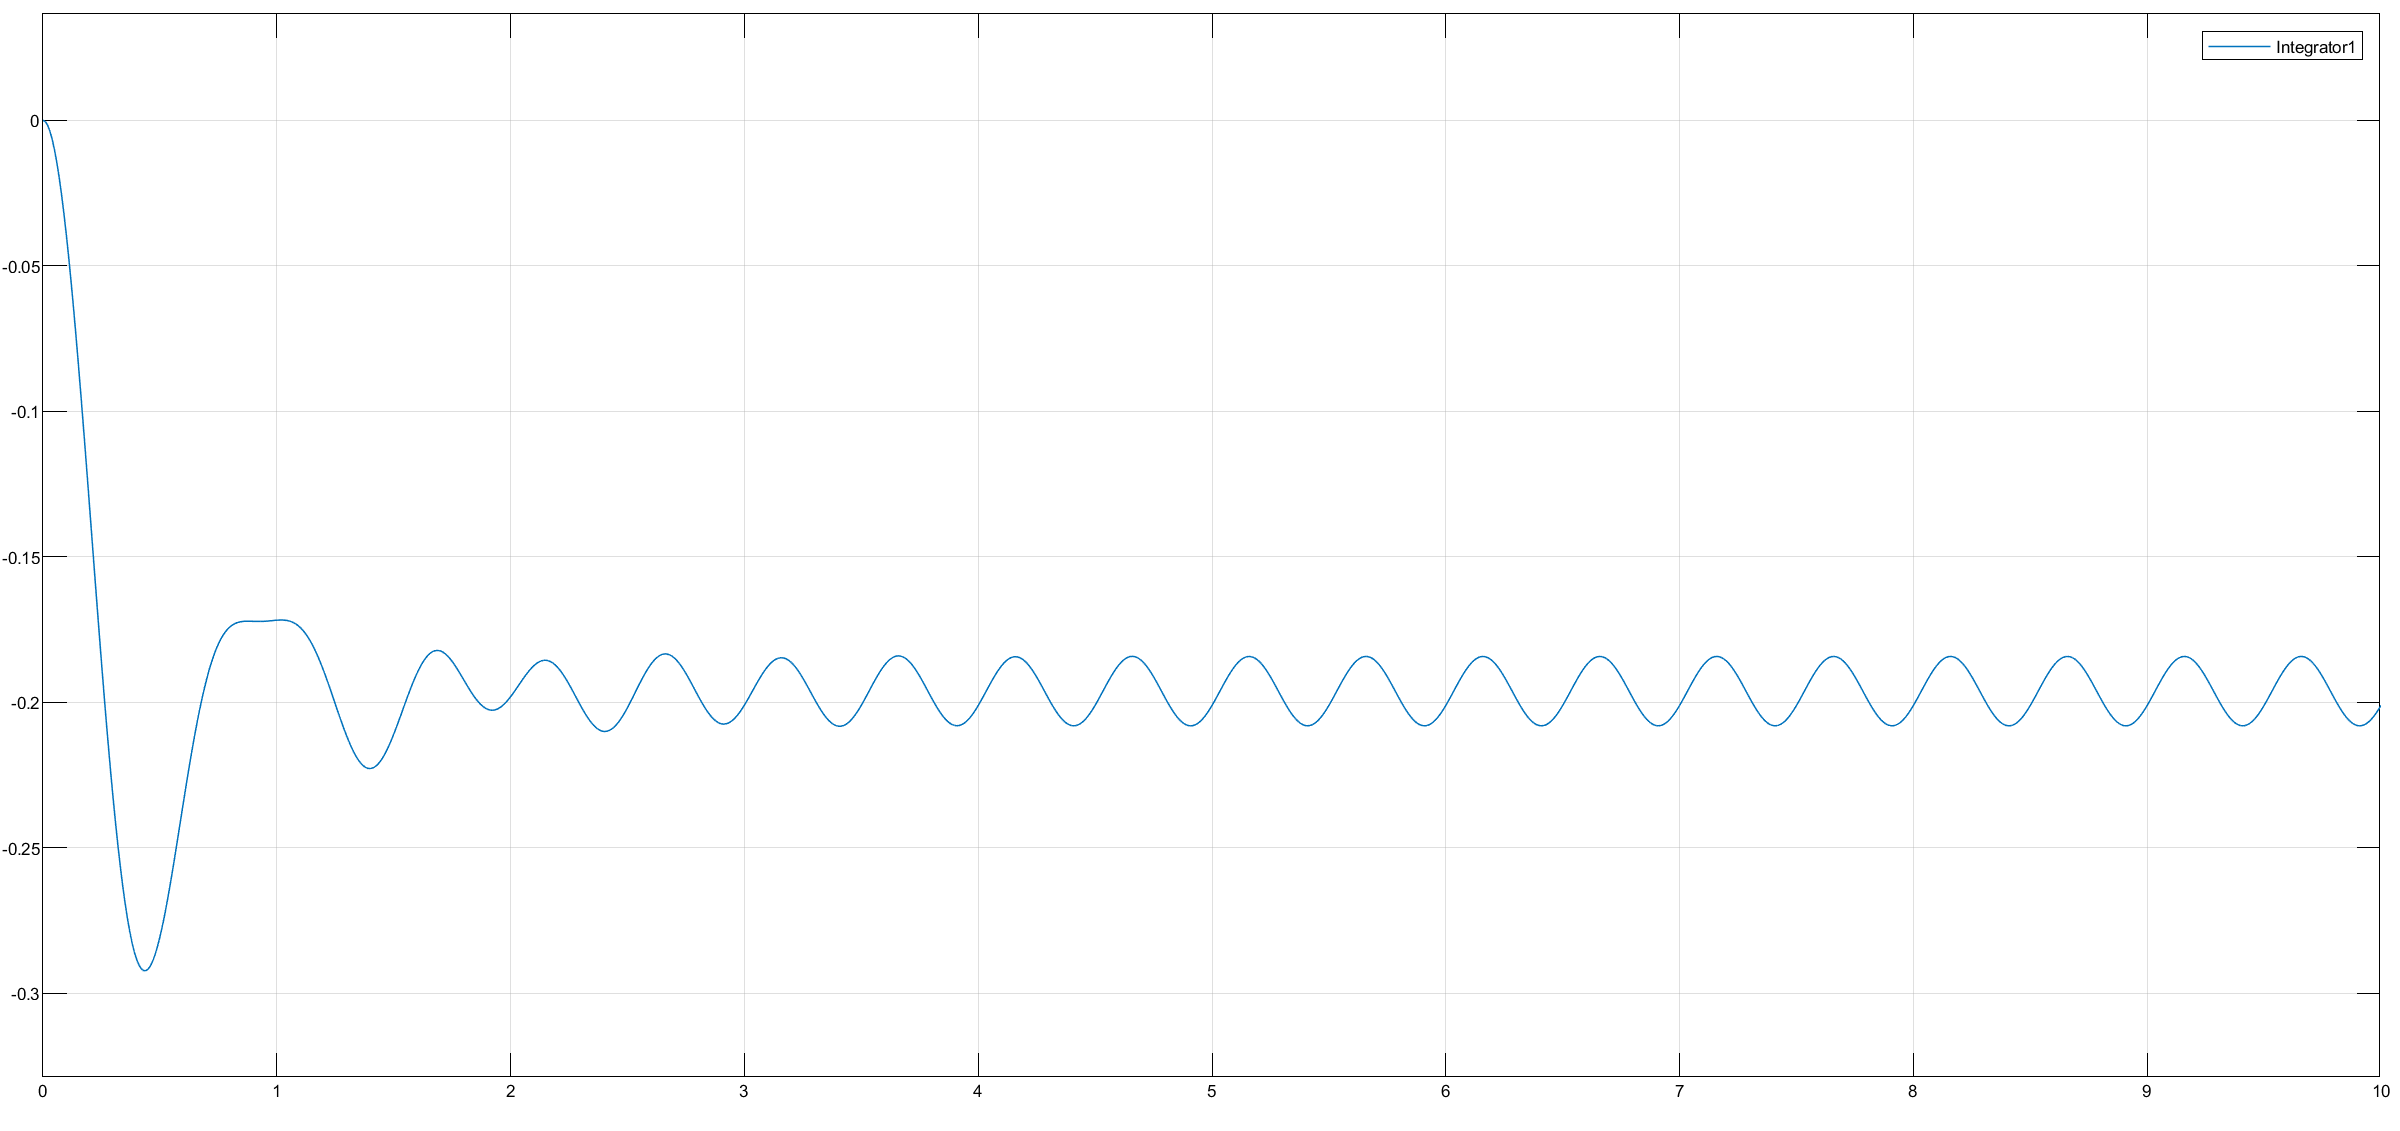
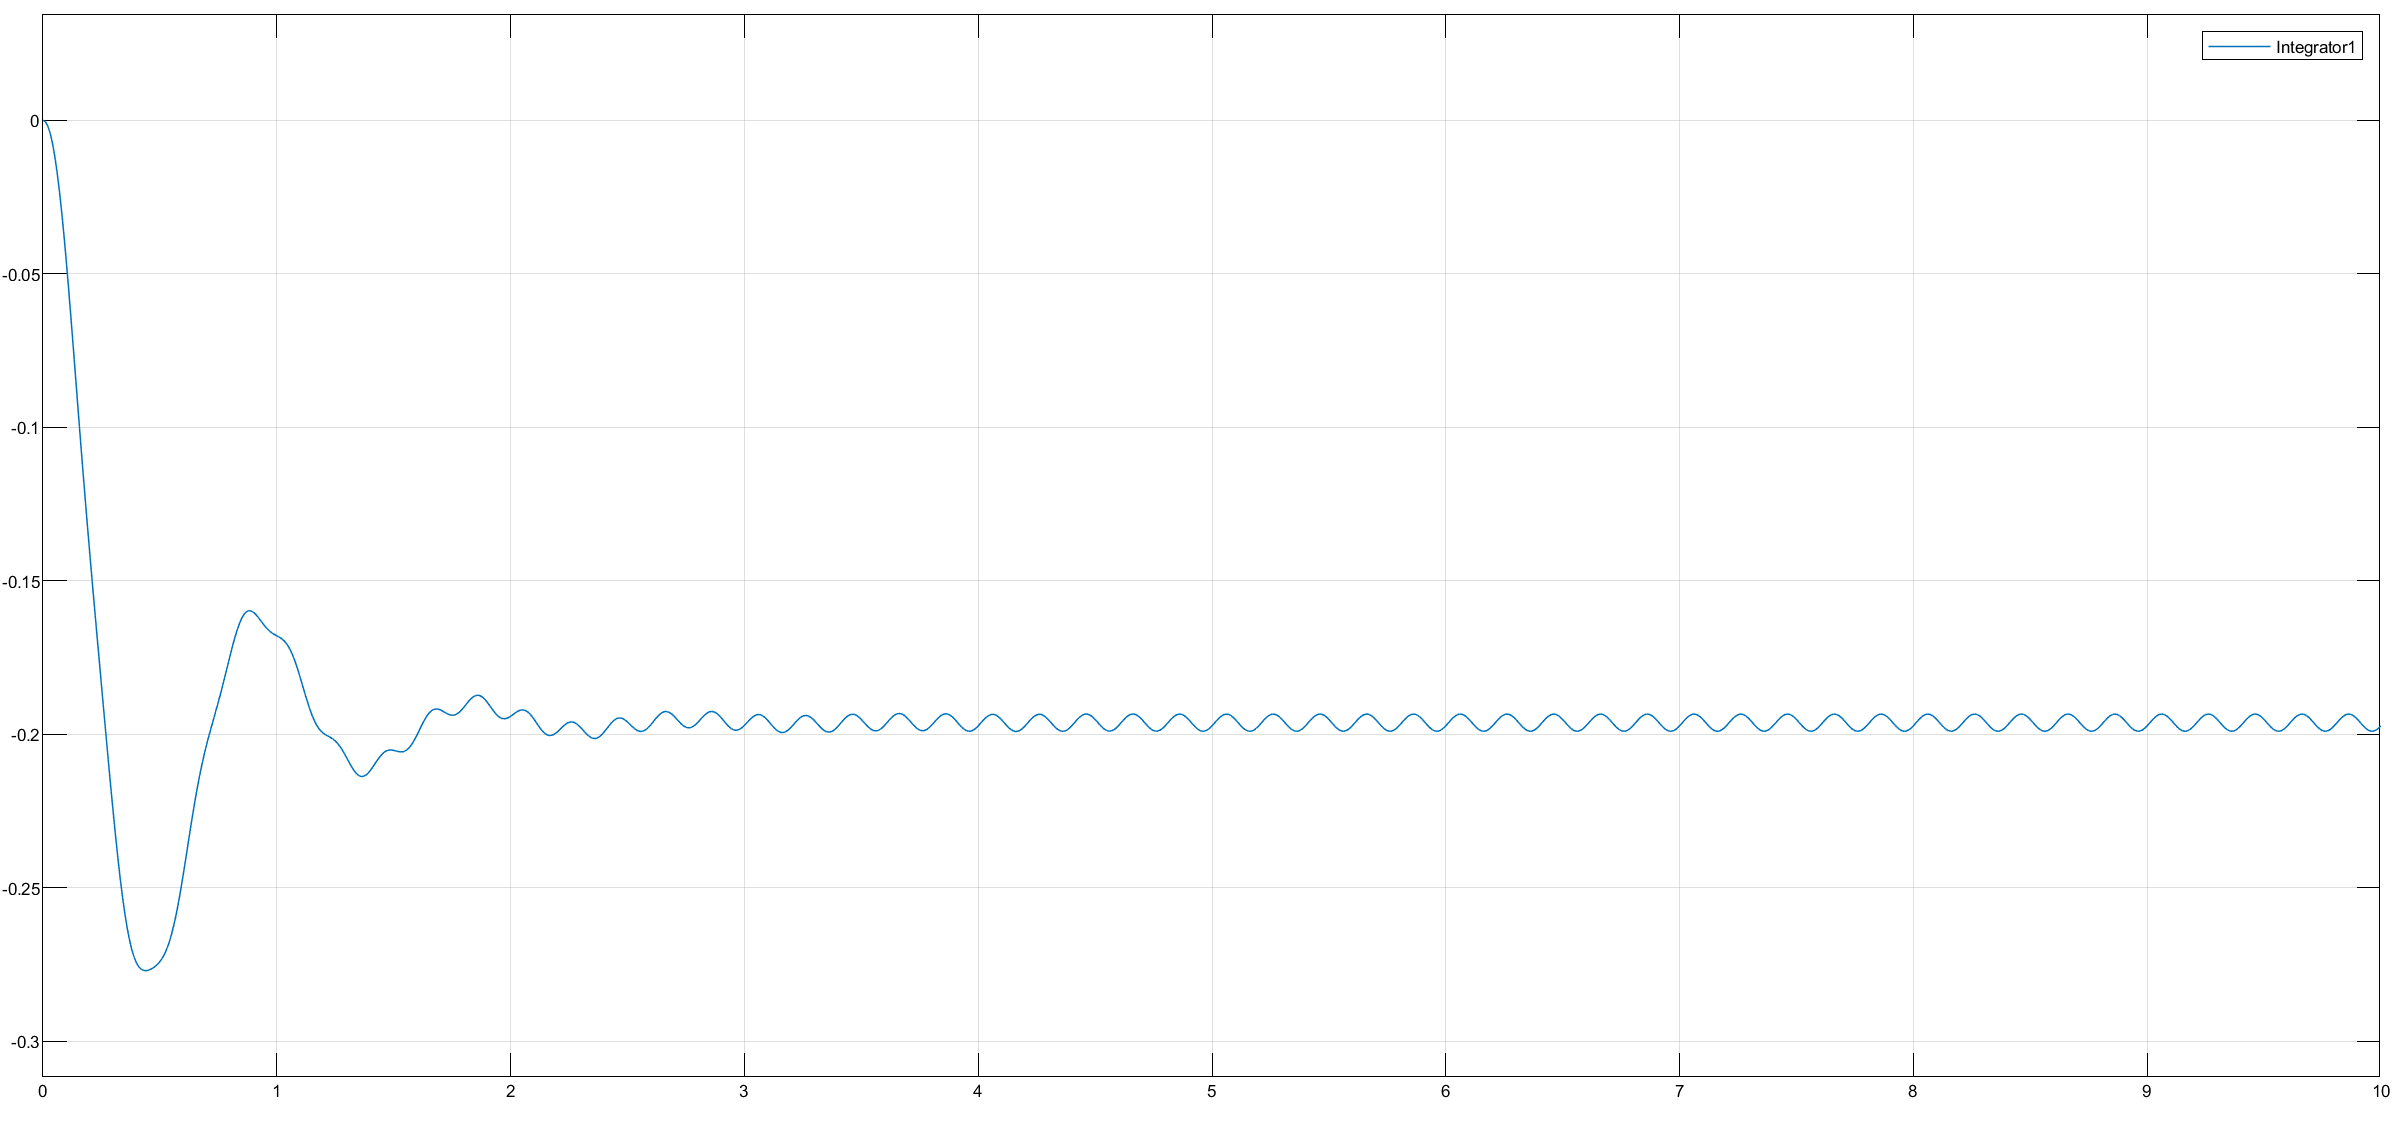
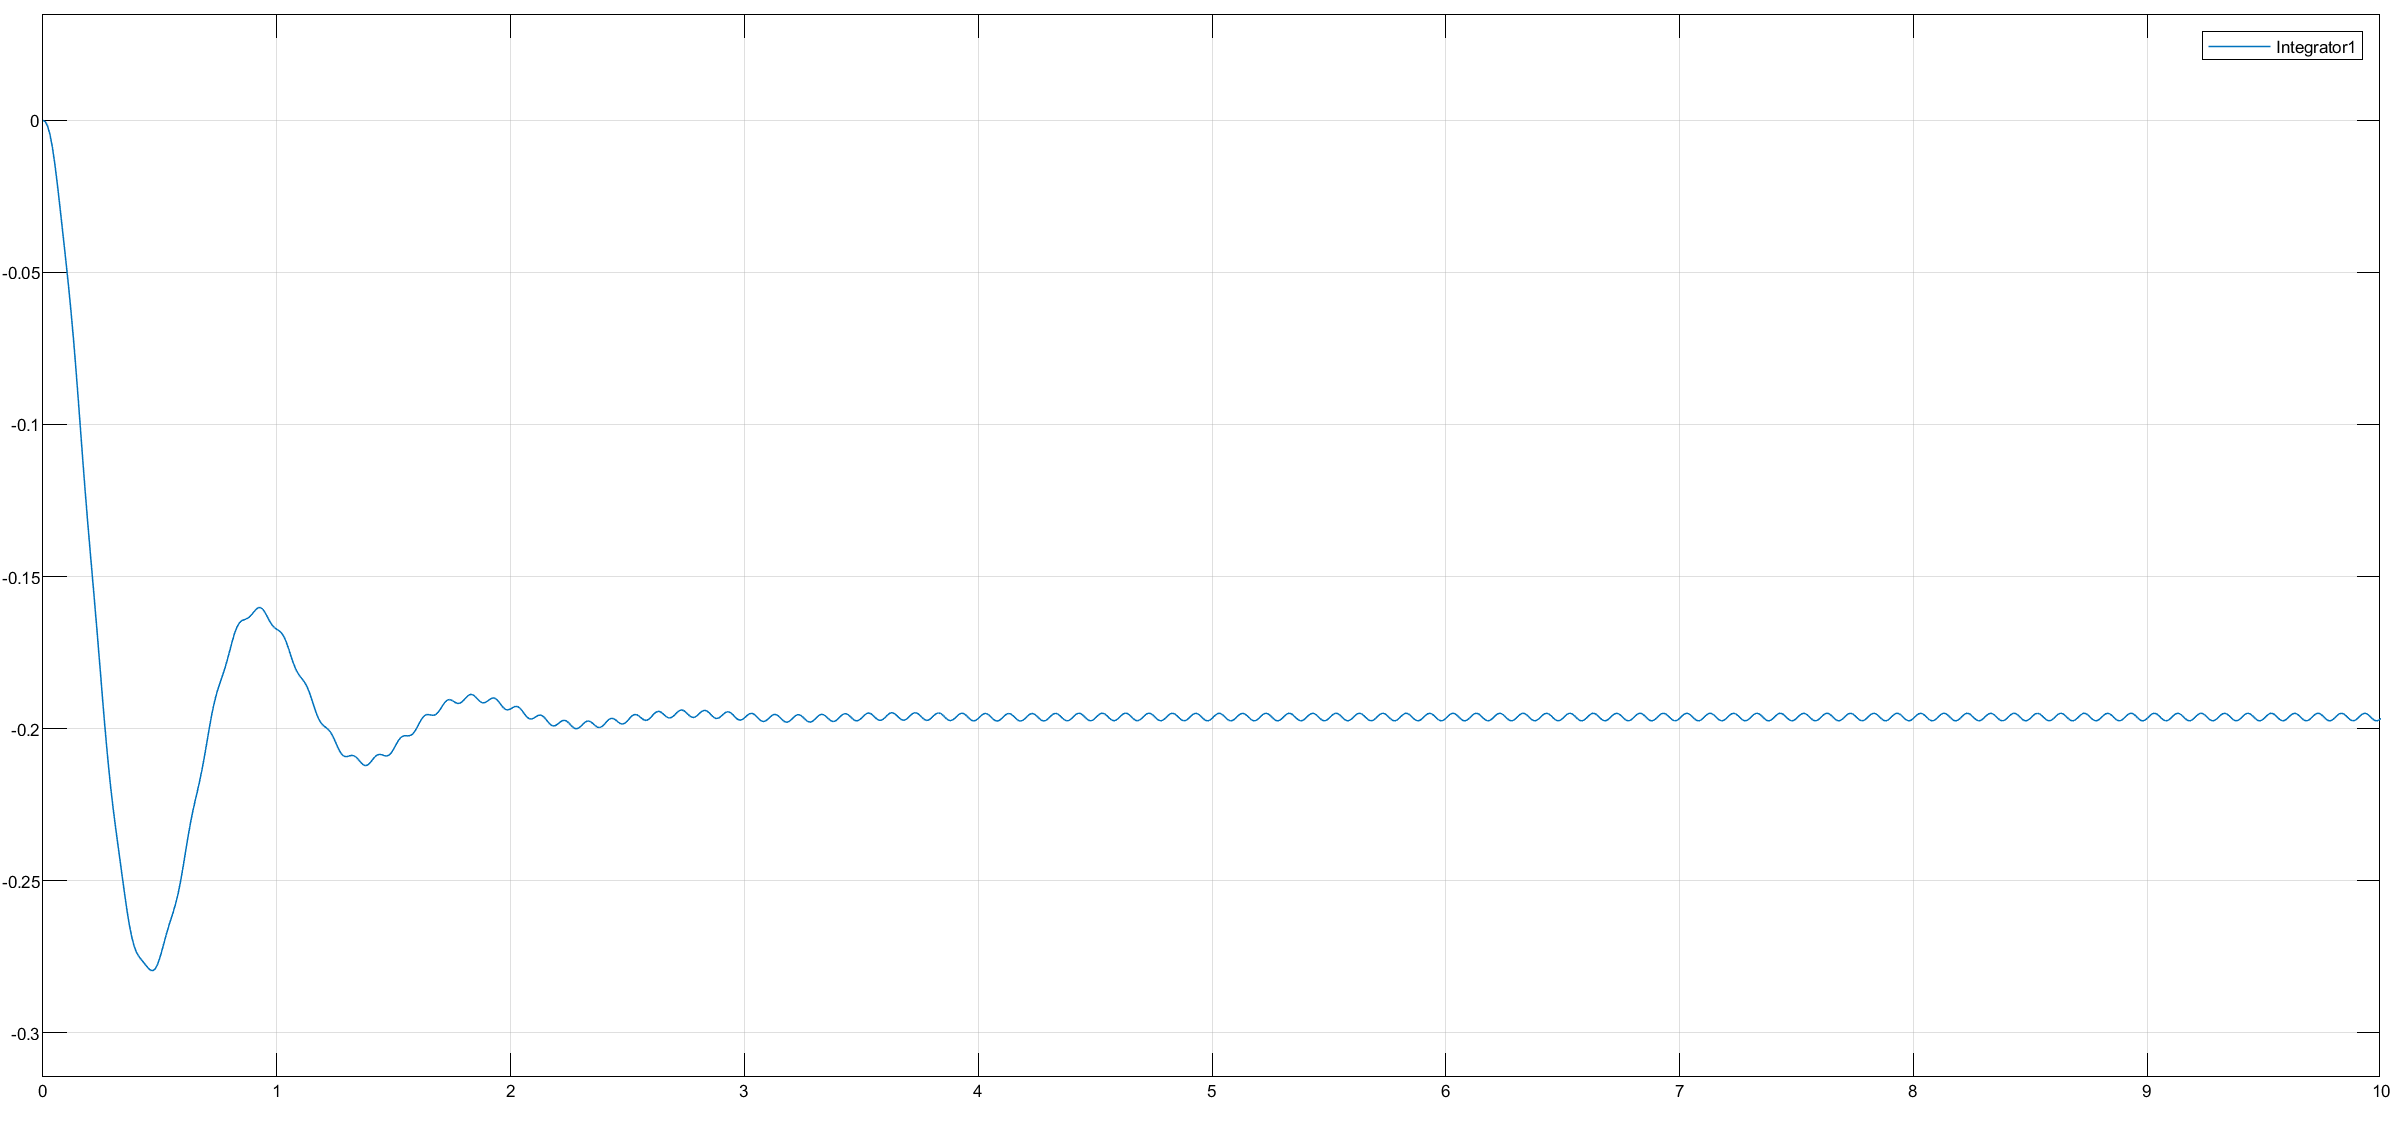
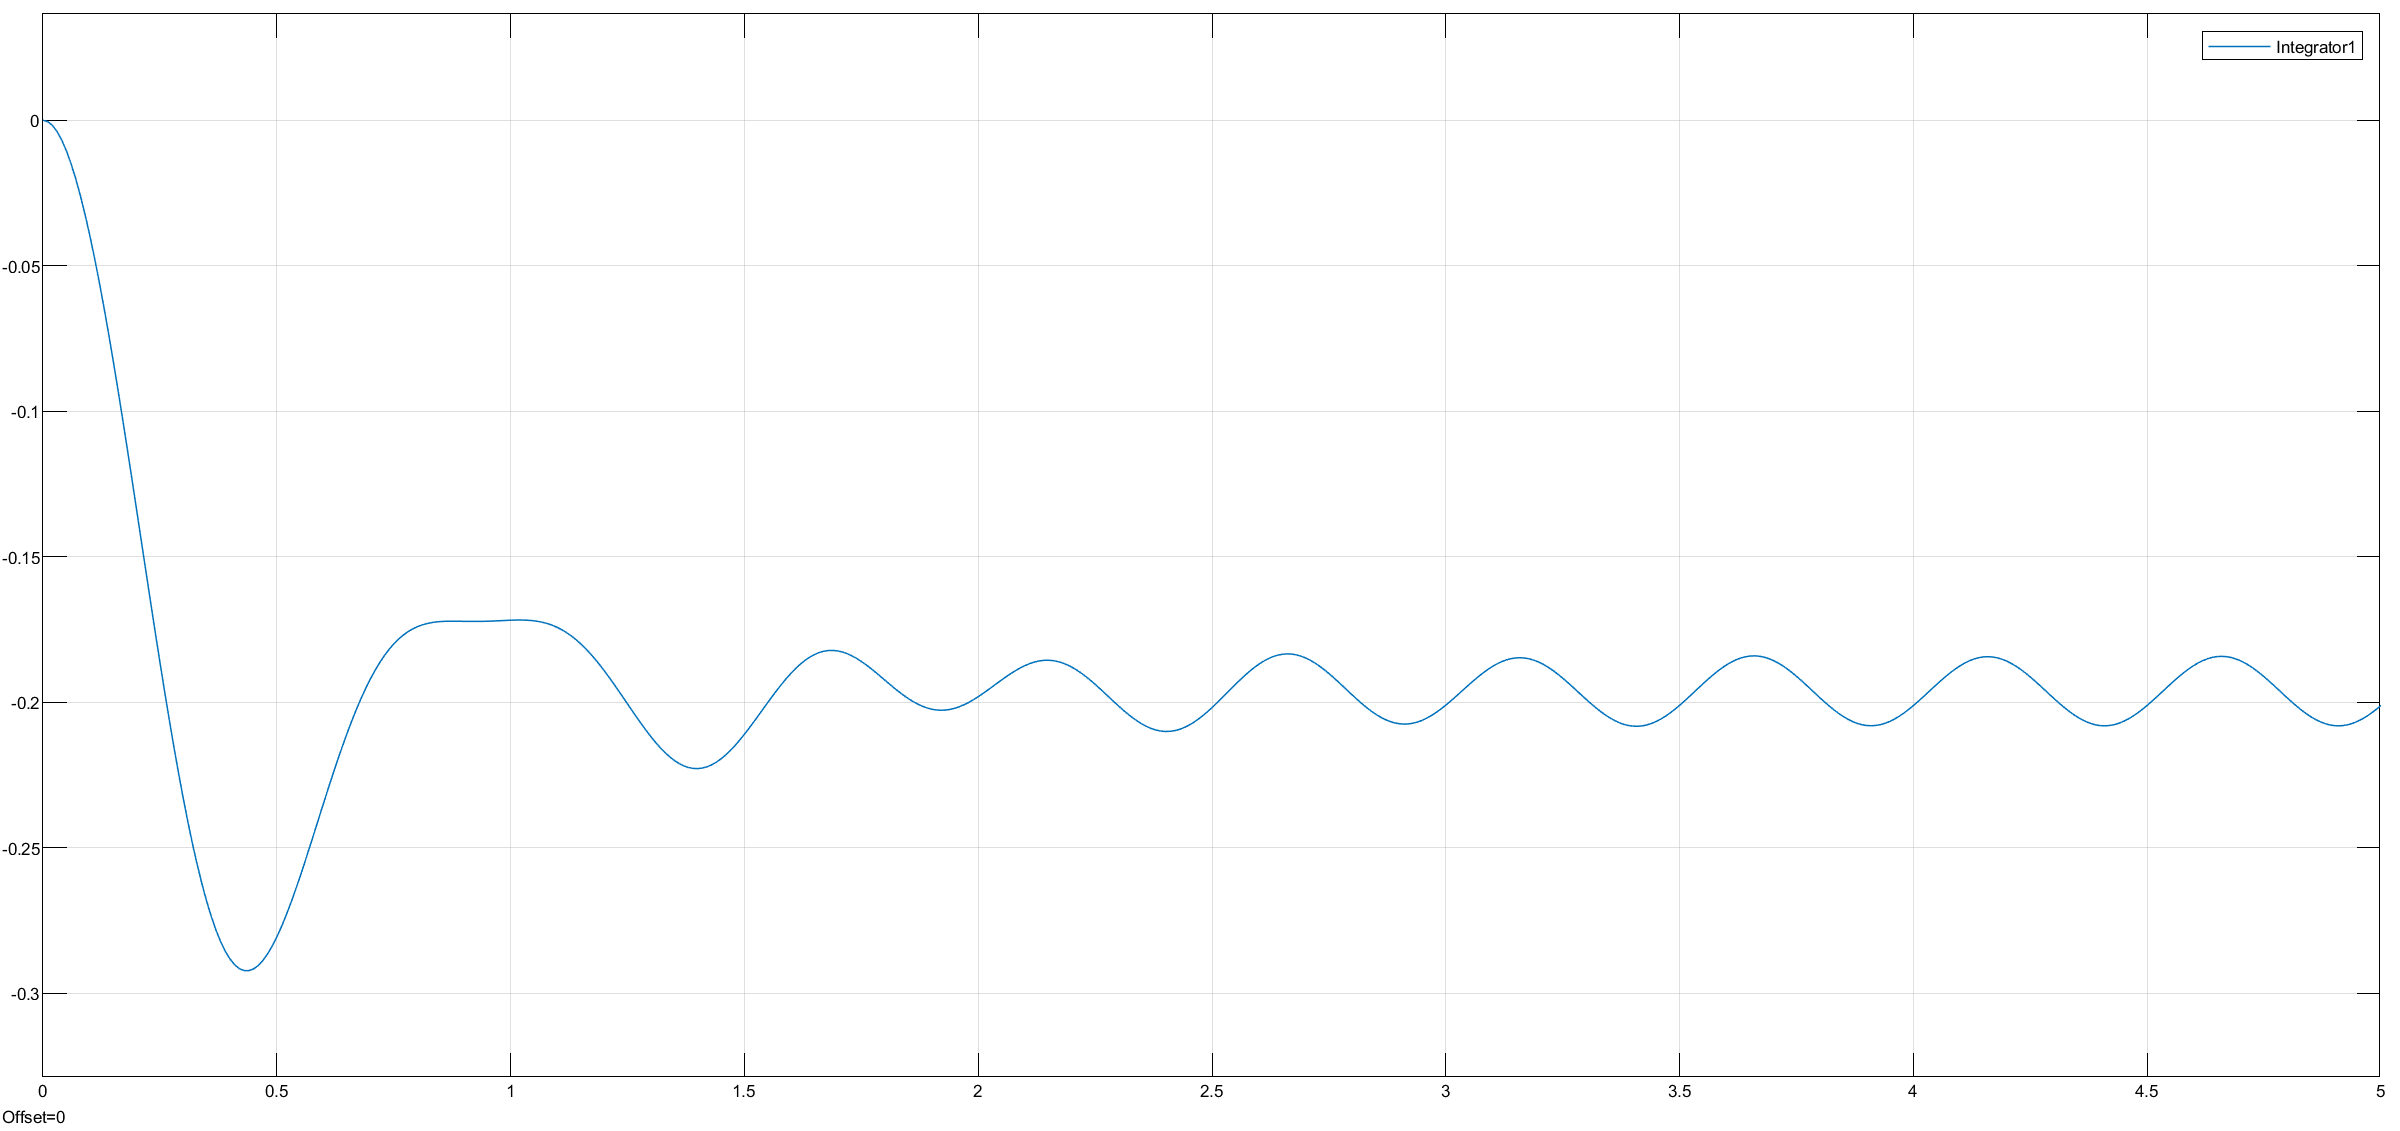
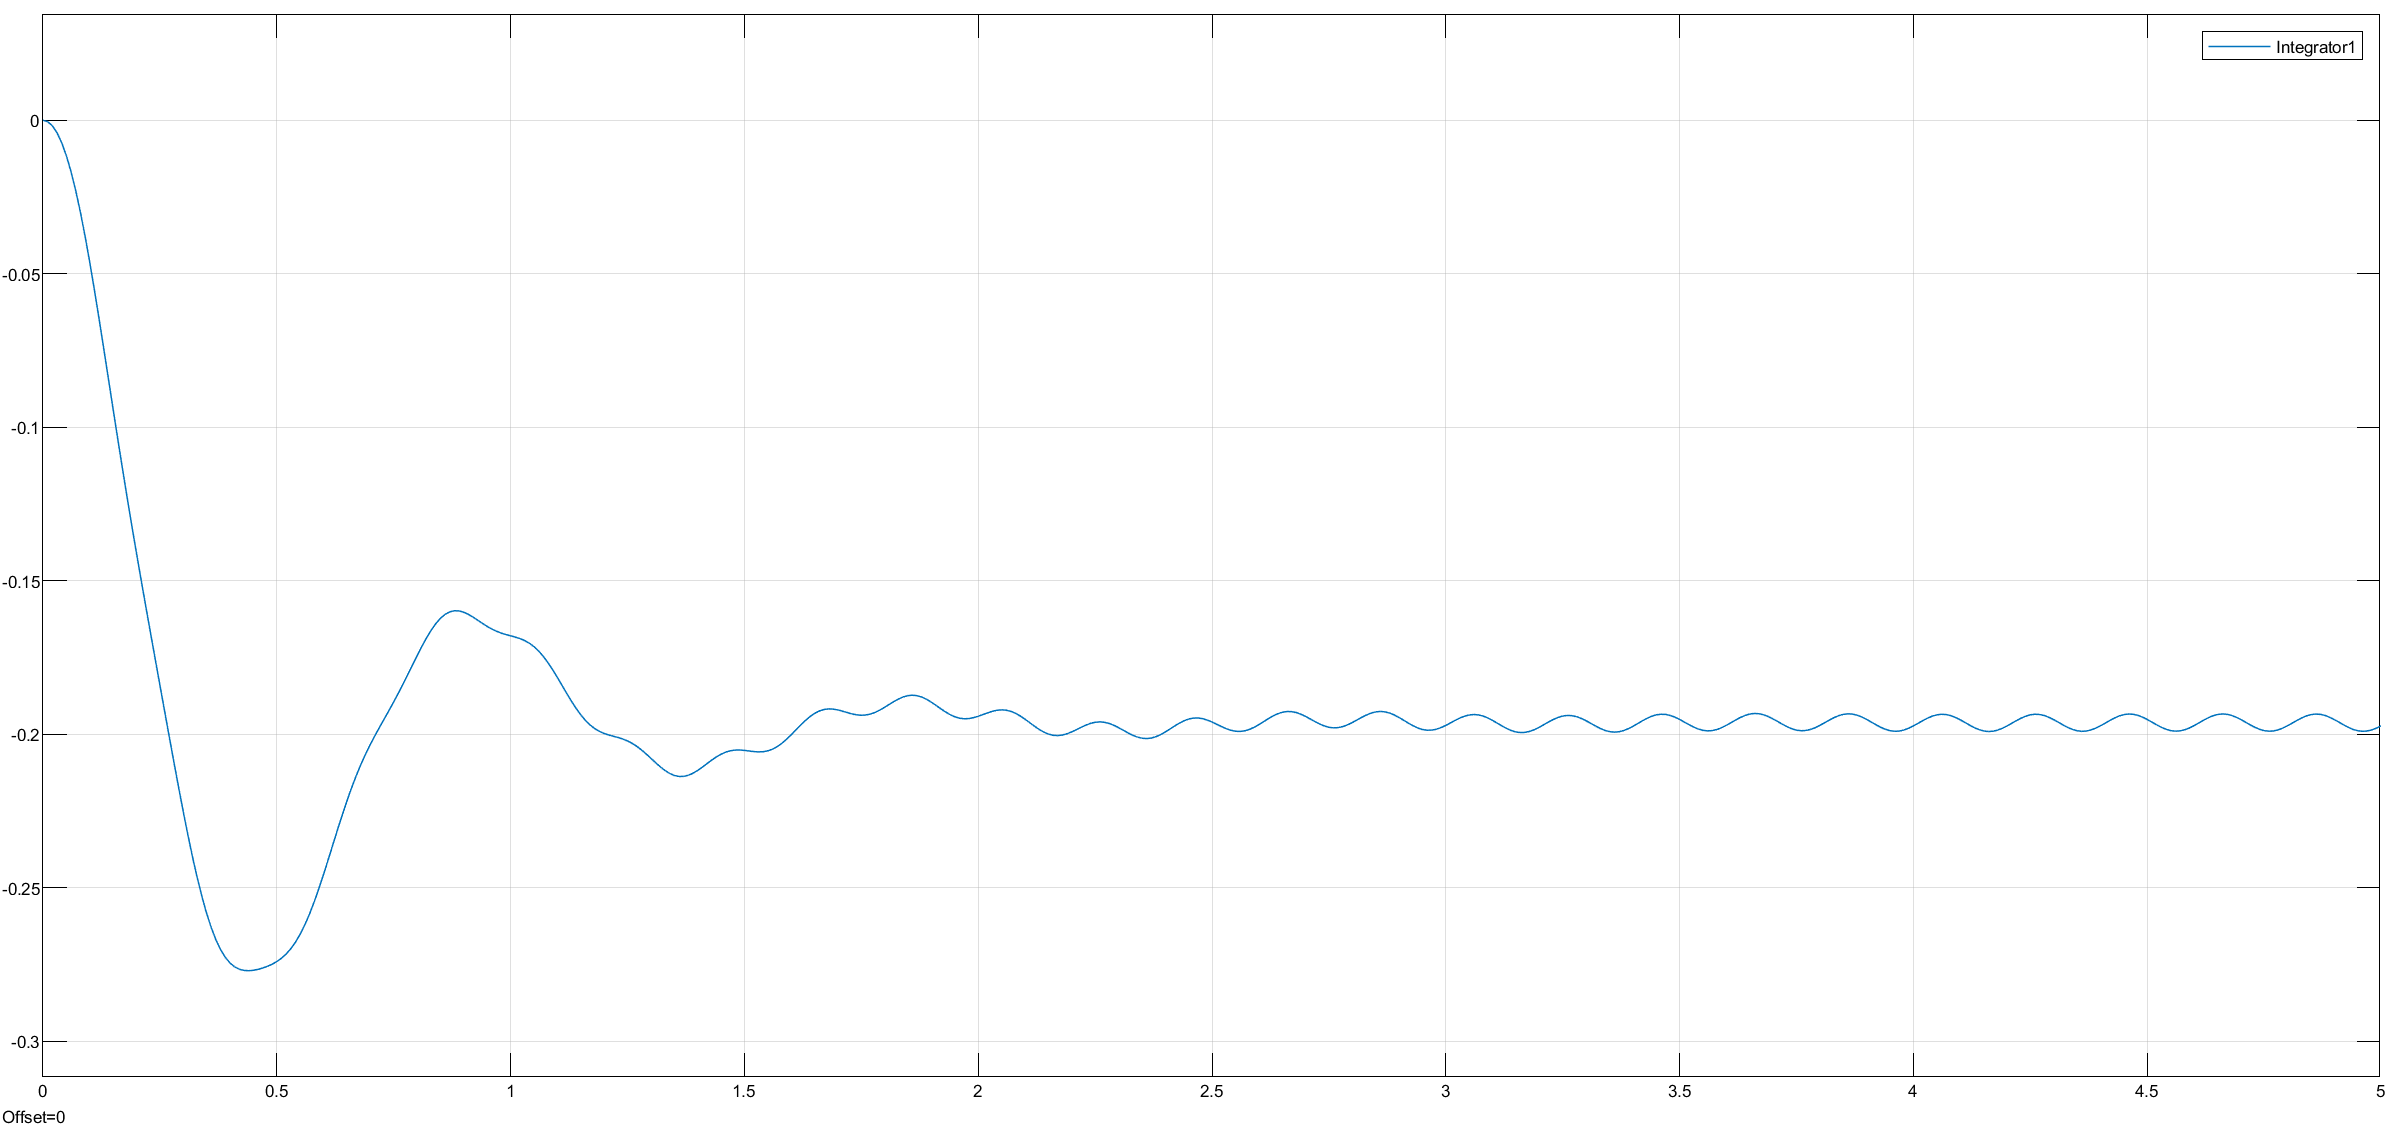
3.0.2.1 Observations from Frequency Modification
with the integrator
with the derivative
2 rad/s
3 rad/s
4 rad/s
5 rad/s
6 rad/s
7 rad/s
7.071 rad/s Natural frequency
8 rad/s
9 rad/s
10 rad/s
10 rad/s
2, 4, 6, 8, 10 Hz
2 Hz
5 Hz

8 Hz
10 Hz
2 Hz, 5s
5 Hz, 5s

8 Hz, 5 secs
10 Hz, 5 s
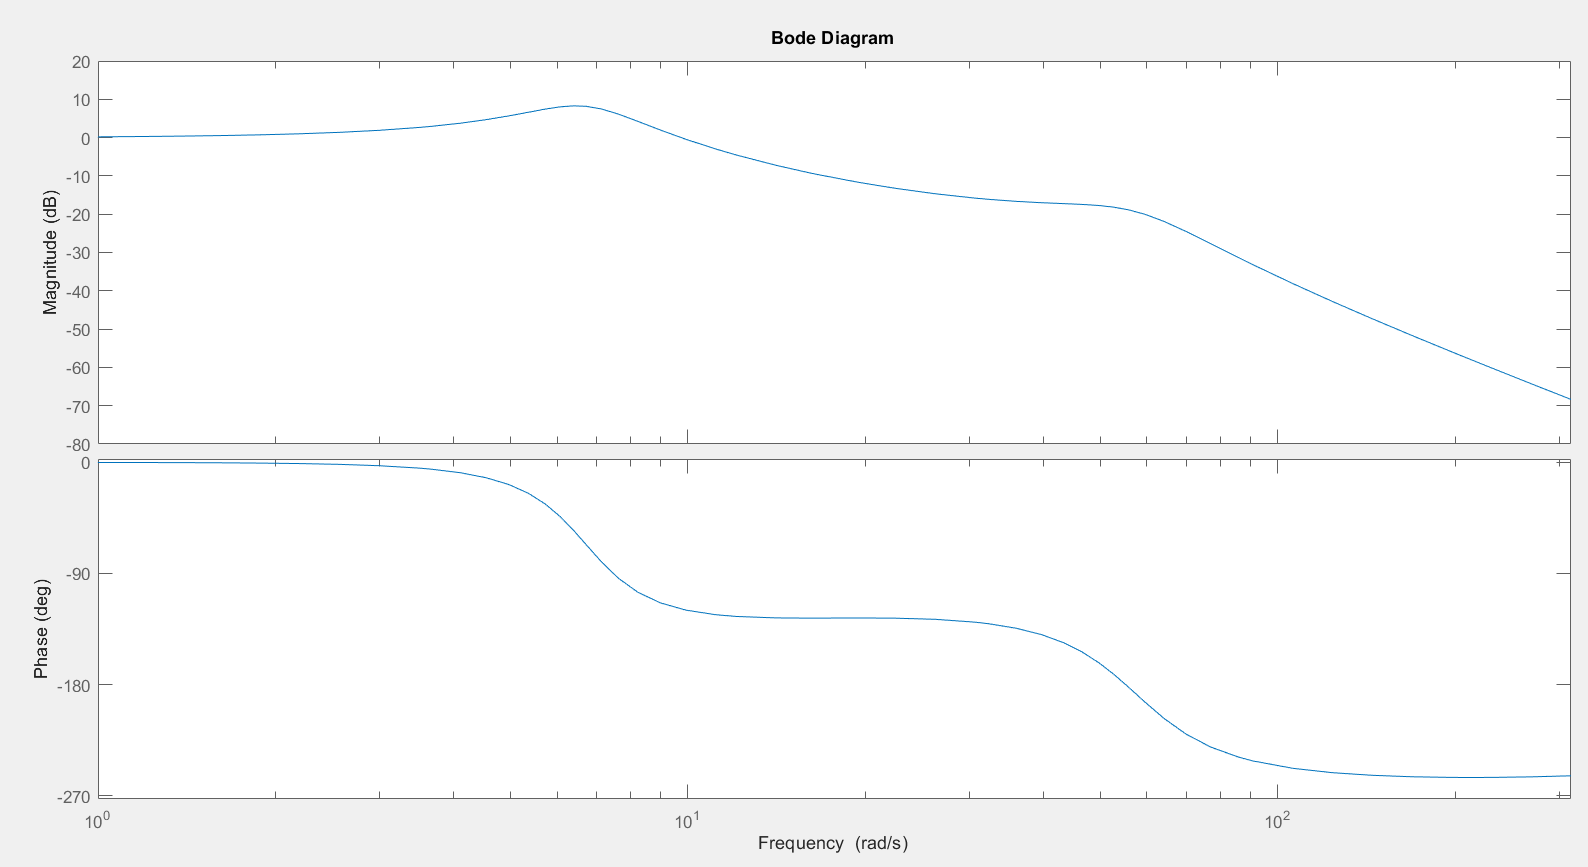
3.0.2.2 Frequency Domain Characteristics
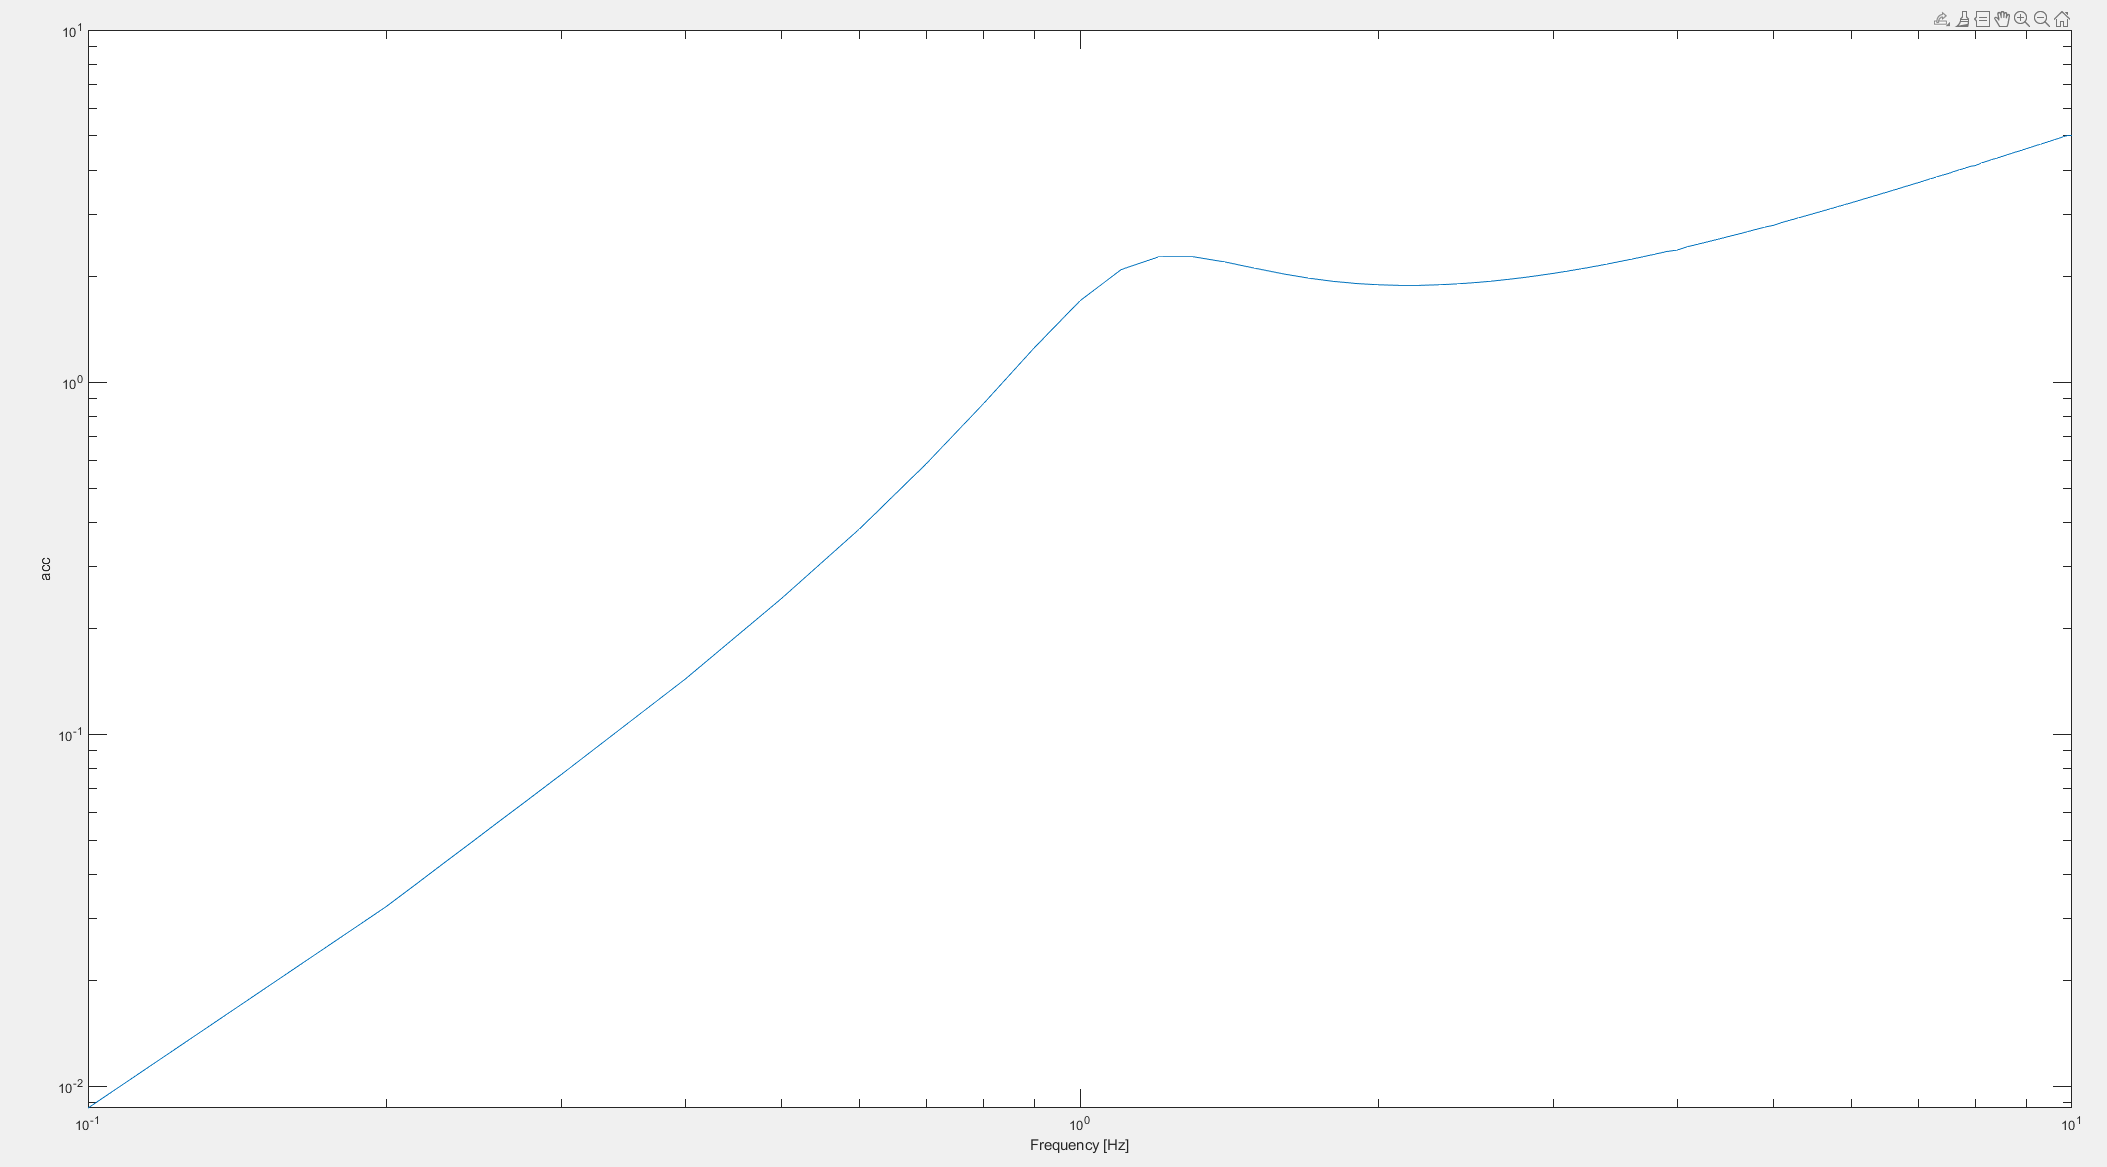
From using Simulink
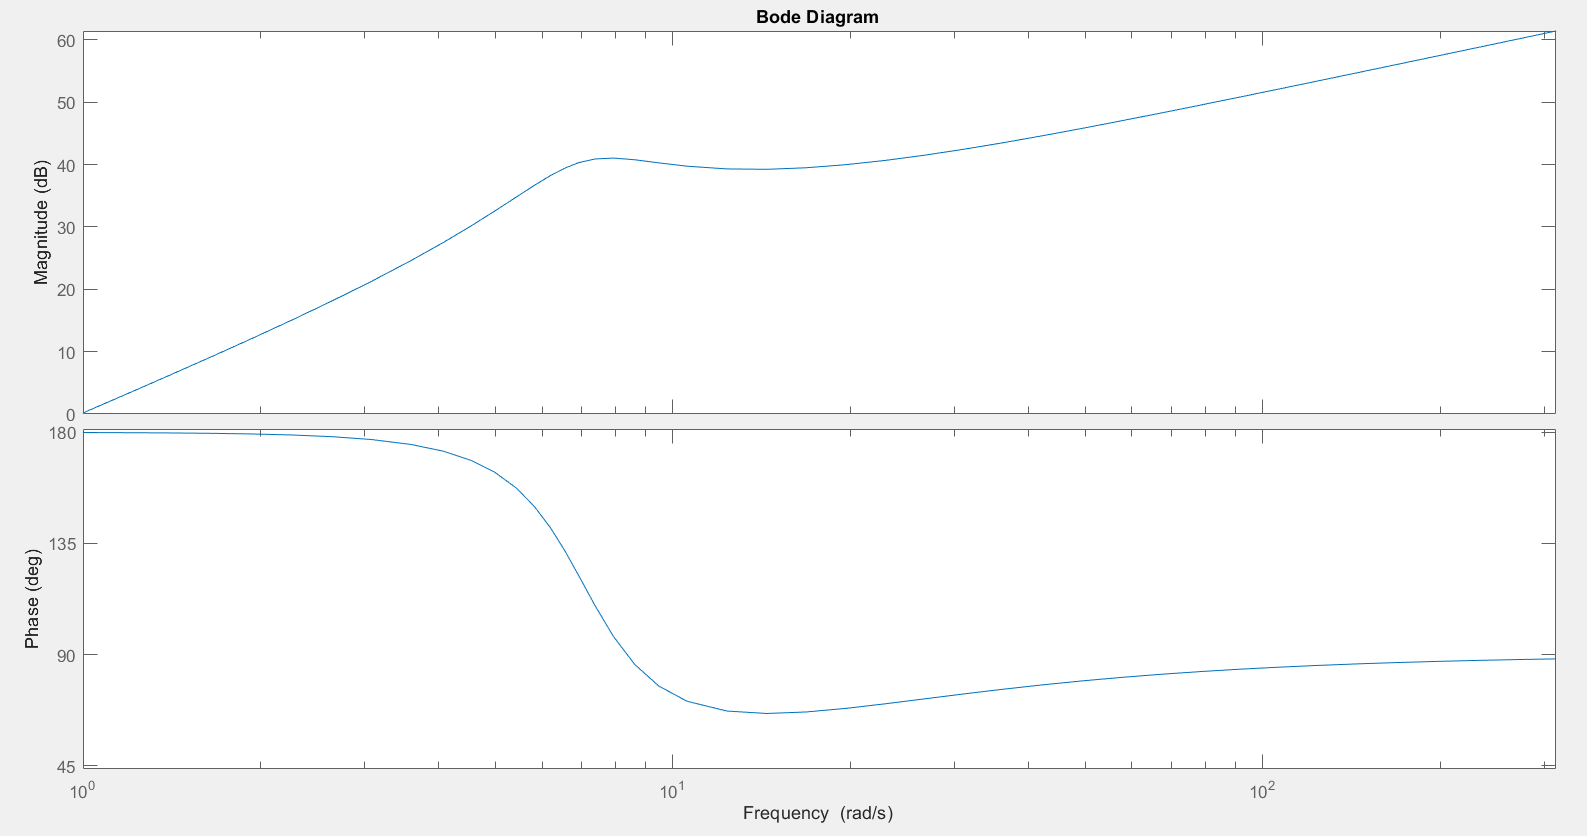
From using bode()
![Psuedo Bode Plot of Amplitude (z [m] vs w [rad/s] )](/_projects/vehicle-simulations/assets/image-55.png)
Psuedo Bode Plot of Amplitude (z [m] vs w [rad/s] )
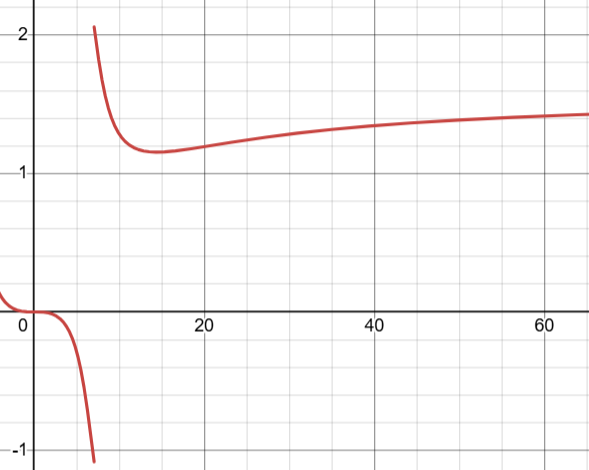
Pseudo Bode Plot of Phase
3.1.0 Quarter Car Two Mass Model
Similar to 3.0.0, this section extends the Quarter Car Model to the dual mass variation, focusing on frequency domain characteristics and parameterisation.
3.1.1.? Transfer Functions
\[G_{B_{acc}}(s)=\frac{k_W k_Bs^4+(k_W c_B+k_B c_W)s^3+c_W c_Bs^2}{m_{B}m_{W}s^{4}+[m_{B}(k_{B}+k_{W})+m_{W}k_{B}]s^{3}+[m_{B}(c_{B}+c_{W})+m_{W}c_{B}+k_{B}k_{W}]s^{2}+[k_{B}c_{W}+k_{W}c_{B}]s^3+c_{B}c_{W}}\] \[G_{W_{acc}}(s)=\frac{m_B k_Ws^5+(k_W k_B+m_B c_W)s^4+(k_Bc_W+k_W c_B)s^3+c_Bc_Ws^2}{m_{B}m_{W}s^{4}+[m_{B}(k_{B}+k_{W})+m_{W}k_{B}]s^{3}+[m_{B}(c_{B}+c_{W})+m_{W}c_{B}+k_{B}k_{W}]s^{2}+[k_{B}c_{W}+k_{W}c_{B}]s^3+c_{B}c_{W}}\]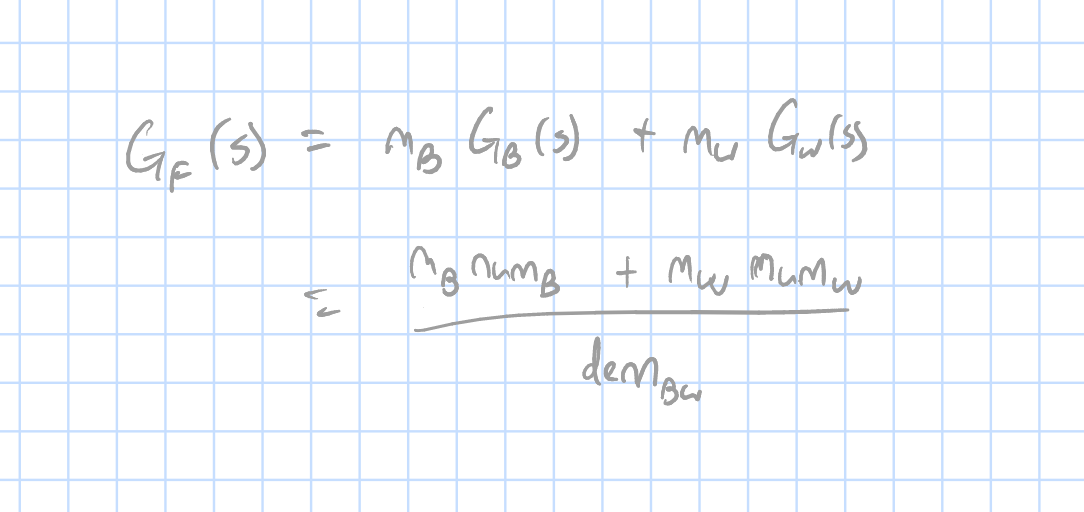
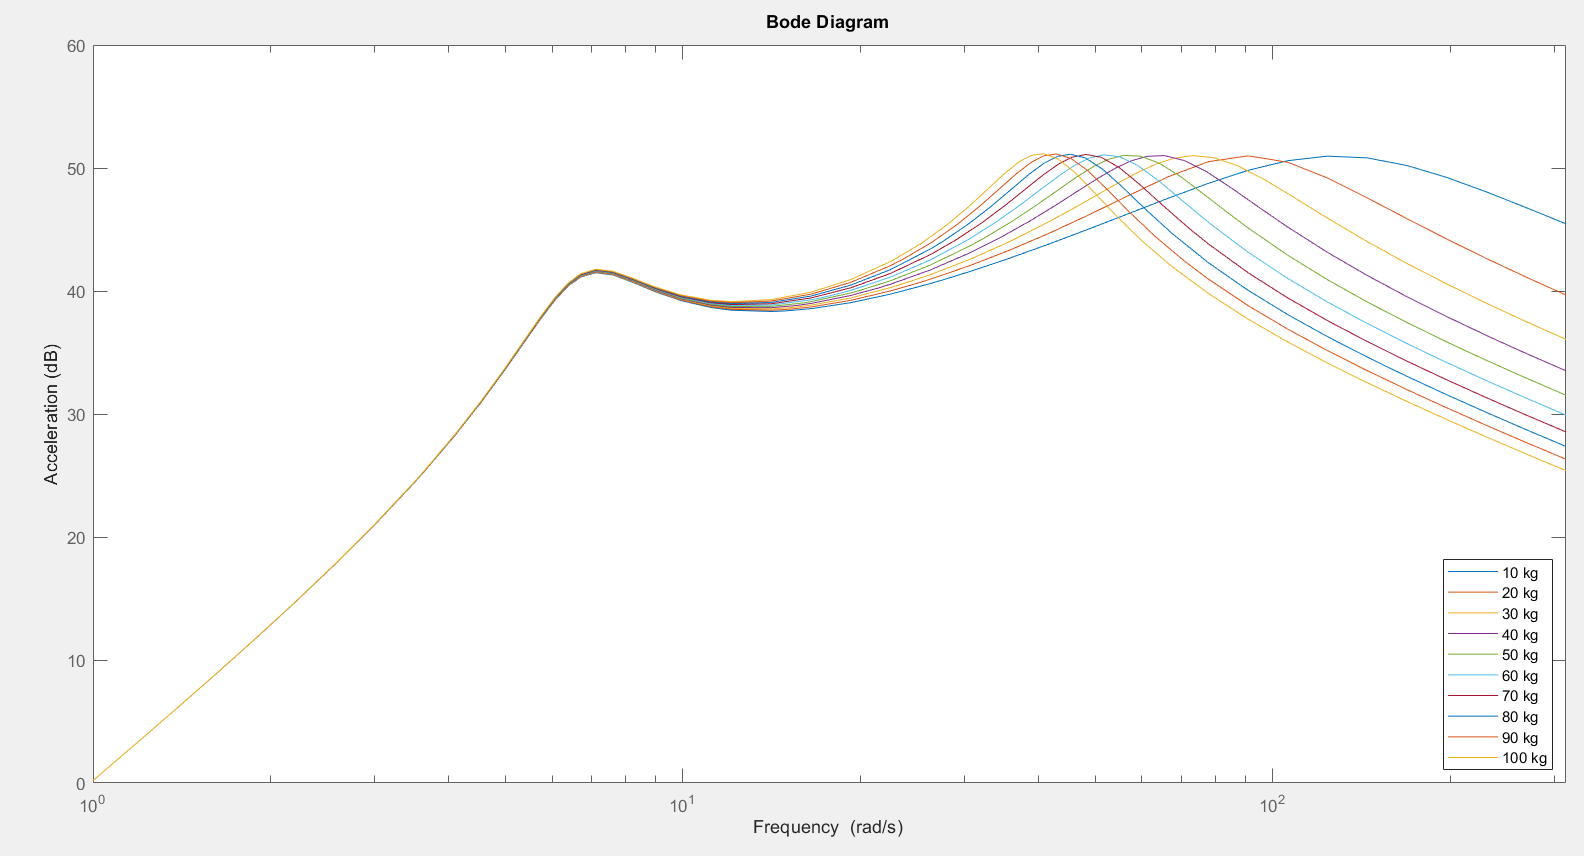
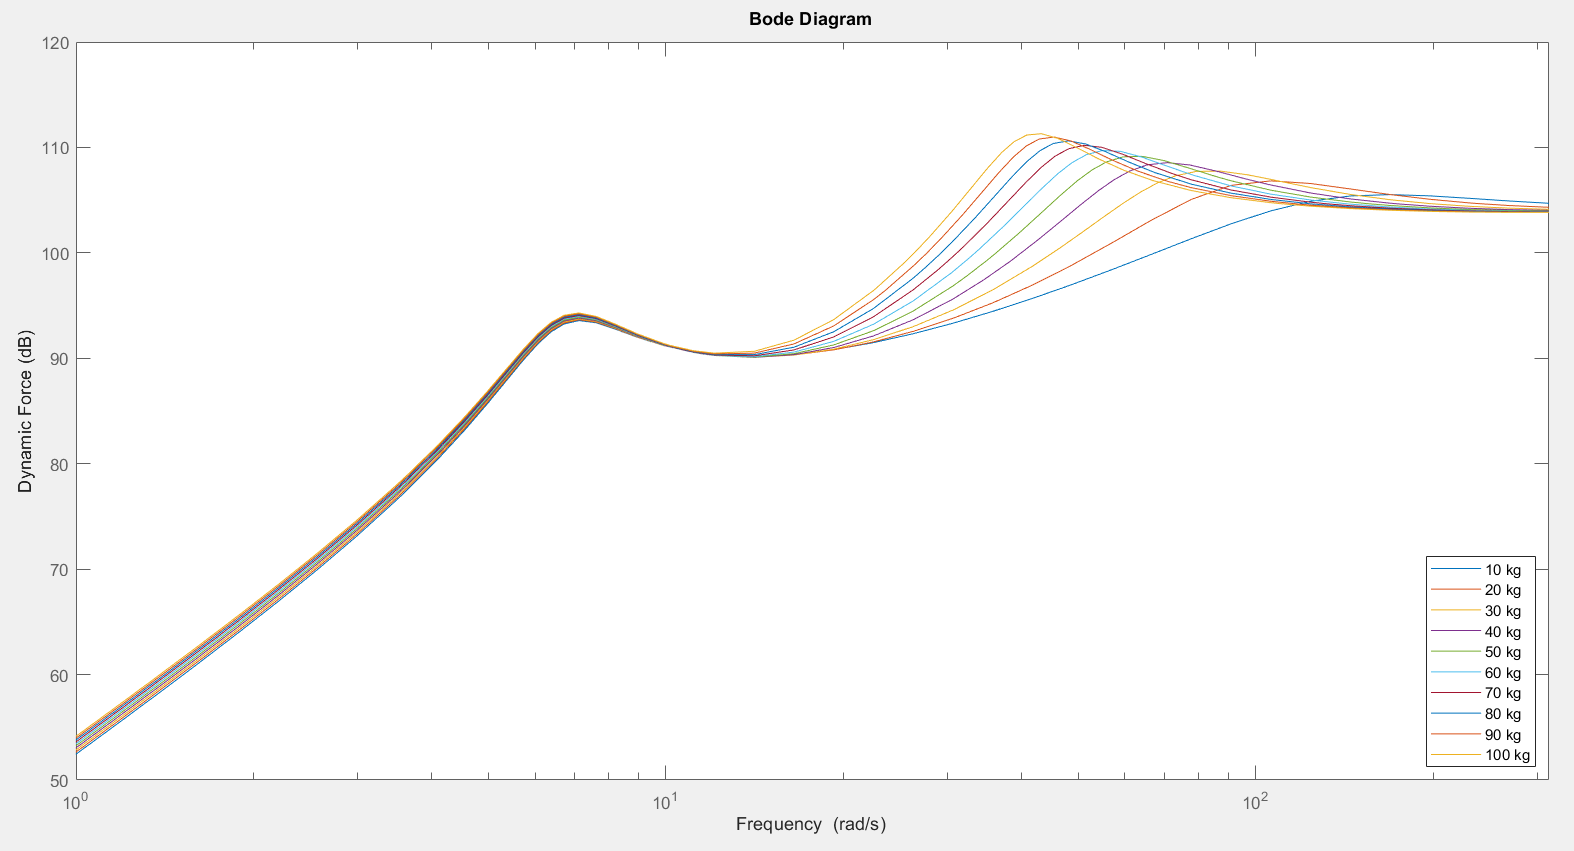
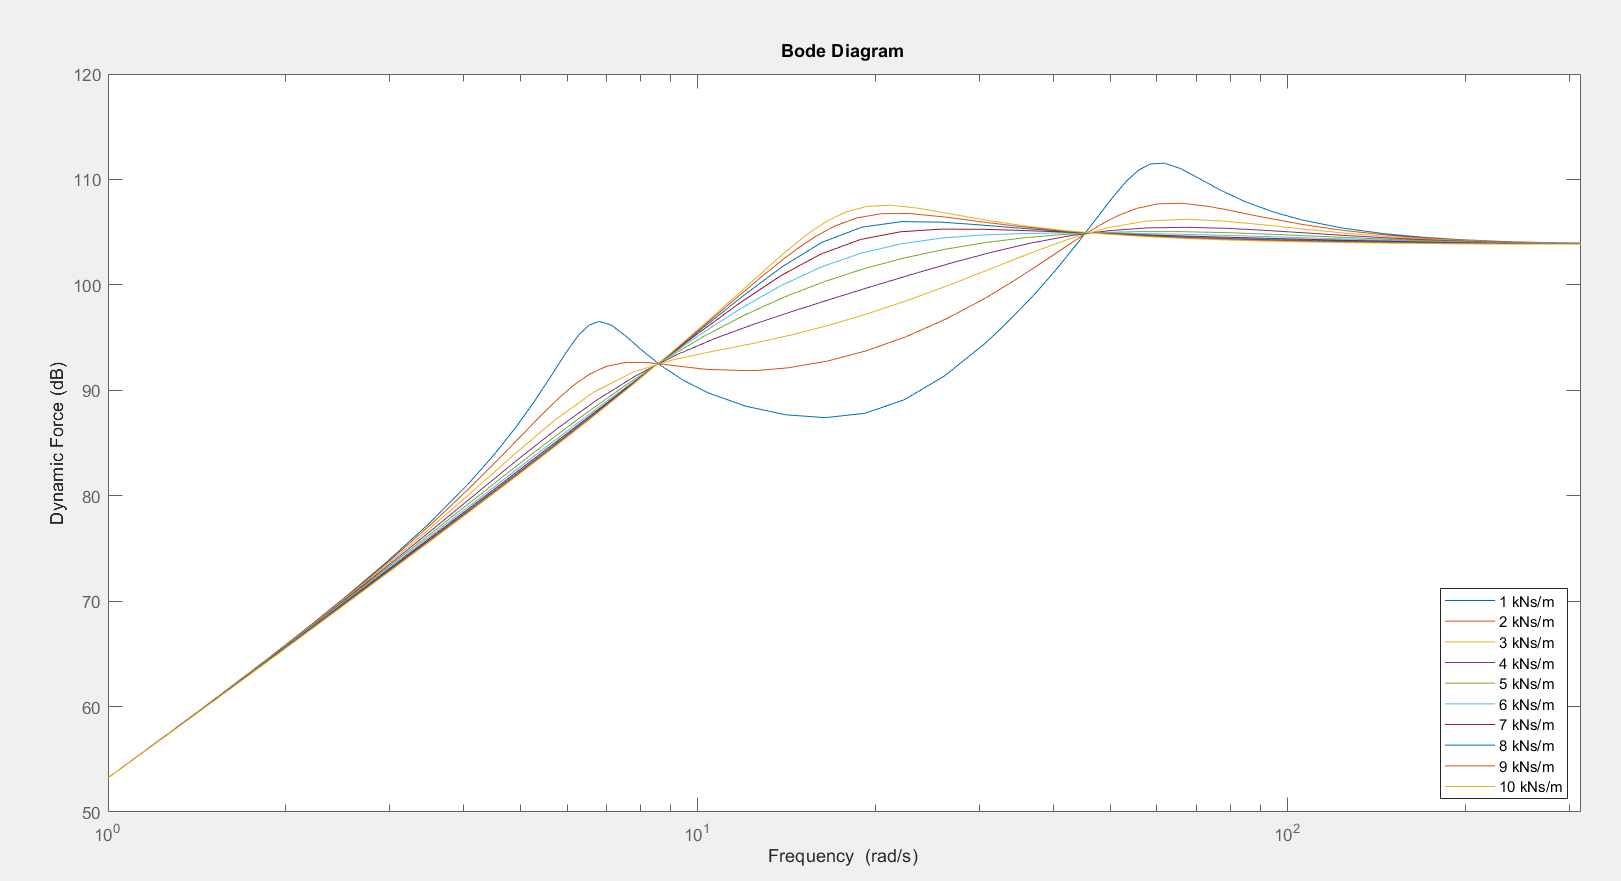
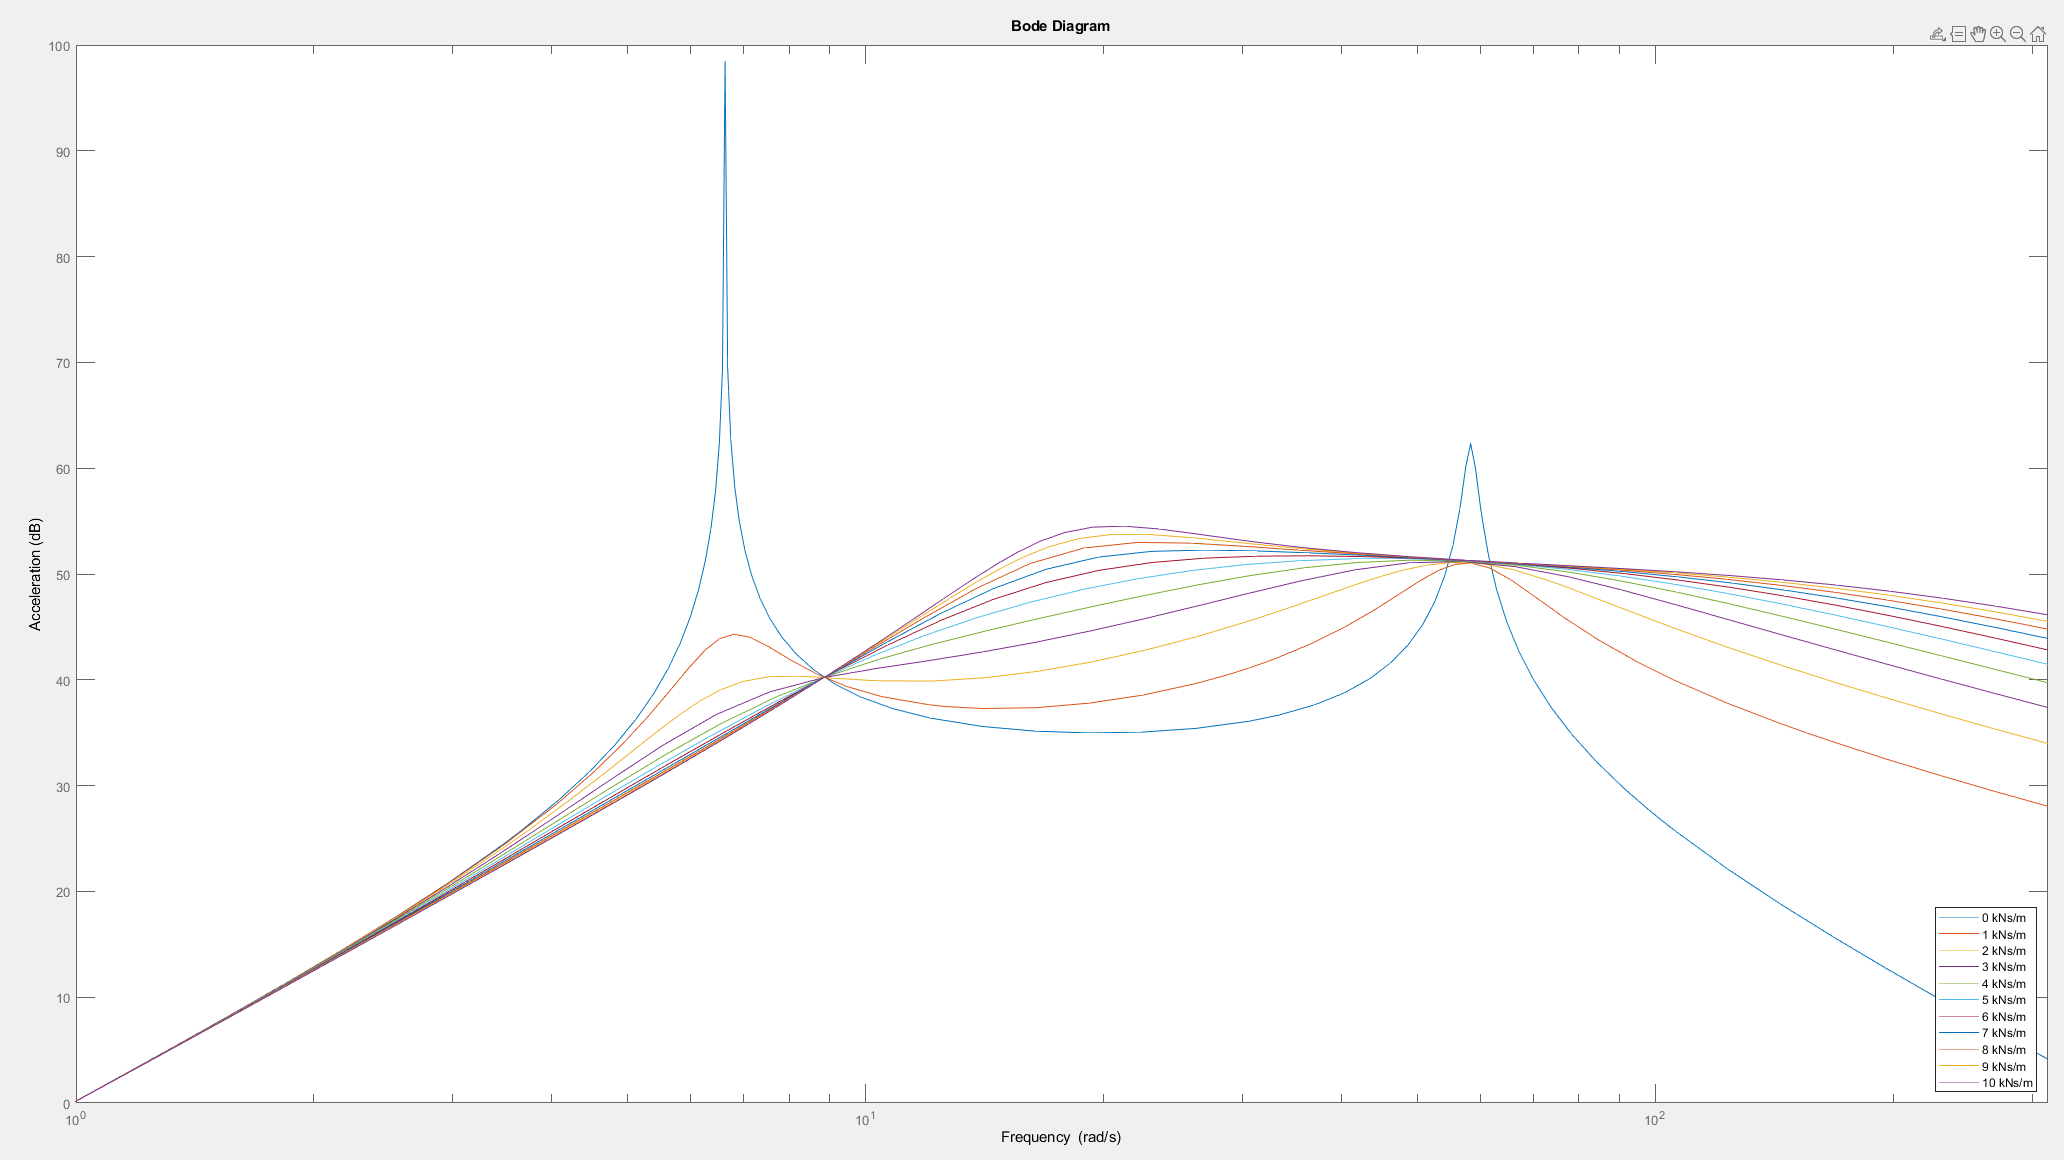
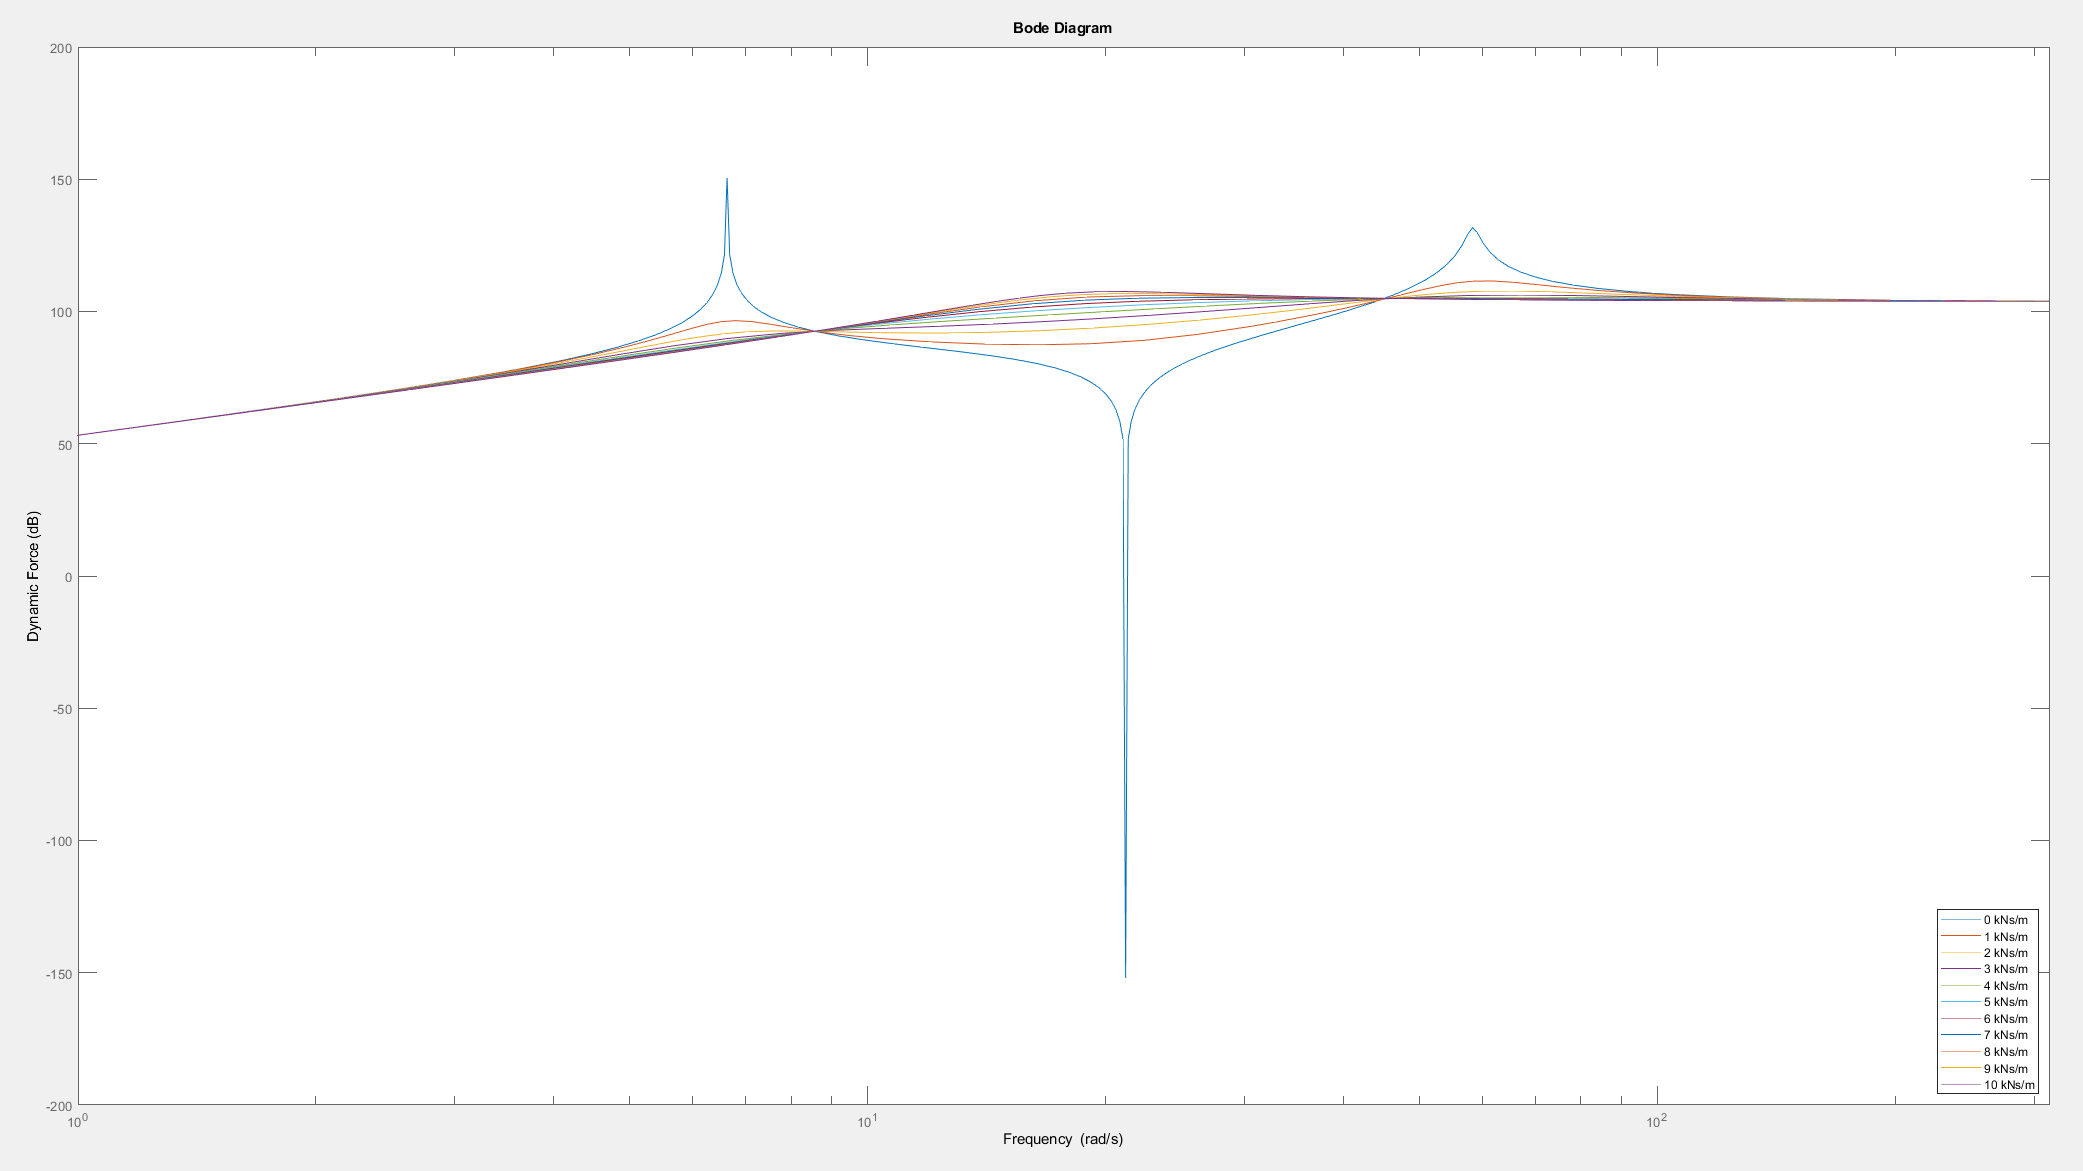
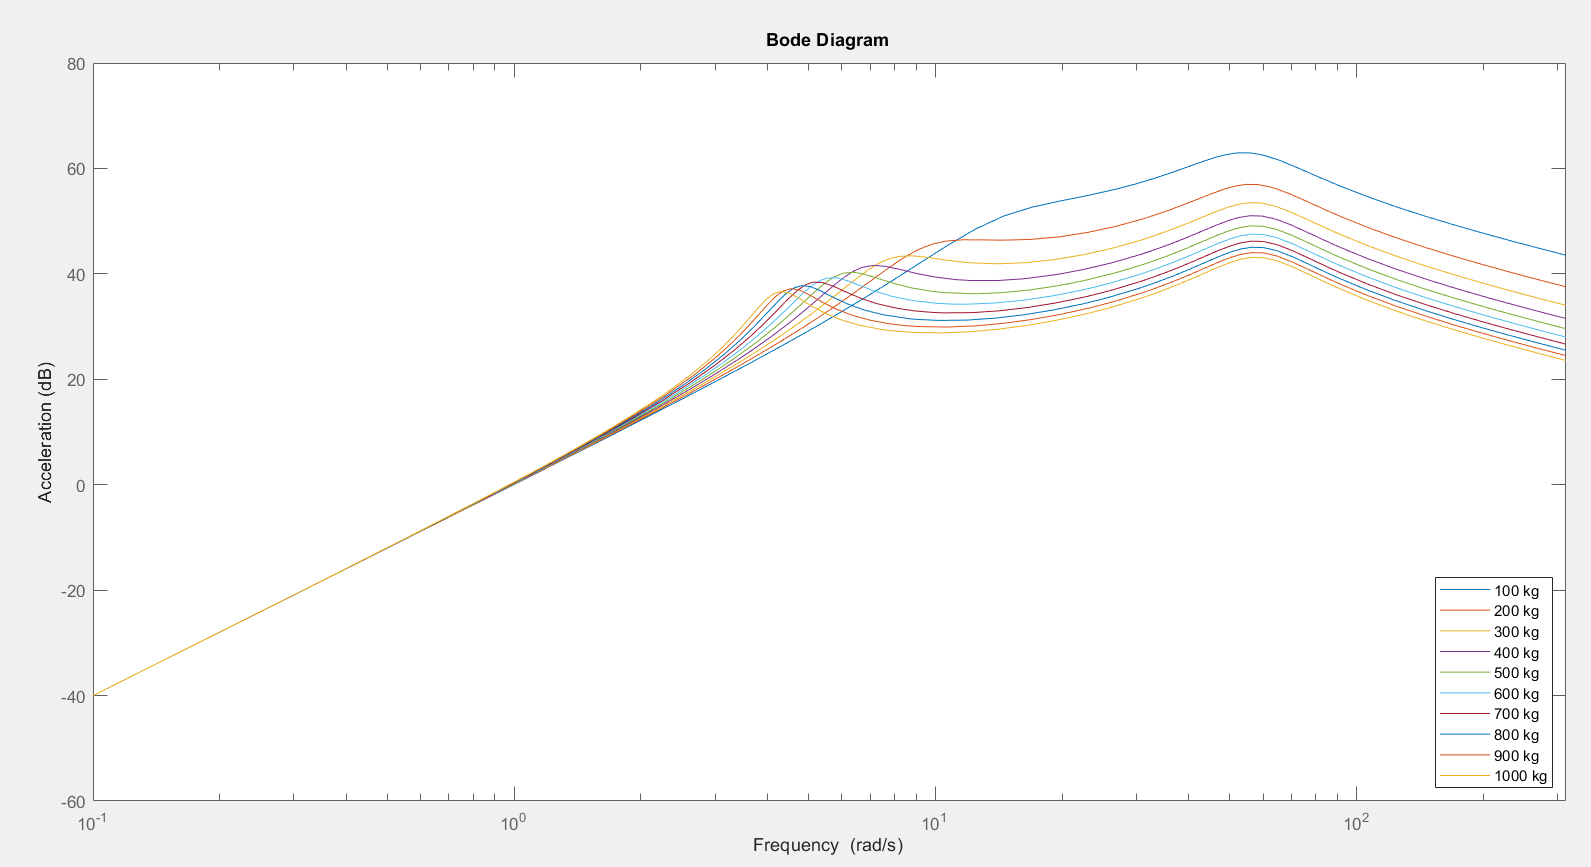
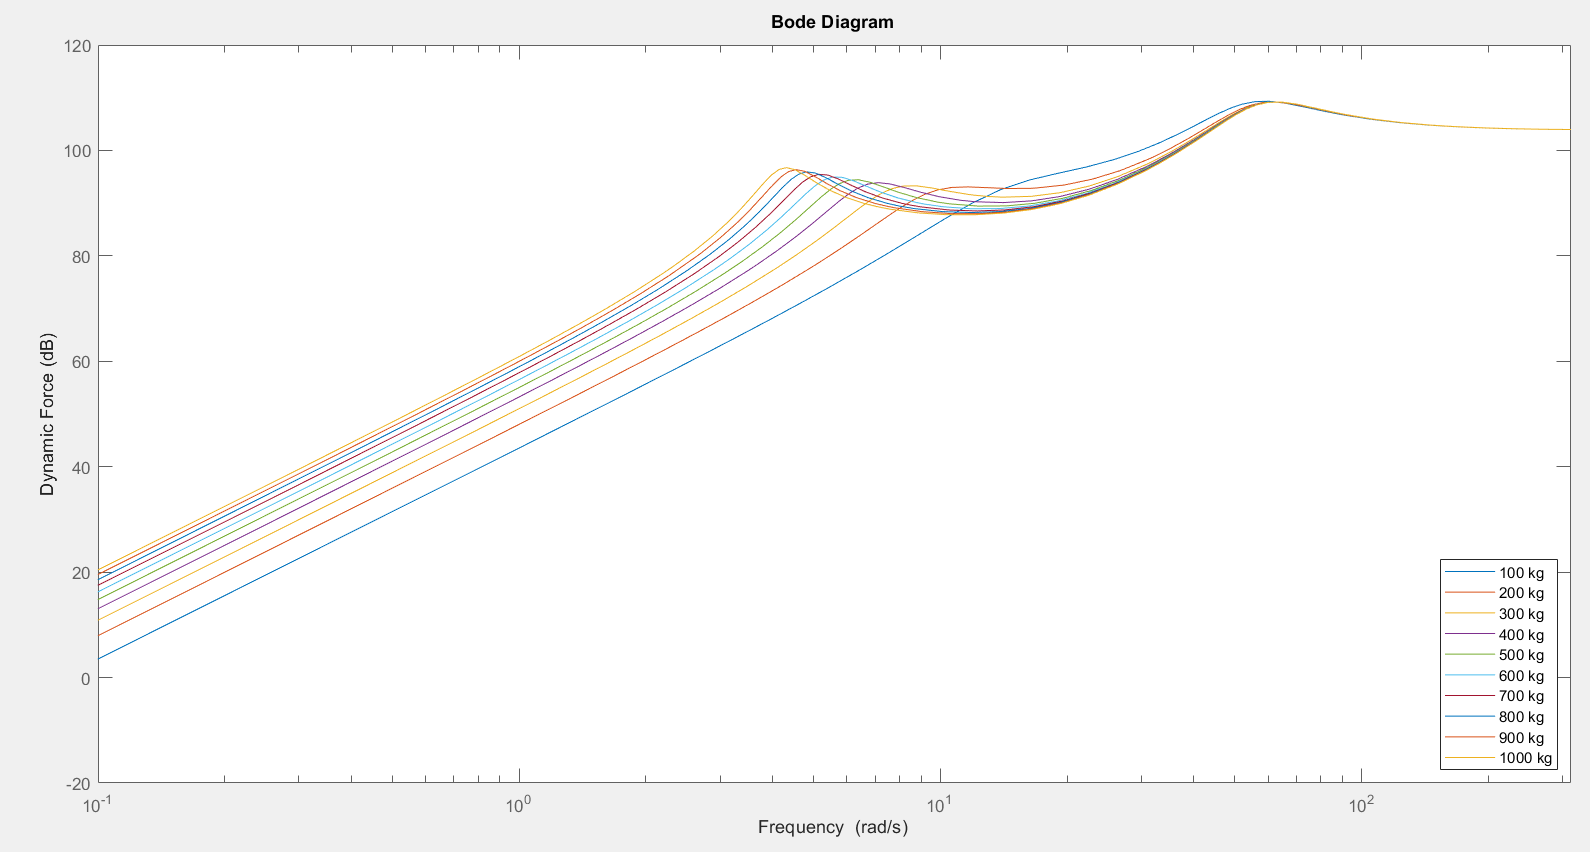
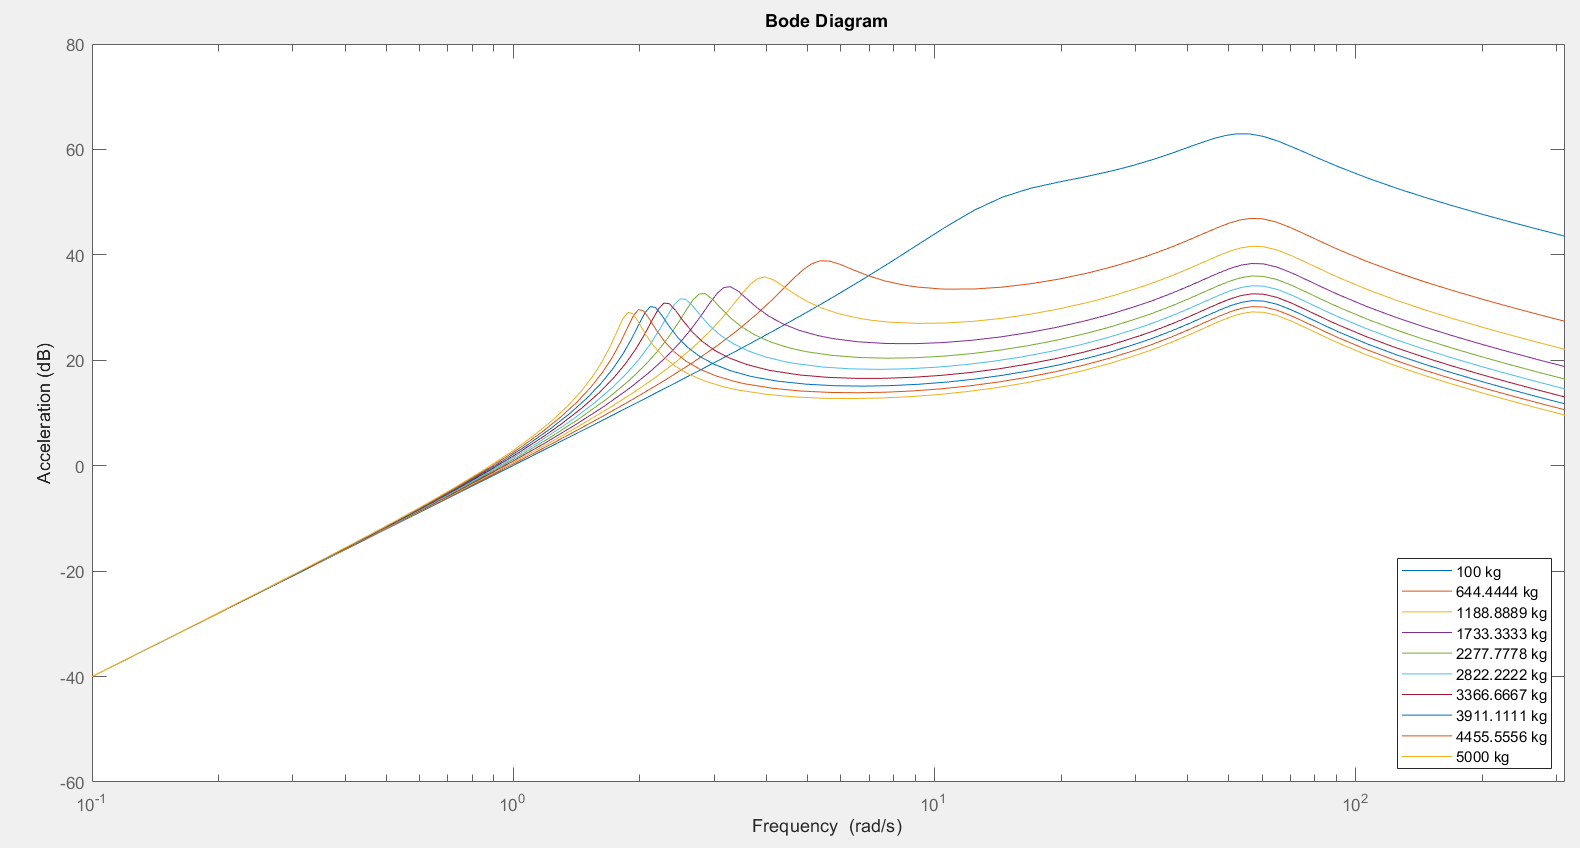
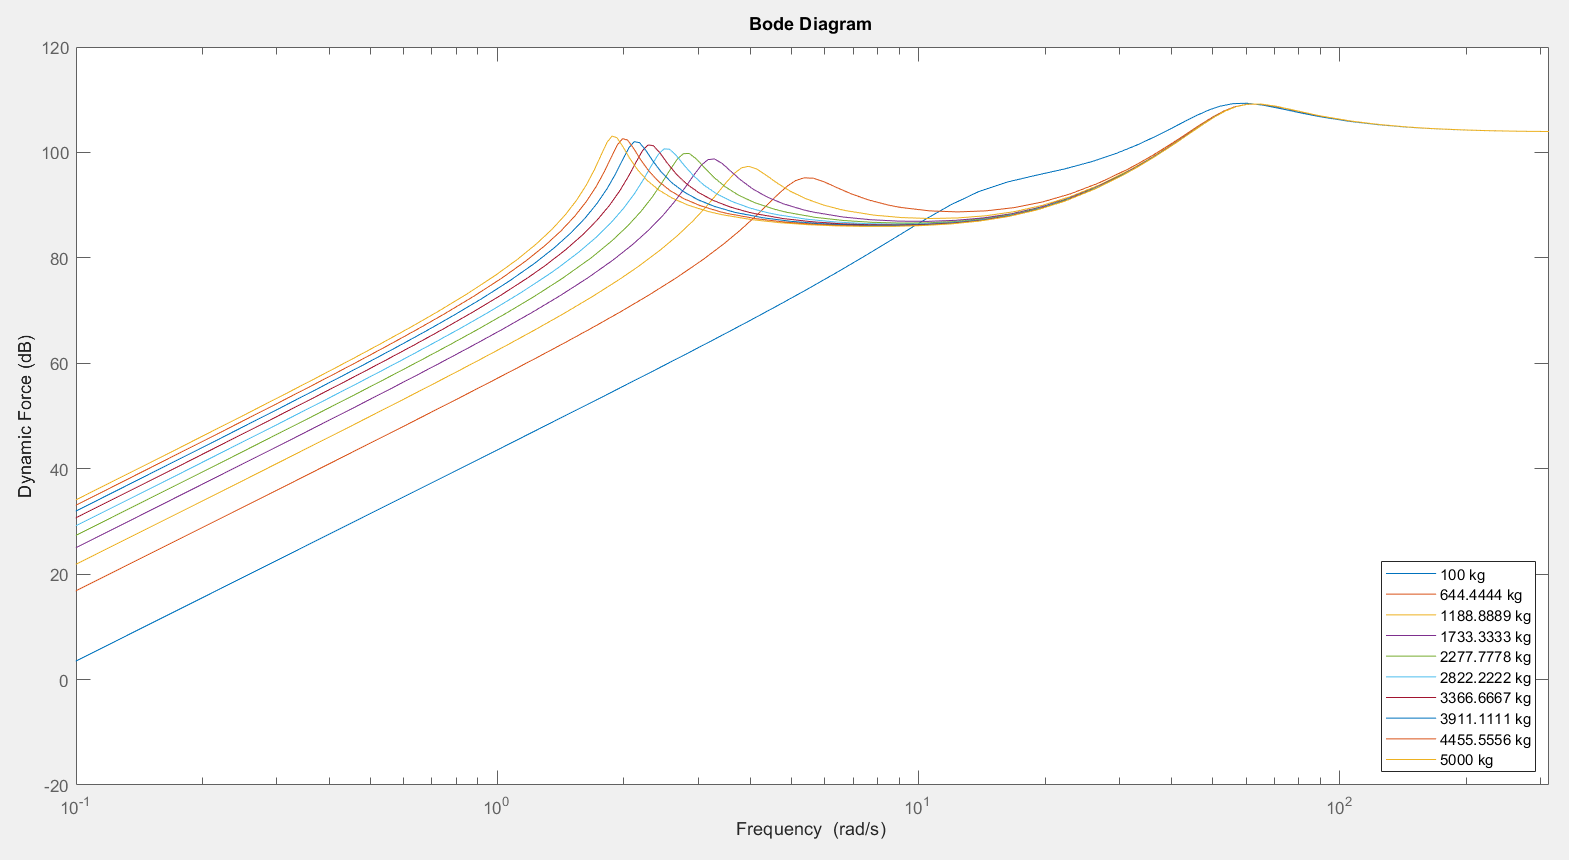
3.1.2.? Frequency Domain Characteristics
3.1.2.? Wheel Mass Variation
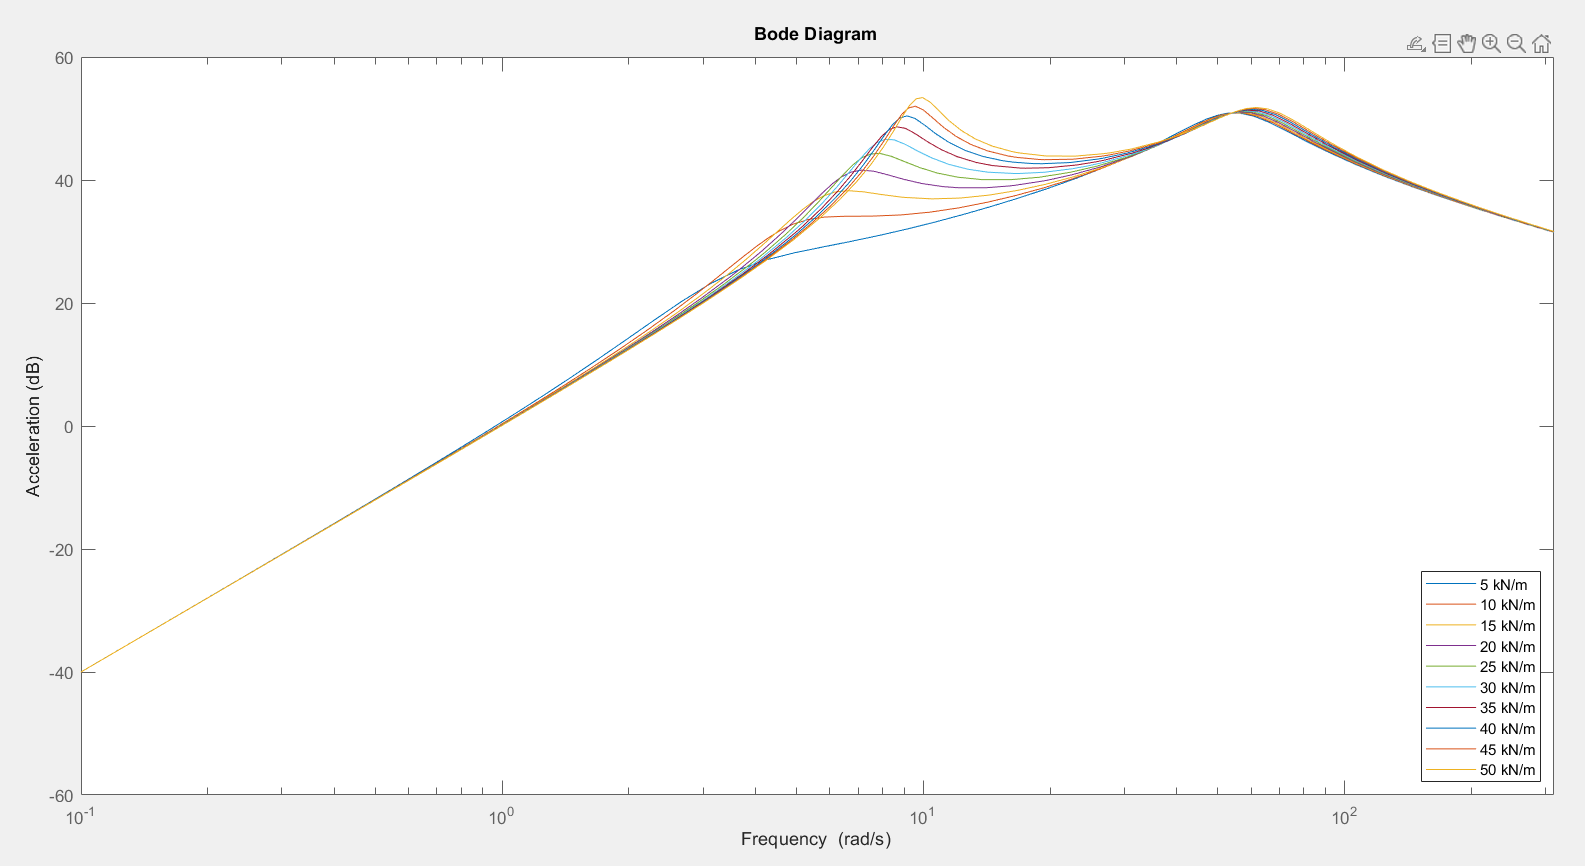
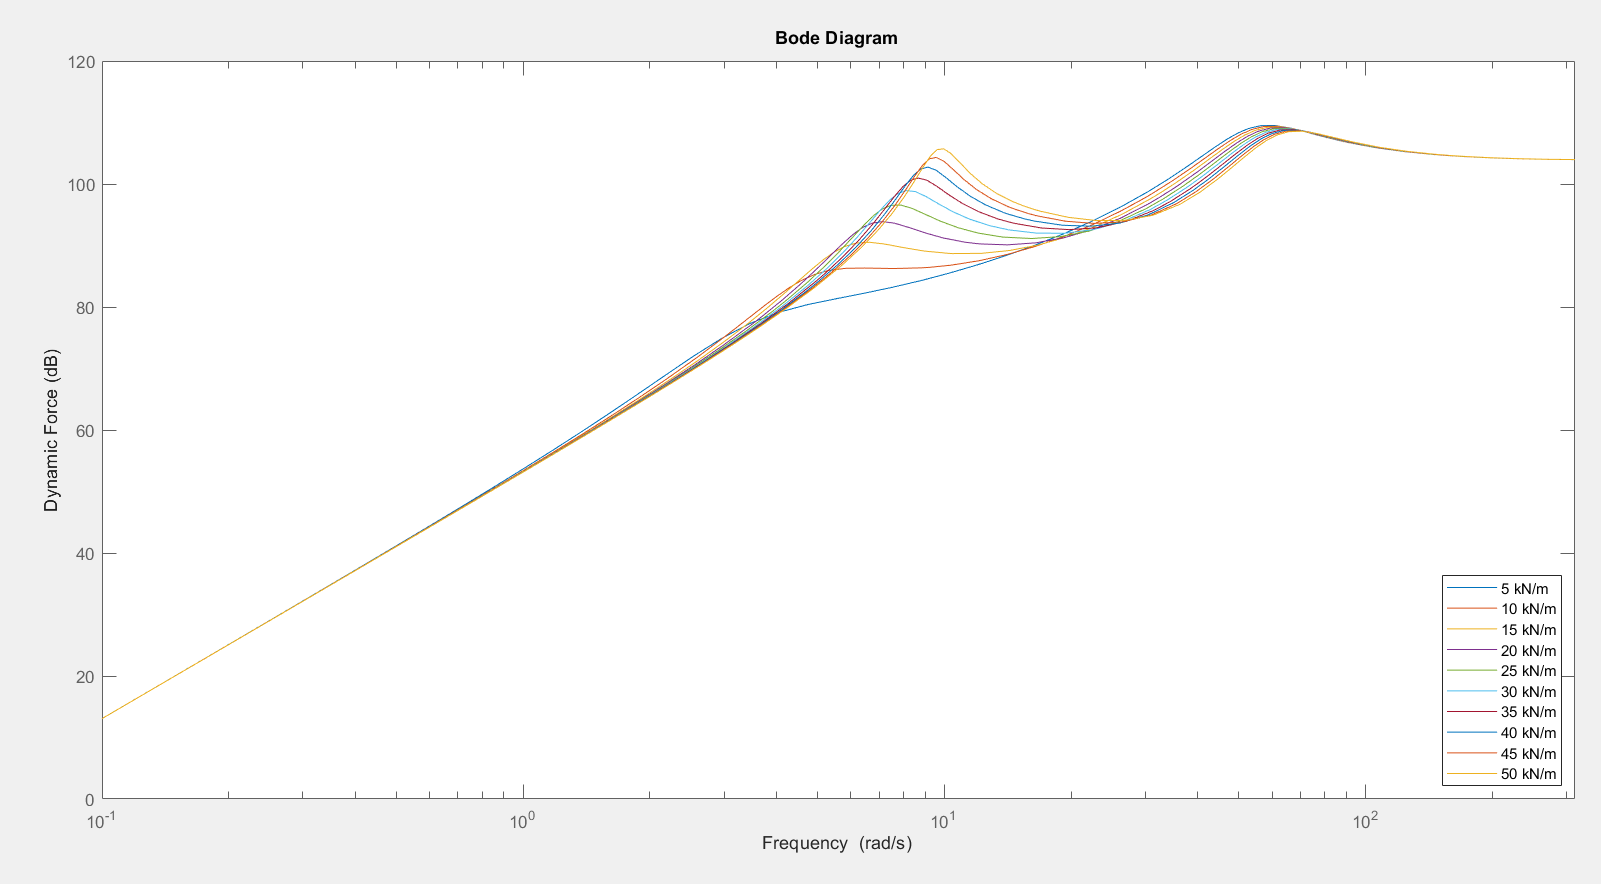
3.1.2.? Tire Stiffness Variation
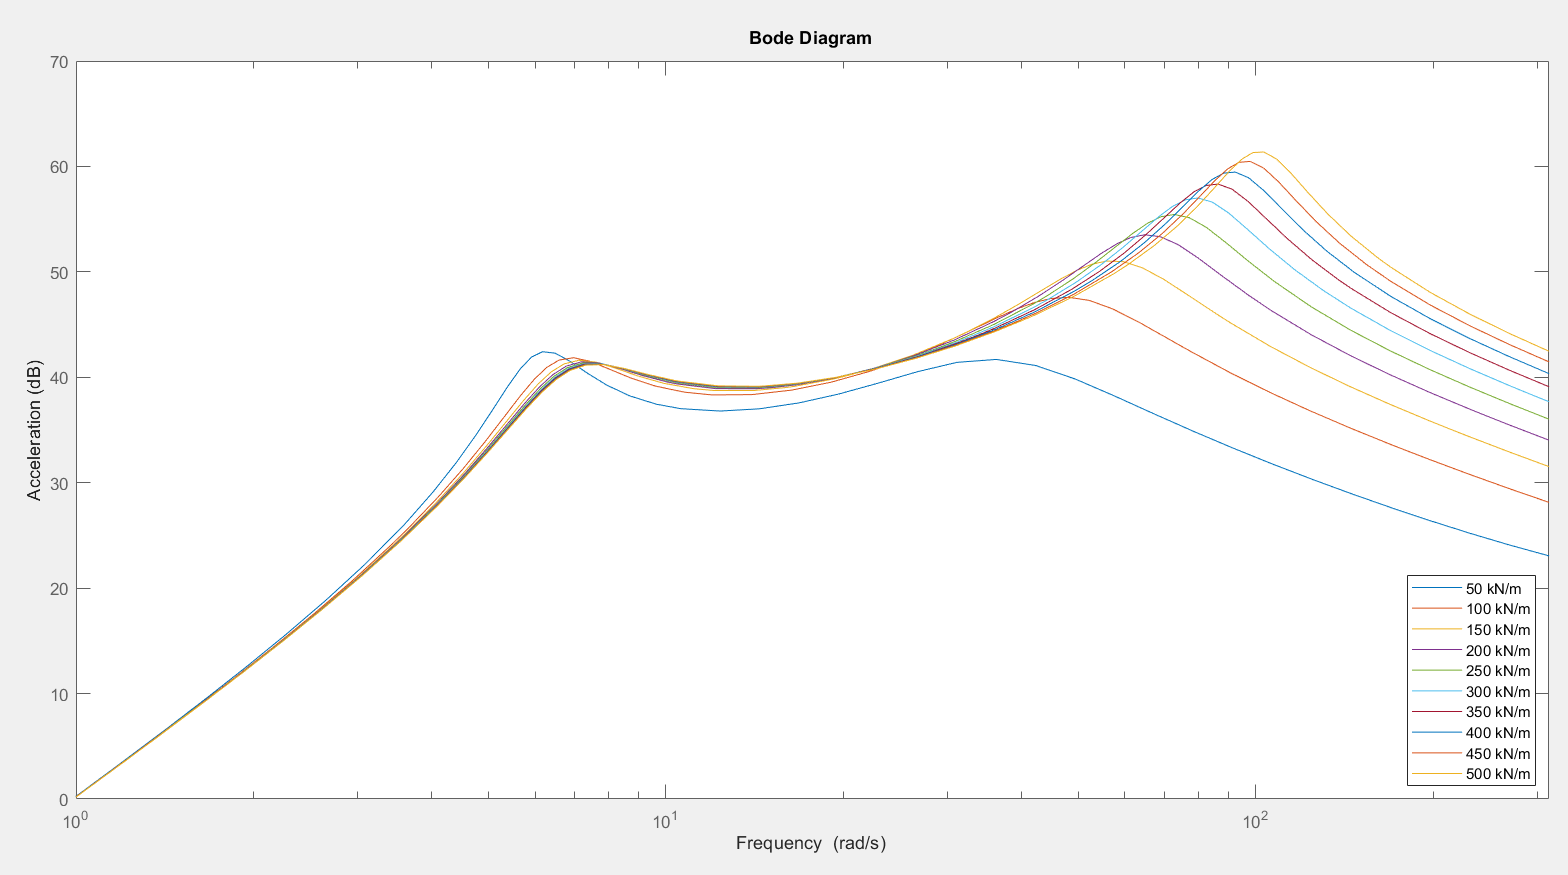
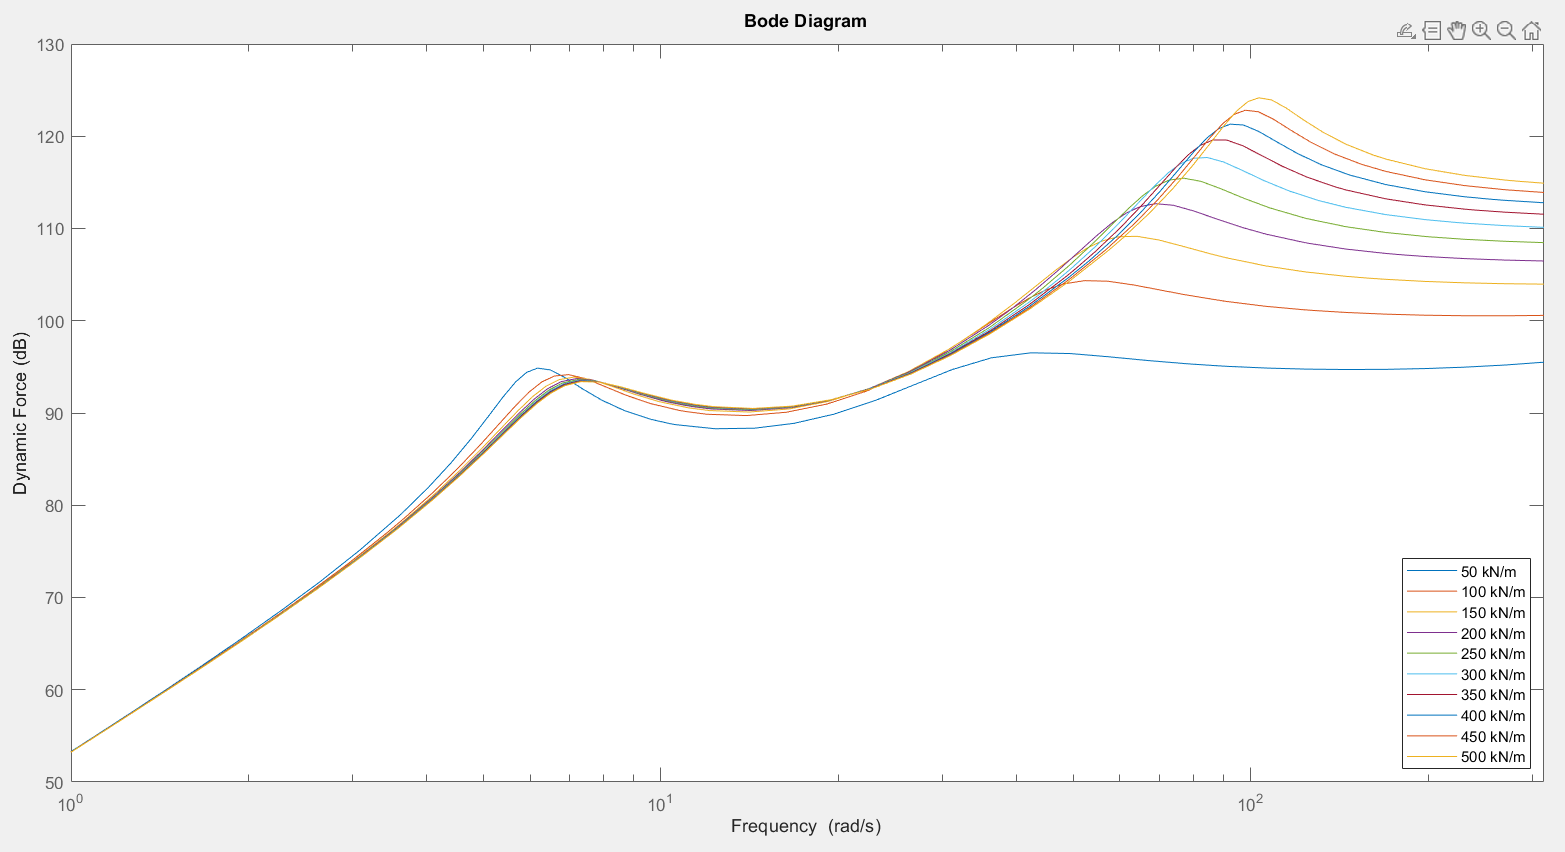
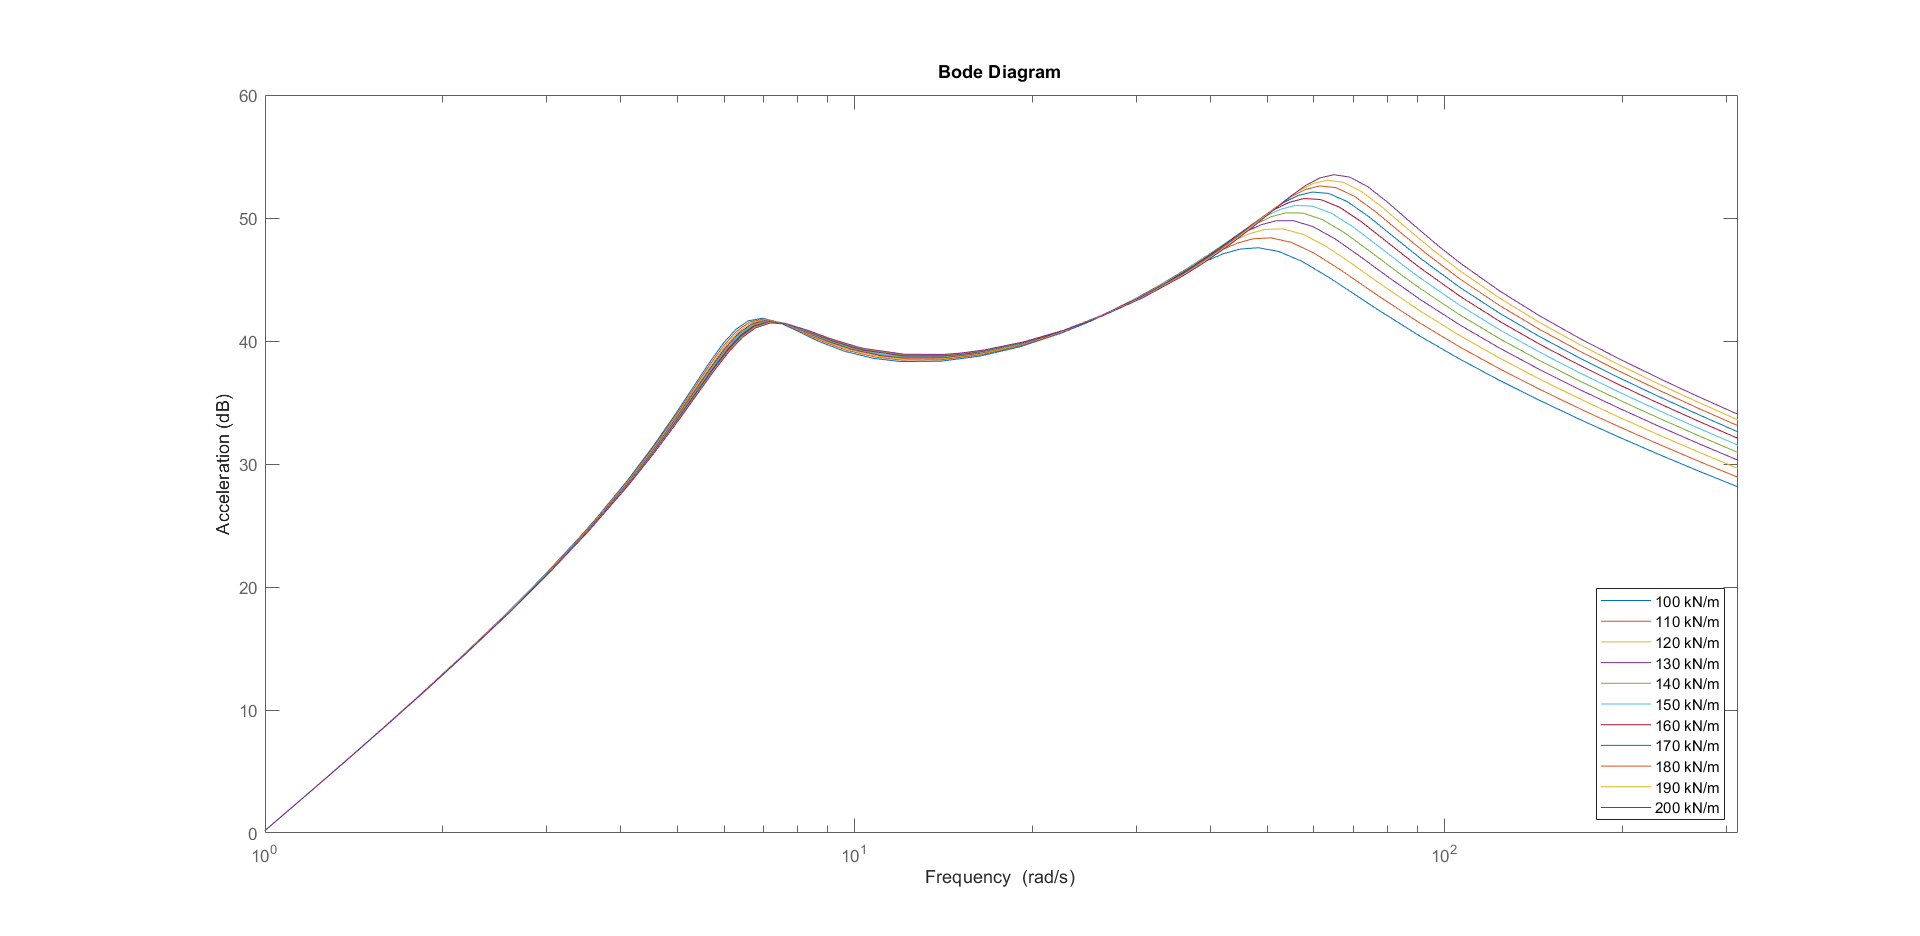
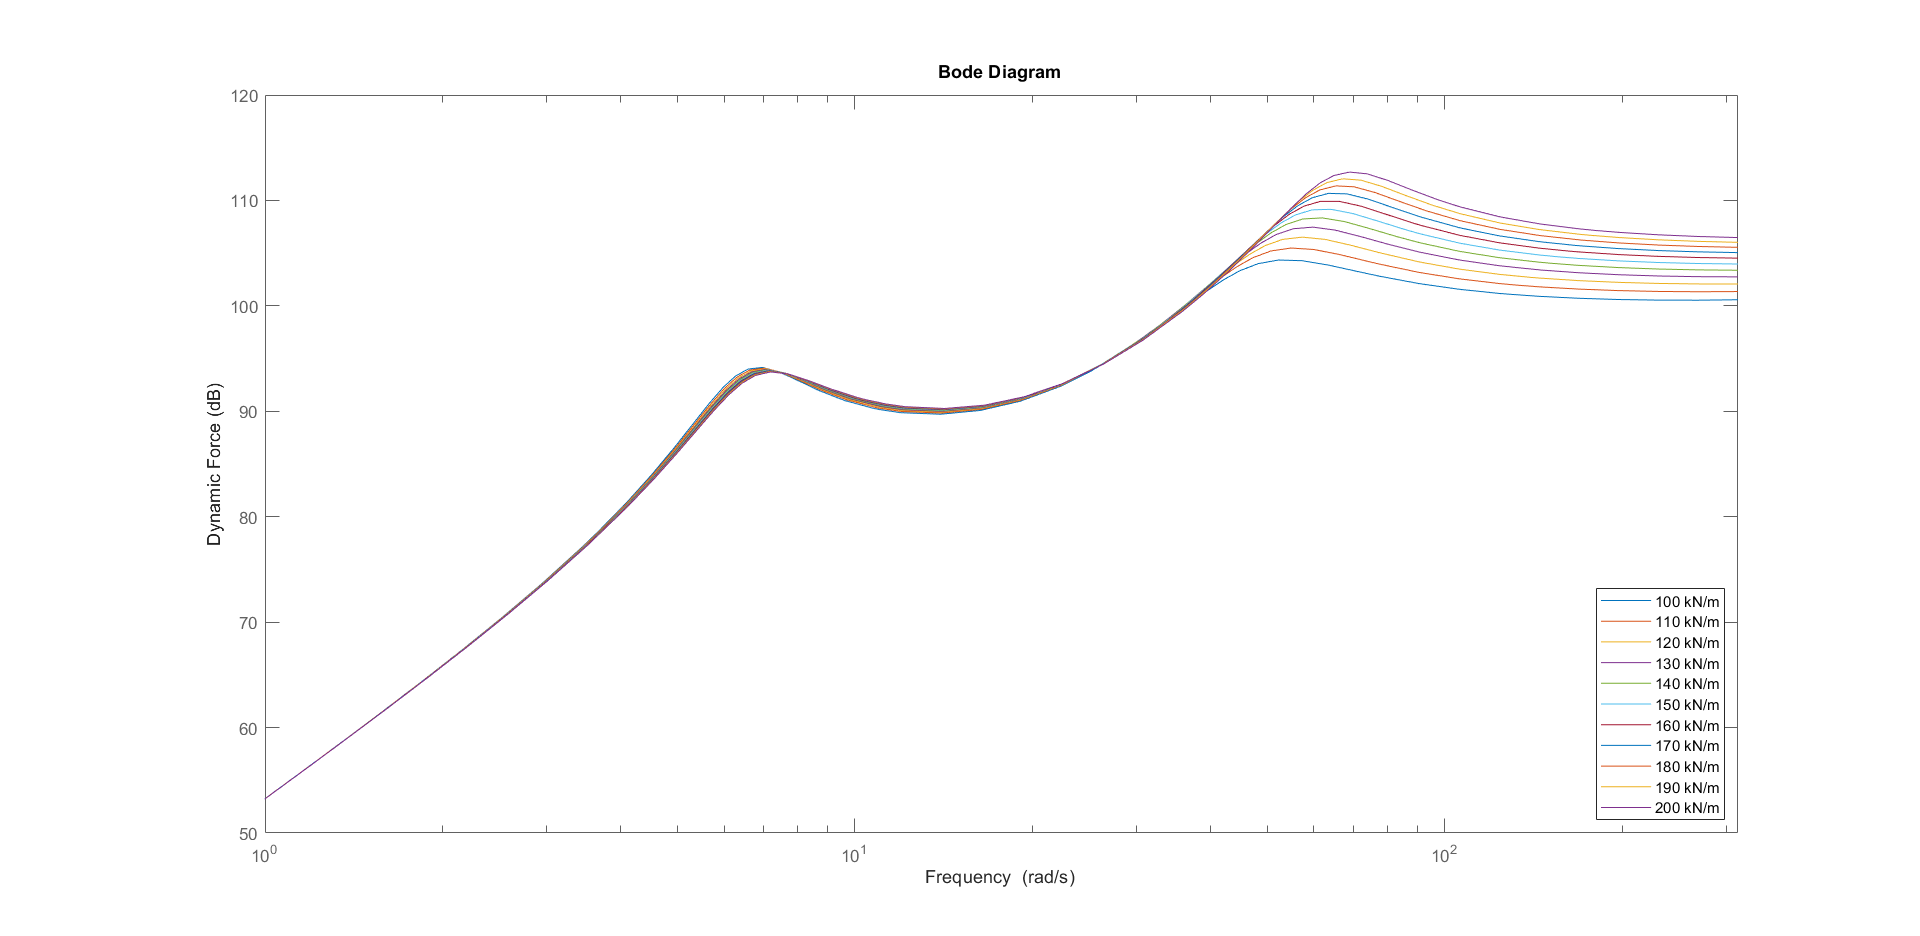
3.1.2.? Body Stiffness Variation
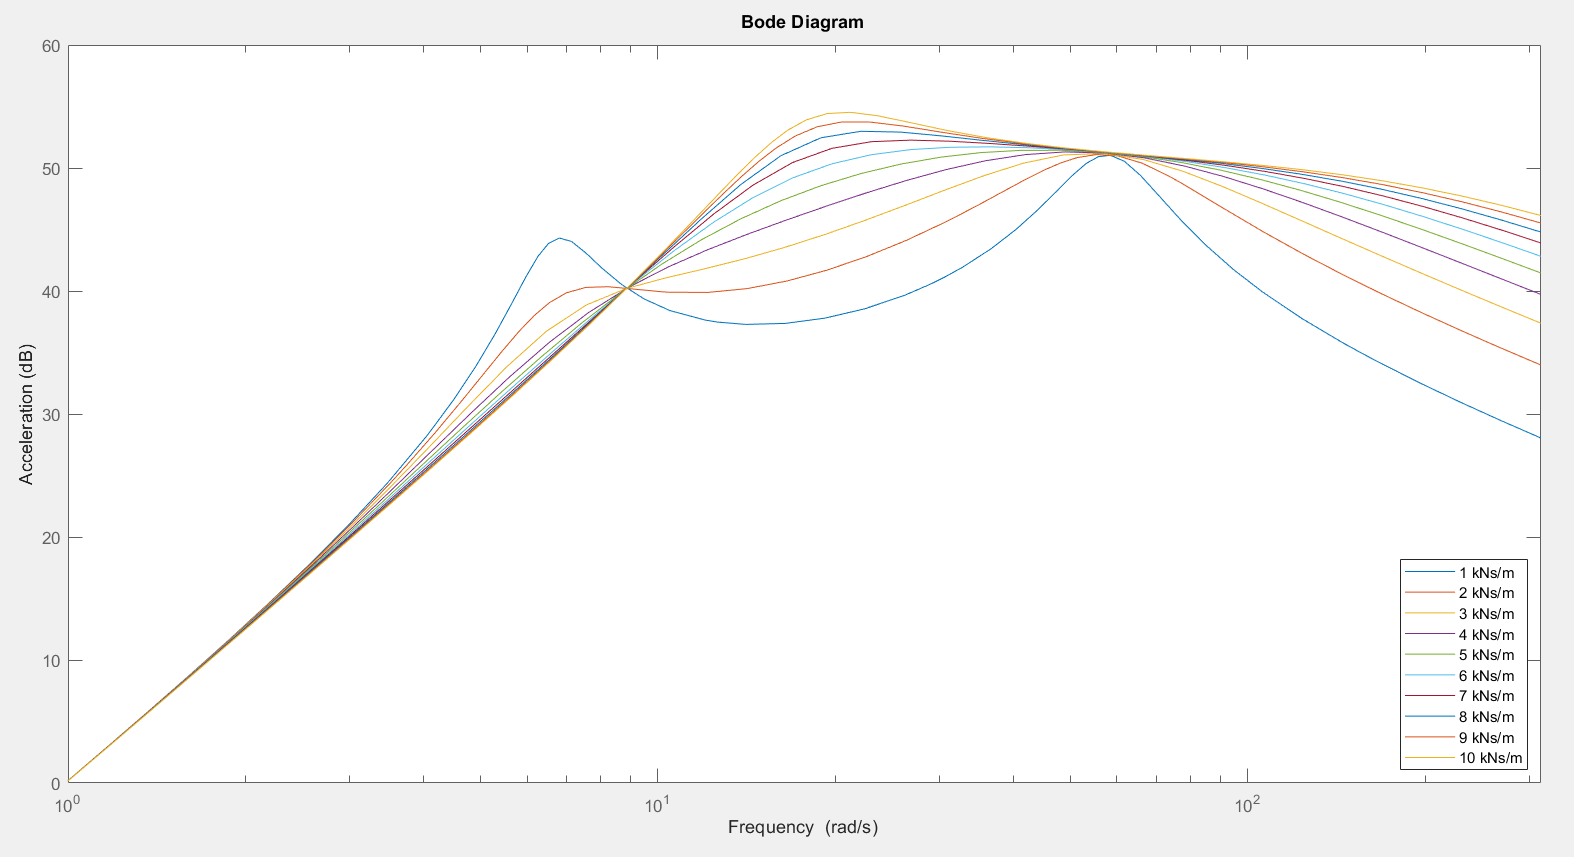
3.1.2.? Body Damping
3.1.2.? Body Mass Variation
3.1.3.? Discussion of Comfort and Safety
| Comfort | Safety | Conclusion | |
|---|---|---|---|
| Wheel Mass | Improved for higher mass at frequency above wheel eigenfrequency | Less safe for higher mass at freq. between the eigenfrequencies | Wheel mass needs to be balanced |
| Tire Stiffness | Improved for lower stiffness for frequency above wheel eigenfrequency | Improved for lower stiffness at frequency above wheel eigenfrequency | Tire should be soft (but hard enough to transfer longitudinal and lateral forces and be durable) |
| Body Stiffness | Improved for lower stiffness near the body eigenfrequency | Improved for lower stiffness near the body eigenfrequency | Keep the stiffness low but high enough to keep the wheels on the ground and doesn’t get completely compressed |
| Body Damping | Improved for higher damping at body eigenfrequency | ||
| Less for higher damping at frequencies above body eigenfrequency $\omega>\omega_B$ | Improved for higher damping at the two eigenfrequencies | ||
| Less safe for higher damping between the eigenfrequencies | We need to consider the excitation frequency | ||
| Body Mass | Improved for higher body mass at frequencies above body eigenfrequency | Less safe for higher mass at frequencies below the wheel eigenfrequency | Balance the body mass |